• Skip to primary navigation
  • Skip to main content
  • Skip to primary sidebar
  • Skip to footer
  • Big Book of BBQ Tricks
  • Resources
  • Free E-CookBook / Newsletter
  • Smoking Meat 101 Book
  • BBQ Blueprint Book
  • Electric Smoker Cookbook
  • Wood Pellet Grill Smoker Book
  • Temperature Guide
    • Seafood
    • Pork
    • Poltry
    • Beef
  • About Me
  • Shop
  • Sitemap

Barbecue Tricks

BBQ Tips and Tricks

Cook

September 21, 2014 Cook

Bic FlameDisk Disposable Fire Source Review

BIC_GRILL.Still003Ever need a fast source of heat or fire in a portable and disposable form?    The Bic Flame Disk may be for you.  This giant sterno in a pie pan is perfect for fast fire for tailgating or camping as a charcoal alternative.

I know we have a lot of charcoal purists out there.  But BBQ Tricks has always been about making things a bit easier.   Sometimes that MAY mean taking a short cut to really be able to enjoy the moment.   Remember grilling – especially during tailgate season –  can be hot and fast as well as low and slow.

The Bic FlameDisk is pretty affordable too – get it here (this is not a paid endorsement but via amazon you will support this site)  BIC Charcoal Alternative FlameDisk, 10-Pack.

unbox_flame
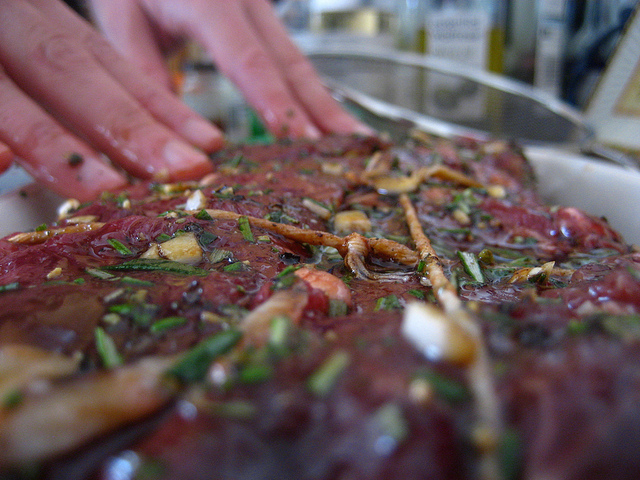
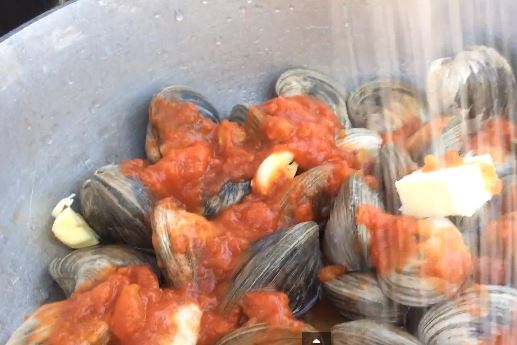
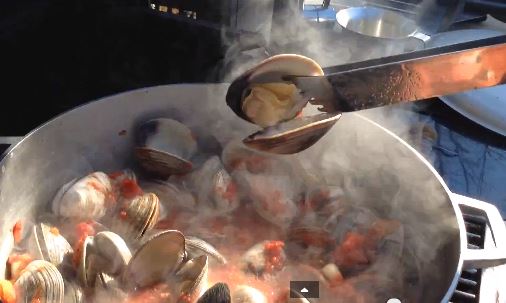
The fuel inside the sealed tin (like a jiffy pop full of vaseline) is a solid white sterno-like substance.  It’s a corn alcohol based fuel (i’m sure sterno is a brand name but it smells the same).  The flame/fuel did not add any discernible taste to the food we cooked.   Unlike “match light” charcoal.

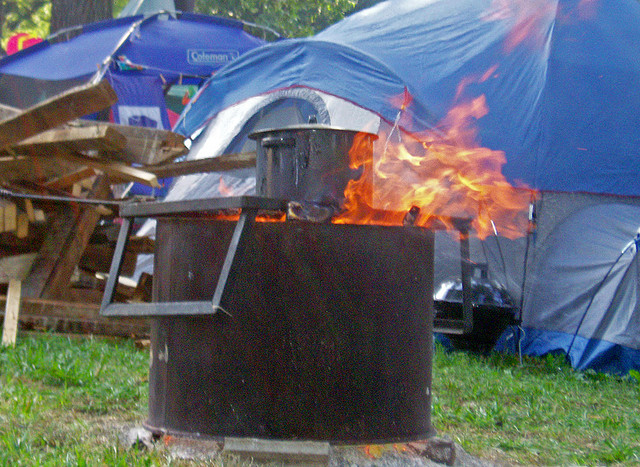
Sure you could actually save a few bucks with a few sterno tins but the form factor here was really nice.    High heat and a super wide flame base due to the evenly spaced holes across the tin’s surface.

http://youtu.be/tfw0zBXLVFE


Video Player
https://barbecuetricks.com/wp-content/uploads/2014/09/bicsmall.mp4

Media error: Format(s) not supported or source(s) not found

Download File: https://barbecuetricks.com/wp-content/uploads/2014/09/bicsmall.mp4?_=1
00:00
00:00
00:00
Use Up/Down Arrow keys to increase or decrease volume.

September 2, 2014 Cook

How To Roast Chicken Breast In Your La Caja China Roasting Box

How To Roast Chicken Breast In Your La Caja China Roasting Box

lacajachinaBy Diane Louise Villanueva

We don’t eat chicken solely because it is delicious but also it provides a lot of health benefits. First of all, it is rich in protein which makes it excellent in aiding weight loss. Chicken meat is also a natural anti-depressant; bone loss preventer and metabolism booster when taken in the right amounts. Most of all, chicken is among our children’s favorite food items! There’s just no telling why but kids are just so into them. And do you know what the most nutritious part of a chicken is? The breast! That’s because it’s the least fatty. So for today, I’d like to share with you a quick guide on how to roast chicken breast in your La Caja China. Gather up your ingredients and enjoy cooking!

Ingredients:

4 chicken breasts, weighing about 6 ounces each, deboned and skinless

1 cup extra-virgin olive oil

2 teaspoons garlic or onion powder

2 teaspoons mustard

3 tablespoons dried herbs (oregano, rosemary, thyme or bay leaf)

2 tablespoons vinegar

Kosher salt

Ground black pepper, fresh

Cooking Instructions:

1. Get a large Ziploc bag or anything similar. Pour your vinegar into the bag, followed by your choice of herbs, garlic and onion powder, salt, pepper, your choice of mustard and your extra-virgin olive oil. You can use Dijon or whole-grain mustard, whichever you like. Once the ingredients are in the bag, shake it well to create an evenly distributed mixture.

2. Open your re-sealable bag and put your chicken breasts inside. Seal it again and shake it rigorously to coat your chicken meat perfectly. Place the bag inside the refrigerator to marinate the chicken. Leave it soaked in the marinade overnight (or longer) for best results.

3. When it’s time to cook your chicken breasts, take it out of the fridge and let it thaw under cold water. You can leave your tap running to make thawing even faster. If you’re not into using water for this task, you can thaw it in the microwave as long as your bag is microwave-friendly.

4. While waiting for your meat, go ahead and prepare your La Caja China. Put on the grid and the ash pan on the box. Place your natural charcoals and light them up when your chicken breasts are nearly ready for grilling.

5. After about 20 minutes of setting the coals on fire, they should be all ready. Spread the coals evenly on the grid while making sure that you leave a space at one end. That should be your cool section in case one or two of your chicken breasts nearly burns.

6. Start putting your chicken breasts on the grill one by one and remember not to put the lid on your La Caja China. You should also grill one side of the chicken for only 5 minutes. Afterwards, flip the chicken over on the other side and let it cook again for another 5. Repeat this process until they reach your desired result.

7. Take the chicken breasts out of the grill and let them cool down on a plate. Serve with rice or your choice of side such as corn and carrots; good old steamed broccoli or your favorite salad. Enjoy!

I hope that this article has taught you how to roast chicken breast in your roasting box. If you still don’t have one, visit La Caja China ‘s website!

Article Source: http://EzineArticles.com/?expert=Diane_Louise_Villanueva
http://EzineArticles.com/?How-To-Roast-Chicken-Breast-In-Your-La-Caja-China-Roasting-Box&id=8682114


August 30, 2014 Cook

Why Marinate Meat Before You Grill

Why You Should Marinate Your Meat Before You Grill

Photo:Flickr.com/adactio

Photo:Flickr.com/adactio

By Bonnie R Giller

The summer is in full swing which means you are likely putting your outdoor grills to work as you cook up some of your favorite grilled meats. We all know that when grilling meat, fish or poultry, it’s all about the marinade. You may think that the sole purpose of marinating your meat prior to cooking is to enhance the flavor, but there are actually health benefits associated with marinating your meat that go beyond satisfying your taste buds.

So here is what you do know. A marinade acts as a tenderizer and brings out the meat’s natural flavors before grilling. What you may not know is that marinating is one of the most effective ways to reduce the formation of cancer-causing compounds, known as heterocyclic amines (HCA’s). These compounds are produced when meat is cooked at high temperatures, like in grilling. Marinades can reduce the formation of these carcinogenic compounds by up to 99%. You can even boost this benefit by adding rosemary to your marinade. This herb contains the antioxidant carnosol, which has some specific anti-cancer properties.

Though it is unclear why marinating meat before grilling effectively eliminates HCA’s, it is believed that the marinade acts as a barrier between the meat and the direct flames. The cancer fighting power of marinades may also lie in the type of ingredients used. Vinegar, citrus juices, herbs, spices, olive oil and safflower oil are common marinade ingredients that all seem to contribute to the prevention of HCA formation. These acidic ingredients seem to slow the growth of harmful bacteria, like listeria, tenderizing the meat to make the protein easily digestible and moisten the meat, preventing it from becoming tough.

If you are someone who never uses marinades, now is the time you should start! Eating healthy does not mean your food has to be tasteless and bland, especially now that you know marinades do great things for your health. There are endless amounts of ingredients that can be used to create healthy and tasty marinades for any kind of meat, fish or poultry. Start to create the perfect marinade by first knowing the basic ingredients:

1 part acid (vinegar, citrus juice, yogurt)

1 part oil (olive, canola, safflower)

2 parts aromatics (herbs and spices)

Salt and sugar to taste (can substitute with low sodium soy sauce and/or honey)

This is a ratio you can always refer back to when creating your marinade. To keep the calorie count down and avoid having leftover marinade, only use about � cup of marinade for every pound of food, unless you have large pieces that may require a little more. Total immersion is not necessary, but the food should be turned occasionally, so that all surfaces will be in contact with the marinade long enough to benefit. Use non-metal containers or re-sealable plastic bags to hold the marinating food. You may also want to marinate your vegetables to add extra flavor. If this is the case, always make sure you keep the vegetable marinade separate from the meat marinade, to avoid cross contamination of bacteria. Also keep in mind that if you are making skewers, keep vegetables on their own skewer, since meat typically requires longer cooking times.

There has never been a more delicious way to prevent cancerous compounds than marinating. The sky’s the limit when creating a tasty marinade. So, get creative! Make use of a variety of herbs and spices to add natural flavor to your marinade. Yogurt in a marinade is thought to tenderize meats and help balance out sweet and spicy flavors in marinades. While it’s best to use herbs and spices, if you are going to add salt to your marinade, don’t add it until just before you cook the meat as the salt will draw out the moisture creating tough, dry meat.

Bonnie R. Giller is a registered and certified dietitian nutritionist and certified intuitive eating counselor who helps chronic dieters break free of the pain of dieting and get the healthy body they love.

Bonnie utilizes the principles of intuitive eating in her work with her clients, which is eating based on internal signals of hunger and satiety versus situations or emotions. The result is they lose weight, keep it off without dieting and live a healthy life of guilt-free eating.

Download Bonnie’s free e-book “5 Steps to a Body You Love Without Dieting” at http://www.DietFreeZone.com

For more information on Bonnie’s programs, books, lectures and presentations, visit http://www.brghealth.com

Article Source: http://EzineArticles.com/?expert=Bonnie_R_Giller
http://EzineArticles.com/?Why-You-Should-Marinate-Your-Meat-Before-You-Grill&id=8653831


June 15, 2014 Cook

MAKE A GRILL HOTSPOT MAP WITH BISCUITS

GRILL BISCUIT hotspot
If you find yourself shuffling your food around the grill haphazardly hoping to find the cool or hot spot this may be of service.  At least you’ll end up with brunch.

Here’s a fun and fast way to pinpoint the hot spots on your grill.   We use a few tubes of refrigerated “poppin” biscuit dough.    A few tips:  get your gas flowing freely first… start with all your dough the same temperature… and make sure the dough slices are of identical thickness.   Take a biscuit selfy and save if for future reference.  Carolina Pitmaster Jack Waiboer suggests this as the first cook on any new grill.  A GRATE idea.


Watch the Grill HotSpot Video HERE

Video Player
https://barbecuetricks.com/wp-content/uploads/2014/06/hotspot_small.mp4

Media error: Format(s) not supported or source(s) not found

Download File: https://barbecuetricks.com/wp-content/uploads/2014/06/hotspot_small.mp4?_=2
00:00
00:00
00:00
Use Up/Down Arrow keys to increase or decrease volume.

May 11, 2014 Cook

Alton Brown – His Favorite BBQ? | BBQ&A

Had a chance to talk to Alton Brown as his fun live show rolled through town...Click for more!

Had a chance to talk to Alton Brown as his fun live show rolled through town…Click for more!

Love Alton Brown? We do too. We were lucky to snag a quick BB-Q&A with the Good Eats Master before his road show in Charleston where we ask him about his FAVORITE BBQ – Favorite hotdog, cheese and country song too… watch it here.

feasting


Video Player
https://barbecuetricks.com/wp-content/uploads/2014/05/alton.mp4

Media error: Format(s) not supported or source(s) not found

Download File: https://barbecuetricks.com/wp-content/uploads/2014/05/alton.mp4?_=3
00:00
00:00
00:00
Use Up/Down Arrow keys to increase or decrease volume.

March 5, 2014 Cook

So Simple Slow Cooker Mac and Cheese

macaroni and cheese recipeEver hear of a Mac-Off??   It’s a beautiful thing.

Recently our BBQ and Grill Show GrateTV held a little challenge.   My co-host Jack Waiboer and I made a fast wager on who could compose the best Mac and Cheese.   Like MACaroni and Cheese cook OFF or Mac-Off as we called it to kick off our series on starchy sides foe “Starch Madness.”  Fun.

I’ll let you watch and see who “won” HERE  but I think this “tricky” Mac and Cheese in the Slow cooker is definitely one to tuck away for future use.   It has become my favorite BBQ side and is sure to have all your friends asking for the recipe (you probably ought to just share it on Facebook now… I’ll wait…).

mac and cheeseBarbecue Tricks Slow Cooker Mac and Cheese

12 oz can evaporated milk
1 and a half cups milk
1/2 stick of butter
1/2 tsp. salt
1/2 tsp. pepper
1/2 tsp. onion powder
1/2 tsp. garlic powder
1/2 tsp. dry mustardmacaroni
8oz. elbow macaroini
3 cups grated cheddar cheese
1 cup grated monterey jack cheese
1/3 cup grated parmesan cheese

This is the cure for StarchMadness (well at least temporarily). Start by using a non stick spray on the interior of your slow cooker. It will minimize the sticking as your mac and cheese set at the end of cooking.

In a bowl mix/beat/whisk eggs and then add both evaporated and regular milk. Mix in all the dry spices in to the mix mixture bowl. The trick is that you Dump UNCOOKED dry macaroni noodles into the slow cooker  and pour milk mixture on top. Stir completely and then add all of the cheeses. Mix again until fully coated. Cover Cooker and and slow cook on low setting for 5 hours. Stir one time after approximately two hours and try to resist opening the lid until done. Stealth peek in at the end if you don’t have a transparent lid.

This recipe triples nicely in a large slow cooker.Capture2

March 2, 2014 Cook

Beef Tenderloin BBQ Tips

Click and WATCH REVERSE SEAR METHOD HERE > ON YOUTUBE

Click to Watch Rverse Sear Method instead of bacon...

Click to Watch Reverse Sear Method instead of bacon…

How To Grill The Perfect Beef Tenderloin

By Malcom Reed

If you want something different that hamburgers and hot dogs for your barbeque this year, then try this BBQ recipe and amaze your friends. It’s a pretty simple BBQ recipe to follow, the beef looks great when you take it off the grill (and makes everyone take notice) and it’s as juicy and as tasty as cooking a perfect ribeye steak.

You need to start with a Whole Beef Tenderloin. If you can get it for a butcher… get it from a butcher! But if you can’t then you can probably find one at Sam’s or Cosco.

Ingredients:

1 lb of Thick Sliced Smoked Bacon

8 oz Worcestershire Sauce

8 oz Soy Sauce

Kosher Salt

Black Pepper

Garlic Powder

Your favorite BBQ Dry Rub

Directions:

Take your whole beef tenderloin and trim any excess fat and silver skin off of it. Trim the side or “chain” muscle off as well. You want enough fat to impart flavor – but you want to remove enough fat and silver skin so that your seasonings and the grill can actually penetrate the meat.

Now you will season the loin with Kosher Salt, Black Pepper and Garlic Powder. A nice, thin coating on all sides will do… just enough to add the right flavor you want to the beef.

Next you place the loin in a large Ziplock Storage bag and pour in the Worcestershire and Soy Sauce. You want to marinate for 4 hours in the refrigerator. Remove from the storage bag and drain any excess marinade from the loin.

Take the bacon and wrap around the loin. I use wooden skewers, that I soak in water (to avoid burning), to hold the bacon in place around the loin. Use one skewer for each slice of bacon going completely through the loin.

After you’ve wrapped the loin in bacon, season it very well with your Dry Rub. Just give it a nice, thin coating on all sides.

Place the loin on a Med. High Grill and begin to sear. You want to turn the loin every two minutes to avoid burning and you want to make sure you get all sides with a good sear.

The bacon will add flavor, but you can also use it a thermometer for getting the perfect cook as well. When the bacon is browned on all sides (about 15-20 min) the Loin will be a perfect medium rare.

Now you just remove it from the grill and allow it to rest for 5 minutes. This is very important or all the juices will run out.

After resting, slice the loin into desired sizes. I like to do a Two finger Cut because it makes for a perfect 8oz serving size.

If you want more barbecue tips, or if you want my BBQ Dry Rub recipe that I use with my competition BBQ team, visit my website at http://www.howtobbqright.com/

Malcom Reed
Killer Hogs BBQ
HowtoBBQright.com

Article Source: http://EzineArticles.com/?expert=Malcom_Reed
http://EzineArticles.com/?How-To-Grill-The-Perfect-Beef-Tenderloin&id=6110670


January 20, 2014 Cook

Grilled Clams

Grilled clams may be the easiest BBQ trick ever.  Add clams to hot grill.  Watch ’em pop open (if they don’t – trash ’em) and add some drawn butter.   clams on the grill

We recruited Chef Paul Stewart of the Palmetto Bay Sunrise Cafe to give the barbecue world a grilled clams recipe and another Clams Bordelaise recipe – a meal in a pot.

It is pure simplicity:

1lb. of fresh clams, tomatoes (we used a can/box of quality crushed tomato) white wine, butter, herbs, and crushed garlic

Watch Here On YouTube


clams tomato

clam broth

November 28, 2013 Cook

Shortcut Tricks to A Successful Thanksgiving Holiday

roast turkey tricks By [http://ezinearticles.com/?expert=Cathy_Ramage]Cathy Ramage

So you haven’t got much time to prepare for the Thanksgiving holiday. You just found out you have guests coming over for dinner on this holiday and you are about to panic. No worries! You’ve got this in the bag… the turkey bag so to speak! Follow these tips or improvise with your own ideas but you can bet you will be very successful with a few easy shortcuts when preparing your Thanksgiving meal.

Make your list and go grocery shopping a few days before Thanksgiving. Don’t wait until the day before because you will run into frantic buyers and there may be a temporary shortage of the food items you need. So get the shopping done.

Get your family to help clean the house before guests arrive. Make a game out of it with some extra rewards like going to a movie or renting a movie when everything is clean to get in the spirit of things.

First we will plan the tablescape.

Use a white sheet for a tablecloth. Buy 1-2 yards of burlap fabric and arrange it down the middle of your table. Take a picture frame (black or brown) remove the glass and set it in the middle of the table. If you have a glass vase or tall candy jar, fill it with tall sticks or pinecones from your yard or buy some from the craft store. Set the vase in the middle of the picture frame. Purchase some brown ribbon. Make a large ribbon with long ends so you can drape it down the middle of both sides of your table.

You can sprinkle candy corn or pinecones in various places around the table. For an added touch cut out labels from brown paper sacks. Make one for each guest and tie it with twine to a pinecone to set by a plate for each guest. Have your children get involved. They can make these for you. There you go. Instant Thanksgiving charm!

Thanksgiving Menu

Turkey

Use a plastic turkey bag for baking your turkey. These are awesome and if you follow the directions you will get a moist and tender turkey every time! It also cuts baking time.

Dressing

Use stovetop baby! Add some sausage for an added delightful taste! You could make this ahead and heat just before serving. You might want to experiement a bit though to make sure it doesn’t go soggy.

Mashed Potatoes

Instant of course will do the trick! Find the brand that you think tastes the best. Get a package that has butter in the mix. They aren’t as chunky as the real deal but they taste really good! Pick up a turkey or brown gravy mix as well unless you want to make gravy from the turkey drippings.

Relish Tray

Pick one up from your local grocery store. Another option would be to buy veggies already washed trimmed and ready to serve to arrange on a platter. Then pick up your favorite dill, spinach, or ranch dip to serve alongside your relish tray. Add black olives.

Fruit Salad or Fresh Fruit

You can pick up a ready made platter of fruit or whip up a quick salad of pistachio instant pudding, whip cream, mini marshmallows, and chopped pecans. Mix it together and you have an instant salad. You can add canned pineapple or fruit cocktail if you like. Can be made a day ahead. (Add the canned fruit right before serving.)

Fresh Rolls

Bake and serve roll dough does the trick. Rolls can be raising Thanksgiving morning while you are preparing the other dishes. Have some jam, honey butter, etc..on hand to serve alongside your rolls. You could even use store bought ready to bake crescent rolls.

Vegetable Dish

Mix green beans and cream of mushroom soup and heat through. Sprinkle crispy dried onions on top and serve.

Yams

Add some yams and a little brown sugar in a glass baking dish. Warm in the microwave. Top with marshmallow and put in the oven for 5-8 minutes to melt and brown the mallows. Yummy.

Pies

Order your pies from a local bakery or pick some up from the grocery store. Try and find some that taste homemade without all the fuss! Don’t forget the ice cream for those who like pie alamode!

Beverage

Pour apple juice and a bottle of lemon lime soda for a sparkling beverage to serve your guests.

Add some canned cranberries to your menu. This will get you through in a pinch. If your guests offer to bring a dish, say yes. Now when Thanksgiving Day arrives you can still enjoy the day along with your guests and be so grateful that you have food to eat and family and friends to enjoy it with!

Cathy Ramage is founder of Christmas Twigs a year round holiday site featuring [http://www.christmastwigs.com/category_169/Teddy-Bear-Plush-By-Ditz-Design.htm]Teddy Bear Plush and [http://www.christmastwigs.com/category_76/Father-Christmas-by-Ditz-Design.htm]Father Christmas

Article Source: [http://EzineArticles.com/?Shortcut-Secrets-to-A-Successful-Thanksgiving-Holiday&id=8134667] Shortcut Secrets to A Successful Thanksgiving Holiday

October 3, 2013 Cook

Camp Trick – Soap Outside Of Pots

Soap Outside of Pots For Easy Campfire Cooking Cleanup

soot soap

Photo: Flickr/ninj4

Soap Outside of Pots For Easy Campfire Cooking Cleanup
By David Healey

The other day we were cleaning our gear here at home after a weekend camping trip and I spent a lot of time scrubbing the outside of a fire-blackened pot we had used to heat chili over the campfire. I could have saved myself a lot of elbow grease if I had bothered to soap the outside of the pot.

Using soap to create an easy-to-clean coating on the outside of your cooking pots one tip that really works when it comes to cleaning up after campfire cooking. It’s an old trick that used to be mentioned in the Boy Scout Handbook but that many campers seem to have forgotten – or maybe they were never Boy Scouts. It’s as simple as soaping the outside of your pots and pans to make cleanup easy.

Put a little liquid dish soap on a paper towel and spread the soap around the outside of the pot you are using for campfire cooking. An even film on the outside of the pot works best. Bar soap also does the trick but is harder to spread evenly. I have even seen this done with shampoo.

When it comes time to do the dishes, that black soot on the outside of the pot will come off much more easily so that you aren’t left scrubbing at a sooty mess. Just make sure you don’t get too crazy with the soap and get any on the inside of your campfire cooking pot because soap doesn’t do much to improve the flavor of most dishes!

Ian Fitzell is the editor of Camping Sky, a blog dedicated to upscale family camping. Visit [http://campingsky.net].

Article Source: http://EzineArticles.com/?expert=David_Healey
http://EzineArticles.com/?Soap-Outside-of-Pots-For-Easy-Campfire-Cooking-Cleanup&id=3222940


  • « Go to Previous Page
  • Page 1
  • Page 2
  • Page 3
  • Page 4
  • Page 5
  • Page 6
  • Go to Next Page »

Primary Sidebar

Welcome To BBQTricks!

Hey Y'all... Thanks for stopping by. I'm Bill West. I blog about BBQ and occasionally country music. When it comes to BBQ I try to find solid time saving tips and tricks to make the grilling life a bit easier. It's life hacking for the backyard cooker. Read More…

Your Gateway to Barbecue Information

This site is a member of The Smoke Ring BBQ Webring A linked list of BBQ websites

Next BBQ Site - Next 5 BBQ Sites - Prev BBQ Site - Random BBQ Site

Join the BBQ ring or browse a complete list of The Smoke Ring BBQ Webring member's BBQ sites

If you discover problems with any of The Smoke Ring BBQ Webring sites, please notify the Ringmaster

fb

Footer

DISCLOSURE:

Posts on this site may contain affiliate links. If you purchase something via one of these links you won’t pay more but the site operator gets a small commission. Or as I like to call it: “beer money.”

Copyright © 2025 — Barbecue Tricks • All rights reserved.