Is anything wrapped in bacon better? See how sausage takes to the treatment on GrateTV. Jack Waiboer pull a trick out of his sleeve with Stovetop Stuffing and you’ll want to see how it looks. Catch the step by step recipe Here
Smoke Ring Hack for BBQ
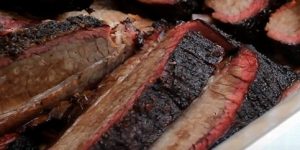
A smoke ring is often thought to be a sign of barbecue perfection. It’s a coveted low and slow cooking phenomenon that looks like a luscious pink edge that boarders the outside border of the meat. It’s vital to competition pulled pork and especially beef brisket. Pit Masters use it as a sign of true craftsmanship but you can achieve this mark of cooking success too.
The smoke ring by itself will not enhance the flavor of your meat. It is not smoke flavor soaking into the meat. It is, in fact, a mark made by a chemical reaction. When nitric acid is absorbed back into the surface of the meat it changes the color of the flesh. Nitrogen dioxide comes from the natural wood smoke and combines with the wet surface of the meat to create this reaction.
Some people say cooking with green or water soaked wood will enhance the color of the ring. Others insist you must put the meat on the grill or smoker while it is still cold and fresh from the refrigerator to get a better ring. One competition team actually fakes the smoke ring by painting the edge of the meat strategically with sauce!
One of the most common ways to “hack” a barbecue smoke ring is by using a curing solution like Morton’s Tender Quick. The package reads, “Tender Quick is a blend of the finest quality salt, sugar and meat curing ingredients. It is perfectly blended for fast cure action and improved flavor and color of the meats.” The secret is that it contains the sodium nitrate/nitrite that you can use to make your smoke ring with no smoke at all. It’s the kind of stuff that makes cured ham pink.
Add some Tender Quick to a rub or dissolve it in a brine and you will see an immediate difference in your meat’s smoke ring. Many competitive cookers will also use products referred to as “pink salt,” Prague Powder or Fab (a meat enhancer).
A spoonful of Tender Quick mixed into your rub before coating the meat should do the trick. For an extreme smoke ring some cooks rub the meat with Tender Quick and then let the meat set for an hour before rinsing and cooking. Use caution with the amount of Tender Quick you use on you meat. You don’t want to end up with corned beef or cured ham.
There are many ways to manufacture a smoke ring on your barbecue but remember using a chemical nitrate like Tender Quick will not add any smoke flavor and that is the true hallmark of great barbecue. Visit Barbecue Tricks to discover more tips to enhance your outdoor cooking.
Weekly Podcast – Meat SHOTS!
 This week the GRATETV BBQ and Grill Show visits some power players at Patriots Point for this year’s BBQ Throwdown. Jack Fulton and Jimmy Haygood from http://foodforthesouthernsoul.com know the ins and outs of good BBQ. Check out their words of BBQ wisdom and have a few meat shots for us.
Beef Jerky How To Low and Slow
Over the last decade the popularity of beef jerky has exploded. You see it in every convenience store and gas station. It comes in many flavors from peppered and hot to sweet and smokey. The major problem is that it is exorbitantly expensive. A small pouch that is listed as three or four servings can set you back around seven dollars or more. Just too expensive for an impulse purchase snack with one major ingredient!
The good news is that making beef jerky at home is affordable and easy. You don’t need fancy equipment. However a simple food dehydrator is handy.
It’s important to be aware of general raw meat safety and food handling dangers especially when handling chicken and fish. Check with the USDA for guidance and take comfort in the knowledge that drying beef is much safer than other meats.
To keep things affordable start with a basic cut of beef that is easily attainable at the grocery store. Brisket is delicious when dried as jerky however it is usually packaged and sold whole (too big) and with a large fat cap attached. You will not want to pay for fat you will later discard.
Instead, opt for a lean large cut like Flank or London Broil. Trim off any extra fat. Slice it into strips as thin as you are able against the grain. Pencil thin or quarter inch thick will do. Partial freezing and a sharp knife will help the task.You may also have to cut at a forty-five degree angle to go against the grain on the London Broil (but your jaw will thank you later). The cut will allow for a more tender bite. Want to slow yourself down? Go with the grain (not a bad diet tip).
Lean 90/10 ground beef also works well and creates more of a “slim beef stick” jerky. Ground beef is usually cheaper and the product is also easier to chew. Use a jerky gun (like a cookie press for ground meat) to craft the ground meat into uniform strips or sticks.
To ensure a longer shelf life you’ll want to use a curing salt like Tender Quick ( 1 tablespoon per pound of beef). Then add your favorite dry spices like black pepper, cayenne and garlic. For a wet marinade on steak strips you can rub the cure into the surface of the meat and then soak in marinade. You can find dozens of fun recipes online. Let the meat marinate for around three hours. Longer for stronger flavor.
Food dehydrators are an easy solution for doing the rest. Just place your meat and set on the machines highest temperature for four to fourteen hours or until dry and leathery. A flip and a light brush with an unflavored oil can add a nice sheen to exceptionally dry slices of meat. Conversely use a paper towel to blot any collecting oil on the surface of your jerky.
If you are new to making jerky you can also use your home oven. It’s easy to space out your strips of wet meat directly on the oven grate with a drip pan directly underneath. A cake rack over a foil lined cookie sheet also works just as effectively.
Preheat oven to 160 degrees (officially the USDA would like the meat to get to 160 to kill any potential bacteria) and allow jerky to dry for 30 minutes and then lower the temperature to 140 degrees for three hours or until totally dry. Some cooks will crack open the oven an inch or two to keep the oven from getting too hot and to encourage airflow.
Once dried allow the jerky to totally cool before storing in air tight containers (this will also avoid any condensation inside containers.)
The great thing about jerky is that you can create unlimited flavors by using different rubs and marinades.
Smoke Fried or SmoFried Turkey Recipe
I first heard of a SMOKE fried turkey about a year ago when Jack Waiboer mentioned it in discussions on frying turkey. It went something like “You wanna try something REALLY good ya gotta smoke fry a turkey.”
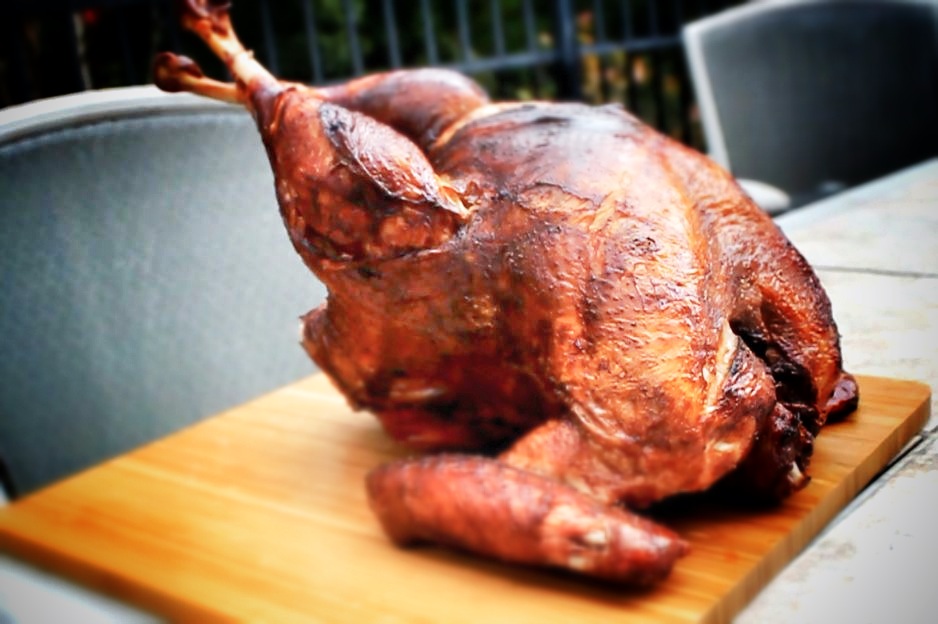
I haven’t been able to get it out of my mind so I set up shop for us to demo the making of what Jack calls a “SMO-Fried” turkey for http://GrateTV.com. I now know it’s as good as it sounds and – although it may be double the work – it’s not really very difficult.
It’s worth another reminder – don’t burn down the house… ask Jack about his old garage door.
Here’s the Deal:
Smo-Fried turkey is a natural progression combining 2 of the most popular ways to cook a turkey. It?s really quite simple, smoke or grill the bird then drop it in hot grease to finish off the cook and crisp up the skin. Please be very careful. Hot grease, liquids, and fire mixed together can spell disaster if you don?t put safety as your top priority! Trust us we call it the garage door killer from personal experience.
Ingredients:
10 bs. Turkey, completely thawed.
3 Gal OilInjection:
Equal parts butter, hot sauce (we used Texas Pete wing sauce), white grape juice,
Rub: Tony Chachere’s,Directions:
Inject turkey breast from inside cavity, legs and thighs from outside. Rub under skin, on top of skin, and inside of cavity.
Smoke over hardwood coals and chunks at a settled temperature for at least 2 hours.Finish turkey in a 325- 350 degree, preheated turkey frying apparatus, until done. 170 degrees in deep thigh. Takes about 30 mins. Let rest, carve, then serve.https://barbecuetricks.com/wp-content/uploads/2012/11/turkeya.jpg
Ingredients
- 10 bs. Turkey, completely thawed.
- 23 Gal Oil
- Injection:
- Equal parts butter, hot sauce (we used Texas Pete wing sauce), white grape juice,
- Rub: Tony Chachere's,
Instructions
- Directions:
- Inject turkey breast from inside cavity, legs and thighs from outside.
- Add Rub under skin, on top of skin, and inside of cavity.
- Smoke over hardwood coals and chunks at a settled temperature for at least 2 hours.
- Finish turkey in a 325- 350 degree, preheated turkey frying apparatus, until done.
- Takes about 30 mins.
- Check temp. for 170 degrees in deep thigh.
- Let rest, carve, then serve.
Smoker Pouches Make BBQ Better
To a lot of foodies and backyard cookers “barbecue” means “smoke kissed” meat. The succulent and flavorful meat just isn’t quite right without a lick of Hickory (in the South) or a hint of Mesquite (in Texas) or even flavors of whiskey barrel Oak (ala Lynchburg, TN). Smoke flavor in grilling and barbecue isn’t too hard to achieve. You don’t need a huge wood stoked smoker on a trailer like the super serious competition teams or even a specially built upright smoker. The only thing you really need is real hardwood.
Hardwood chips or chunks for barbecue are fairly easy to find. Watch the country roadsides to buy good dry wood in full logs or split. Wood chunks – about the size of a lemon – can be found in outdoor and cooking centers. And smoking wood chips can be found bagged in many supermarkets right along side of the charcoal. When buying make sure the wood is nice and dry and with little bark attached (bark and insects can emit unpredictable scents).
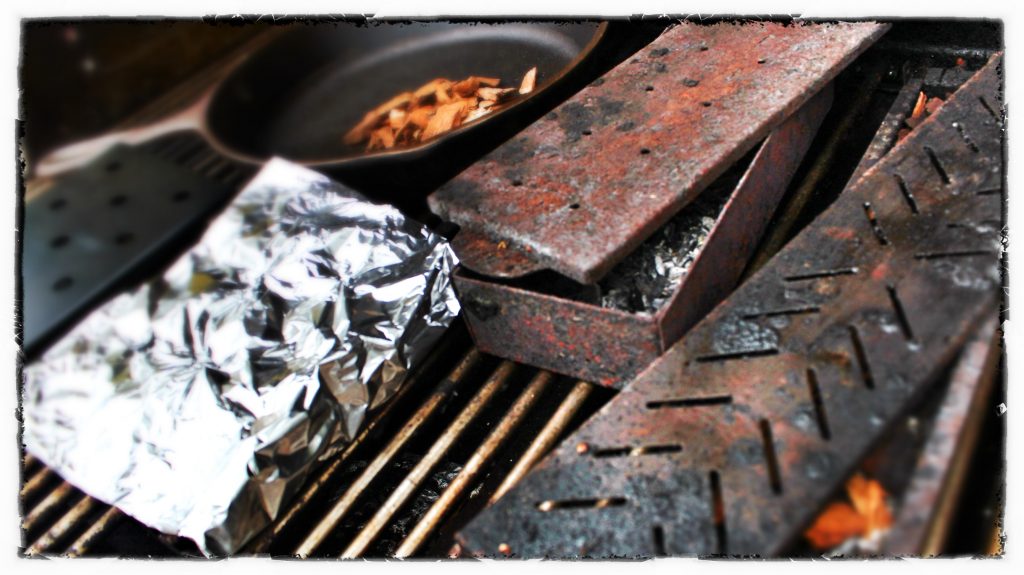
If you don’t have a true smoker you can still add that real smoke flavor to your outdoor gas grilled foods. Smoker boxes are made to contain about a fist full of your favorite wood chips. The box controls the intake of oxygen to help keep the wood from burning too fast and, instead, smolder with a slow stream of flavorful smoke lofting up to the meat. The boxes come in lots of shapes and sizes. Some are even triangular to set nicely inbetween grill grates or wedge next to a gas burner. Most all smoker boxes are short enough to fit UNDER grill grates to set next to or on top of gas burners. Place the meat directly in line with flow of smoke (usually between the box and an open chimney).
The smoker boxes are an inexpensive addition to a gas grill and can also be used in charcoal grills to keep floating ashes down off the meat.
If you are looking to buy a smoker box look for the most solid construction you can find. Ideally a cast iron box will last the longest in the high heat and corrosion. Pit masters will bigger grills sometimes resort to using cast iron pans for long term chip boxes.
If you are only adding occasional smoke in your back yard gas grill you can easily achieve great results by constructing a simple “smoker pouch” out of heavy (or double layer) aluminum foil. Simply fold the foil into a makeshift envelope, add chips of your liking, and fold to seal tight. Poke just a few air holes into the foil to release the smoke and then set the pack under the grill grate and on top of the burner. For longer cooking time (like four hour ribs) you can have a second or even third “smoke bomb” set aside from the start to quickly toss under the grate after the first pouch smokes out. Discard the pouches when the grill is fully cooled. You could even soak half the chips in water to slow down the smoking process. BBQ masters will typically soak wood chips and chucks for at least 30 minutes before they put coals directly on hot charcoal to allow for a smolder instead of a sooty hot fast burn.
Wood chips and a smoker pouches can really help make your next batch of home cooked barbecue taste like the competition champ’s. Experiment with wood varieties like hickory, apple wood, mesquite, and cherry. Avoid pine and resin heavy woods that can leave off flavors and never use pressure treated lumber that could give of toxic fumes. See our Wood Smoking Guide HERE.
Meat The BBQ Team: Mike’s Catering
GrateTV paid a visit to one of the South East’s winning-est BBQ Teams… Mike’s Catering. Mike Fields has been cooking and competing for over a decade and has plenty of Grand Champion trophies to prove his team’s elite status. Take a look and meat the Mike’s Catering team and grab a tip on award winning chicken, ribs, pork, and brisket.
GrateTV is a weekly web video series on barbecue and grilling. Subscribe and rate on Youtube, iTunes and Facebook.
See How Easily You Can Make Perfect Grill Marks
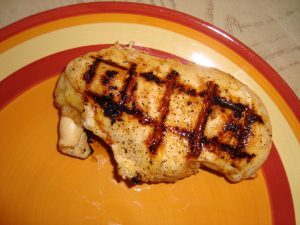 The signature sign of a great grill master is those perfect diamond or square grill marks. To keep your bbq cred they gotta look good on on a steak or a piece of chicken or a chop. Here’s how to do it:
First, start with a clean gril. You don’t want grime making the mark. You want it to be a true sear. With the grill clean it’s time to look at seasoning. Basically, with the seasoning you don’t want too much sugar. Sugar will simply burn on the surface of the meat. low sugar on the surface. Use turbinado suger when you must. It has a higher burn point.
Then, it’s pretty simple. Place the meat on the grate and make sure it has good surface contact. Then, don’t touch it for one fourth of the cooking time. Again don’t touch for one quarter of the cooking time. After you’ve exercised your patience give the meat a 45 to 90 degree rotation on the grill (remaining on the same side) forthe rest ( the second quarter) of the cooking time. Again, don’t move it. You’ll want to allow the sear to do it’s thing and actually release from the grill. If it is still sticking you may need a bit more time. Once the whole piece is half cooked you can flip and check your results (repeat for the 2nd side. Inevitably one side will look better than the other. Present that side up on the plate.
The method also works well with indoor grill tops. Looks nice on veggies and best on lighter colored meats.
Twisted Shrimp Tacos With a Secret Twist
Warning! What You Need To Know about Grease Fires
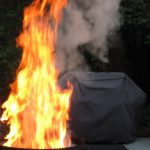 Grease fires are unfortunately an all too common danger in the cooking, and especially the barbecue, and live fire outdoor kitchen environment. Meats marbled with fat, and poultry dripping oil directly on to an open flame can cause real problems for the apathetic pit master. When you set out to grill use extra caution with high fat content meats like ground beef, sausages and skin on meats like chicken and pork.
Of course you should never leave any open flame unattended. It takes mere moments for flare ups to run out of control. By the time you walk inside the house to get a beverage in the refrigerator you could have a blaze on the kettle grill.
First, if you expect dripping oil or any pooling grease at all consider using a drip pan and an indirect heat source (off set flame or coals) before you cook.
Place a sturdy aluminum pan filled with water (juice or beer may be nice) under the grate beneath the meat or drips. This will avoid major flare ups and protect succulent meats from over cooking. Indirect heat like this is usually desired for cuts thicker than the palm of your hand.
Second, make sure you start with a clean grill. A dirty grill can mean pooling oil and grease that can ultimately flare up.
Third, have a dry chemical fire extinguisher handy whenever grilling. It’s O.K. to use the one temporarily from the kitchen (you DO have one in your kitchen right)? Baking soda can also be used to stop a small grease fire. You may need a lot (and baking flour!)
Fourth, NEVER spray water on a grease fire. It will most likely flare up and spread.
Fifth, In the kitchen you can often cover a grease fire with a pan lid. to cut off oxygen. This is very difficult on a grill grate. A heavy wool or flame retardant blanket can sometimes smother a flame.
And finally do not try to move the flaming material. Turn off the burners and if all else fails get away and call 911.
Flare ups can be a real danger with live fire cooking. Keep charcoal grills off wood decks and all grills clear of vinyl siding. In fact its good practice to remove any and all flammable material at least ten feet away from active and hot grills and barbecues. This includes the ground (dry grass can catch fire in an instant in the dry summer months). Use some advance planning and keep it safe.
