• Skip to primary navigation
  • Skip to main content
  • Skip to primary sidebar
  • Skip to footer
  • Big Book of BBQ Tricks
  • Resources
  • Free E-CookBook / Newsletter
  • Smoking Meat 101 Book
  • BBQ Blueprint Book
  • Electric Smoker Cookbook
  • Wood Pellet Grill Smoker Book
  • Temperature Guide
    • Seafood
    • Pork
    • Poltry
    • Beef
  • About Me
  • Shop
  • Sitemap

Barbecue Tricks

BBQ Tips and Tricks

Butcher's Guide

September 24, 2020 Butcher's Guide

Cooking Bison vs. Beef and How to grill it on the BBQ

BISON curious? Time for some red meat! Ever wonder how cooking bison compares to beef on the BBQ? Here’s my review and how I cooked fresh bison meat on the grill and smoker.

The other Red Meat

The USDA defines “red meat” as “all meats obtained from mammals,” but for this post I like to think bigger. Red meat includes beef, lamb, and even wild game. And YES BISON!

Red meat plays a starring role in American barbecue. We eat about 25 billion pounds of beef a year in the United States. Believe it or not, per capita, Uruguay and even Argentina actually consume more. Now I see why the new Brazilian steakhouses are so popular. They have the meats!

Large chest = Large Ribs. Photo: Unsplash

The most popular red meat BBQ recipes to grill at home are usually beef. But I have been seeing BISON and BUFFALO pop up on my meat seeking radar. I recently connected with The HONEST Bison and I’ve been really enjoying their meat. I should note I was provided the bison for this article. This post also contains affiliate links and I will be compensated if you make a purchase after clicking my links.

Take a look at what The Honest Bison has to offer HERE

Why Bison?

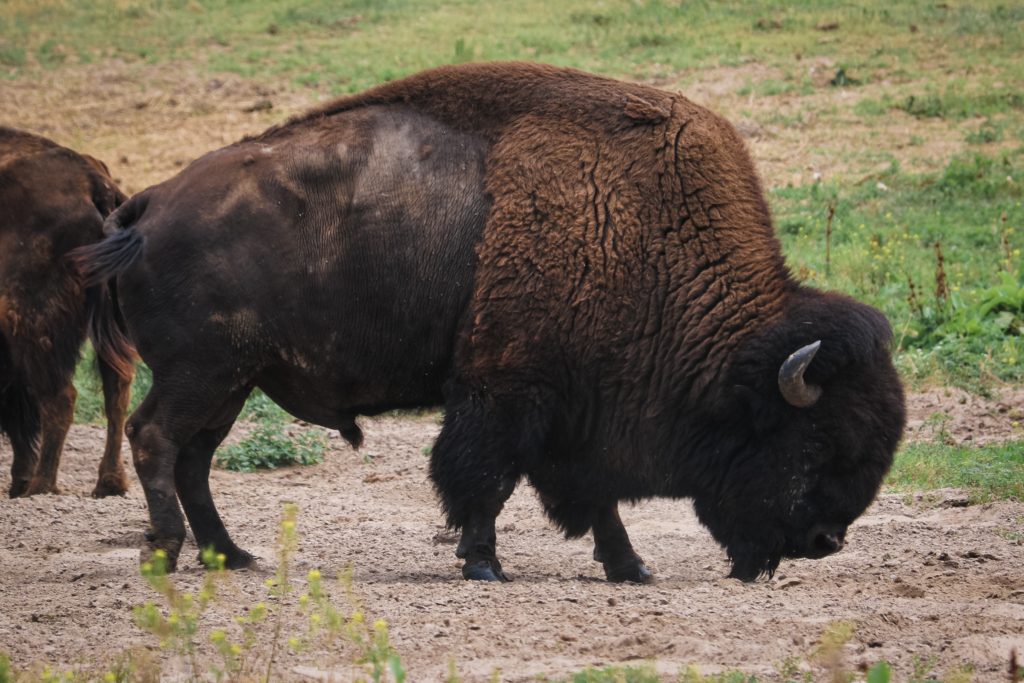
Bison is seeing a surge in popularity in North America due to the sustainable farming craze, and because it is considered a healthier protein choice. It’s interesting to note that a bison is not the same as a buffalo, although it is sometimes incorrectly used as a nickname. Bison is a much leaner meat than beef so the trick is to keep it moist, since there is very little fat to render.

Bison Is Better For You

First thing that I really like about bison is the fact that Grass fed meat is better for you than your average factory grain fed beef.

Supermarket beef these days is plumped up with grain.  Seek out meat that is labeled grass-fed or finished. Although grass-fed meats have a little different flavor profile, grass-fed beef is prized mainly for its health benefits. It is also considered more humane for the animals. Grass-fed and finished beef comes from cattle that are pasture-raised and fed with only grass, not grain. It’s a more expensive process with real dietary benefits. Grass-fed beef has healthy Omega three fatty acids. Also, it is higher in antioxidants, vitamins, and a beneficial fat called conjugated linoleic acid (CLA) that is known for its improved immunity and anti-inflammatory benefits.

Same goes for the Bison from The Honest Bison. It’s hormone-free, organic meat (Hey, when I was a kid, everything was organic!)  Honest Bison delivers the meat right to your door. They take their meat seriously, and I highly recommend them.  Another smoked cut of meat you will like is their ELK. Wait!?! My auto correct really wants to give you an “Otter Smoked cut of meat!” I’m thinking that would be unusual…

They call it: Food you can trust. Naturally.

The Honest Bison was founded on the notion that they believe you should be able to trust what you eat. When they saw how hard it was to find unprocessed, humanely raised, quality meats in stores, The Honest Bison was born. Here’s more from the company website:

“We started out with just 100% grassfed bison but have since branched out to include a curated selection of other high-quality meats as well. As we continue to expand, our mission still remains the same – to bring trust back into today’s food system.”

Also, on the Honest Bison website it is inspiring to see them spell out their truths: Transparency, Respect and Purity.

Transparency

Transparency. We believe everyone deserves to know exactly where their food comes from: how it’s raised, how it’s processed, what’s in it and who’s handling it. We follow our meat every step along the way and know everyone involved personally. And we will always answer any questions you have honestly.

Respect

Respect. Everything we do starts from a place of respect – for our animals, our land, our partners, our customers and ourselves. Our holistic approach to ranching helps replenish the lands naturally and allows the animals to roam freely in large, grass pastures. Our animals are always treated humanely, in both life and the slaughter process.

Purity

Purity. Our meats are processed as minimally as possible to allow the natural flavors and nutrients of the animals to remain intact. Any ingredients we add are real, whole foods and are always clearly labeled.

How I cooked my Bison

So lets look, specifically, at what bison cuts I grilled/smoked and just how I approached cooking bison.

  • I quick grilled my ground bison as burger patties.
  • The bison short ribs tasted great slow smoked on my pellet grill.
  • I cooked bison brisket with simple seasoning and “low and slow” smoke.

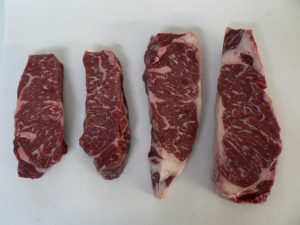
All three of these cuts cook differently so I’ll look at them separately below. You can also choose from steaks and roasts so think of this as a BBQ focused look at how to cook bison.

Ground Bison Burgers

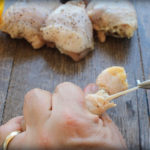
First, I grilled it as ground bison – in burgers. Bison often appears darker than beef. The burger patties I made were a beautiful, rich red color thanks to the mineral-rich nature of game meat. I cooked bison patties along side typical beef patties (80/20 grain fed). The uncooked beef was a bit more grey. But when cooked they really looked the same.

Cooking bison as ground meat is essentially the same as ground beef. The flavor is a bit more robust and rich. I saw on the website that The Honest Bison also offers pre-pressed bison patties as well as 90/10 ground bison. 90/10 may be too lean for what you want in a burger. The standard “ground bison” I grilled(I think it was 80 percent lean or 80/20) was perfect. I just added Montreal steak seasoning and grilled the same as the beef. If you are a fan of a rare internal temperature on your burger cook the bison just as you would beef. Bison does cook differently with streaks and roasts… more on that in a bit.

How Bison tastes vs Beef

The flavor of bison was really good for burgers. Just slightly different then the beef burgers. Slightly.

There was what I would call a grass fed flavor (mostly with the brisket and the ribs) but with the ground bison I could barely discern a difference from beef. And I could just slightly notice a bit of a wild flavor on occasional bites as if it was from different flecks in the grind. Just enough to know it was something different.

Cooking Bison Short Ribs

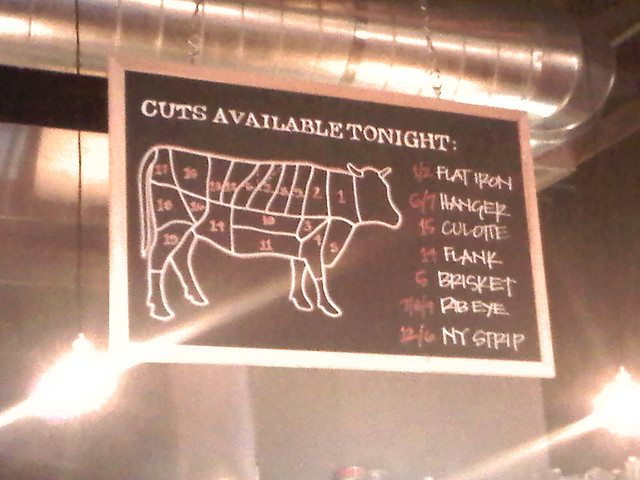
Bison ribs are something BBQ fanatics will enjoy cooking. If you are looking for something a little more exotic (but not too exotic) this is great for a grill and smoker. The typical cut is bison “short ribs.” These are like “English style” beef ribs where the bones are cut into three to four inch segments.

With the look of the animal, I had envisioned GIANT “Fred Flintstone” bones. When you look at the BISON… It’s hard not to marvel at the massive chest and the stocky front half of the beast.

But in reality the bison ribs looked (and cooked) a lot like beef back ribs. I noticed the color being a bit darker then beef before cooking.

Again game mammals are true “red” meat. The protein, myoglobin, holds oxygen in the muscle, and gives the meat a darker color. 

I also noticed that my bison ribs have less fat then beef short ribs. But they were really similar in size and shape… I  cooked them on the wood pellet smoker like beef ribs.

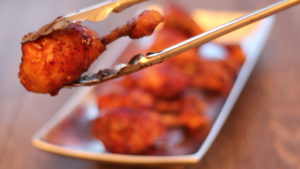
Bison ribs are best when slow-cooked or braised until the meat falls off the bones. So I smoked for 3 hours and wrapped them with foil and a bit of apple juice to keep them moist. Then, I continued to cook at 225, wrapped in foil for two or three more hours. I finished them, unwrapped, and sauced them up for the last hour over direct heat.

It’s also good to spray or “spritz” the meat to keep things steamy before you wrap it in foil. This keeps is moist and enhances the smoke ring. Just beware of opening your smoker too often in colder weather (it can really lower the temperature in the smoker and extend cook times).

I enjoyed the beefy yet wild taste of the bison. These are also very similar to their beef counterpart. But because they are more lean you will really want to marinate (or inject with a marinade) and wrap with foil to keep them from drying out. Sauce as you would with beef ribs.

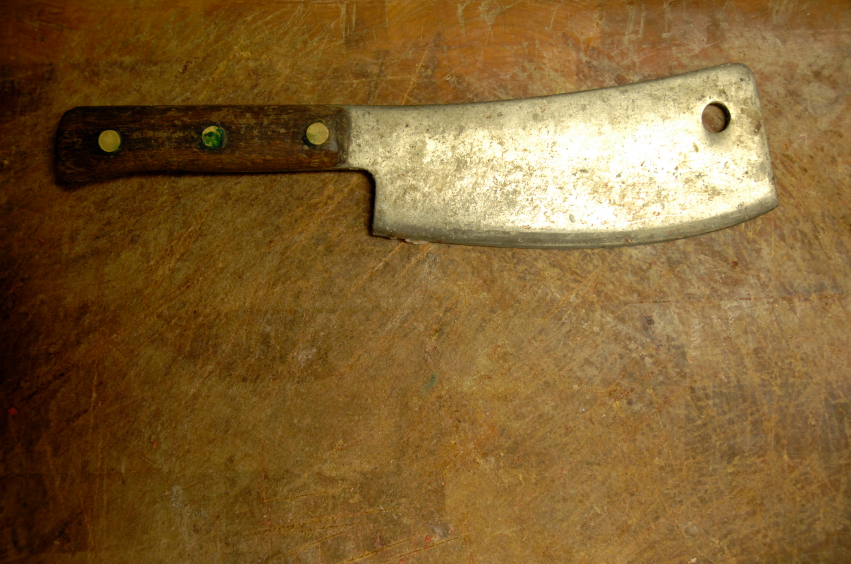
Trim off the silverskin

When I cook beef I try not to over trim off the fat  – but, when cooking bison, you will want to use a sharp knife and get all the excess silver skin and membrane on the top and back of the bone. I, mistakenly, did not remove some of the top layer and I really should have. The white membrane looked like it was a layer of fat (on the meaty side of the rib bone) so I left it alone. I discovered that’s where a lot of the gamey flavor came from. After cooking I was still able to remove the top membrane and it eliminated the stronger flavor.

Nonetheless, I always pull the membrane of the back side of the ribs anyway (beef and bison is tougher than pork). Here’s my video on how you can pull the rib membrane more easily.

Also, to minimize gamey flavors in wild meats like bison, venison, elk and boar, some hunters also eliminate any excess blood. Other marinades for game meat call for an overnight soak in a buttermilk solution with salt or vinegar, and sugar or other spices as desired. 

Cooking Bison Brisket

Lastly, Bison Brisket was a cut I was really looking forward too..  because my thinking was it would be massive like the whole packer beef briskets Im used too… and the bison was definitely leaner… you THINK looking at the bison it would be a meaty brisket because the meat comes from the chest… but I it’s really too lean for my taste on the smoker… you’ll want to smoke it for a couple of hours… then wrap it and continue to braise it in it’s own juices… I would even recommend using  slow cooker after you get a couple of hours of smoke on it.

Grass fed bison brisket is just like grass fed beef brisket. They are better for other cooking methods. It’s not going to have the thick fat layer that a lot of pit masters love about grain fed beef brisket. If you’re looking for a fatty brisket experience you may want to try a different cut.

Cooking Bison is a great conversation starter

In summary, I recommend you give The Honest BISON a try. It’s just fun to offer it up as something adventurous for friends. Check out their latest offer here (20 percent off).

Top reason I think it’s just exotic enough for “all American” tastes. It’s just such a cool animal. By the way I also love their logo at The Honest bison. It pays tribute to how majestic these animals are.

If you are having a cookout with friends its not too much of a stretch to get them to try something “wild.” Cooking bison is a unique conversation starter too.  I don’t think anyone would get upset trying it thinking it was beef and not knowing it was a different animal… Yeah that happened to me once with Rocky mountain oysters…lol.

Many Americans love cooking Bison and Elk because It’s a healthier meat than grain fed beef. I mentioned the Omega 3s… on top of being healthy… whole 30 and Keto fans love bison and grass fed meat. Honest Bison treats the “meat” with respect: their holistic approach to ranching helps replenish the lands naturally and allows the animals to roam freely in large, grass pastures. Always treated humanely (in life and the slaughter process).

Next – the wild and rich flavor is something really satisfying… and in brief you cook certain cuts a little differently.

Tricks for cooking bison

When you veer off the basic barbecue path with bison, you can keep these tips in mind for best success:  

  •  Trim off all visible silver skin and rib membrane
  • Marinate: I used some cider vinegar in a marinade for the ribs that helps mellow the wildness.
  • Other ways to boost moisture (that I didn’t do here but you may want to try) include basting, and larding or barding (inserting slivers of fat or wrapping in bacon). 

Also, the company sends along an insert thet they use to advise you generally of how to treat BISON… as well as other leaner game meats… they say FIRST… cook for one third of the time and temperature of beef… and that’s maininly referring to the steaks and cuts you will serve rare… NOT the ribs and brisket I tried… so make that distinction.

One third of the time and that would be the “doneness/internal” temperature of beef. I think that’s hard to understand,  but think of it as approximately one third of the “doneness temperature of BEEF in degrees. Beef is rare with a red center at 125 degrees Fahrenheit. Beef is Medium at 145.

So for the steaks and cuts like bison tenderloin they suggest

  • Rare being 115 degrees F to 120 degrees F
  • Medium Rare being 121 to 125 degrees F
  • And Medium cooked BISON should have an internal temperature between 126 degrees F and 130 degrees F.

Lastly, remember to Rest bison steaks and roasts as temperature will continue to rise while resting. So you should remove the bison from heat when thermometer registers 5-10°F lower than desired doneness.

cooking bison short ribs

February 6, 2018 Butcher's Guide

Omaha Steaks vs Butcher Box

omaha steaks vs butcher box

https://www.flickr.com/photos/stuart_spivack

If you are looking to buy quality steaks online you’ll want to compare Omaha Steaks vs Butcher Box. Unboxing vids below.

The online grocery battles are just starting but Omaha steaks has been in the business of shipping steaks for years. Omaha steaks differs from Butcher Box in that they seem to specialize in one time gift giving whereas Butcher Box is aiming to cultivate a monthly subscription starring “green” grass fed beef.

The three big differences between Omaha Steaks vs Butcher Box are:

  • Quality
  • Price
  • Subscription

Quality: First, the quality of both are good. Taste is excellent for both. In this comparison the Butcher Box quality is focused on hormone free grass fed beef. Omaha steaks has been selling grain fed beef for one hundred years and, with a lot of marketing, they have developed a respected brand and reputation for quality. They have more recently started selling select grass fed meats with an explanation of some differences.  Omaha Steaks also offers a premium level they call Private Reserve. However, I was not able to find any disclosed level of quality for Omaha Steaks.

Butcher Box has put it’s main “quality” focus on Grass-fed & Grass-finished Beef, Heritage Breed Pork, and Free-range Organic Chicken that is all certified humane, all free from added antibiotics and hormones.

Price: Simply put, the prices for grass fed, humane, no antibiotic, no hormone is significantly more for Butcher Box.  They aim for six dollars per meal. Find out more about Butcher Box here and for a limited time they are offering free bacon for life here. Omaha steaks can offer some jaw dropping sales prices (we’ve received the best offers after the first purchase via special offer mailings). The “value packages” they offer can be found for around fifty bucks. They’ll add a bunch of “filler” like burgers, hot dogs, stuffed potatoes, and apple tarts but it’s all great tasting and great looking (we have never NOT consumed the extras. The potatoes and apple tarts are fantastic.

Subscription: Butcher Box has you sign up for a monthly delivery box either curated by them or you can pick and choose. You can cancel at any time, but it’s different from Omaha Steaks single purchase arrangement (they will bombard you monthly with sales in the mail).

In Summary:

If you are very conscious of your meat sourcing and antibiotic use you’ll find a great service in Butcher Box. Their packaging is even more “eco-friendly.” Butcher Box is shipped in recycled biodegradable material and Omaha Steaks is packed in Styrofoam. Both always arrive solid frozen in dry ice and vacuum sealed. Take a look at the unboxing videos of Omaha Steaks vs Butcher Box both below. If you are looking for good quality and taste often at a big value I recommend Omaha Steaks. Both are great ideas for gifts too.

Other options include Snake river Farms Wodagyu, and D’Artagnan

Snake River Farms  is one of the only Competitive BBQ meat providers we’ve found. If you need American Kobe (Snake River Wagyu beef) brisket they are the most trusted source. They’ve also created a Snake River Farms Wagyu Brisket club for best pricing. See my Unboxing Snake River Wayu Beef HERE

D’artagnan offers a wide variety of gourmet meats including Wagyu, and specialty beef.

Spend $99 and Get Free Rack of Kurobuta Pork Spare Ribs and Free Standard Shipping at Snake River Farms, code SPARES18, exp 12/31.

Wodagyu is a small Texas farm specializing in American Wagyu. A great option for brisket or unusual beef cuts. See the specials section.

Butcher Box Unboxing:

Omaha Steaks UnBoxing:

September 10, 2017 Butcher's Guide

Chicken Pops On An Electric Smoker

Plum Chicken Pops is my favorite recipe from my new book The Complete Electric Smoker Cook Book.  Chicken Pops are one of those things that are a bit of a trick to make therefore they’ll take a bit more time. As a result they are always more appreciated.  Check out the video to see the How To pluck the pops HERE.  


Chicken drumsticks have always been a BBQ favorite. We love them as a kid because they are tasty, hand held, portable, and fun. As an adult I can also appreciate the fact that dark cuts of chicken are easier to cook without drying out. Because dark meat is so affordable – heck inexpensive – my wallet is happy too.

Furthermore, the addition of this sweet and sticky plum sauce takes the drum stick to the next level of flavor. Plus, making the handle all fancy (a technique known as “Frenching”)  keeps your family’s fingers from getting too sticky.  The boys (young and old) will just like it because it looks cave man cool.

chicken popsPlum Chicken Pops

  • 12 chicken drumsticks
  • 2 tsp salt
  • 2 tsp pepper


For the plum sauce:

  • ¾ of a 16 oz jar of plum jam
  • 2 Tbsp apple cider vinegar
  • 1 Tbsp brown sugar
  • chicken leg1 Tbsp minced onion
  • 1 tsp crushed red pepper flakes
  • 1 clove garlic, minced
  • ½ tsp ground ginger
  • Salt & pepper to taste (less than i did in the video – whoops)

First of all make the plum sauce. Combine all ingredients in a medium saucepan and remove from heat after reaching a boil. Set aside.

For the unique looking legs that I call pops you need cut the skin down to the bone just over the bottom end leg joint.  Stretch skin as much as possible on drumsticks and using a needle nose pliers, remove the thin, white tendons from each leg.  You’ll need to grip (I suggest using a paper towel to grasp the slick skin) the meaty end and then

chicken leg tendon

pull and  “pluck” the long tendons This can sometimes be tricky (and slippery) to do. Don’t panic if you lose a bit of meat clinging to the shoelace -like tendons. Grip the meaty end to help keep more meat in the process.

Sprinkle each with salt and pepper and head to the smoker.

I used cherry wood and smoked on a Char-broil Electric Smoker for 90 minutes at a steady 250 degrees F.  Look for the skin and meat to retract to create a nice looking ball at the end of your “chicken pop.”

Finally, I like to dredge the pops in the sticky sauce. However it’s really up to you.


March 8, 2015 Butcher's Guide

Tips For Cooking Ribeye Roast On The Grill

heart rib eye

By Diane Louise Villanueva

I have some friends who get frustrated whenever they cook ribeye meat on the grill. What do they complain about? Well, they say that their dishes don’t taste or look like the ones served in restaurants. And I tell that’s not a problem at all. Chefs have exhausted a lot of years just to learn and perfect the art of cooking ribeye steak (among many other dishes) on the grill and there’s no reason to compare. Now I’m not saying that we have to enroll in a culinary school just to be able to serve home-cooked goodness such as theirs. There are definitely ways on how we can better our cooking. For starters, check out these simple tips!

1. Buy steaks that are about 1.5 to 2 inches thick. I know this is not readily available in groceries because the ones being sold are either too thin or too thick. Don’t worry though because you may actually ask the butcher to have yours customized.

2. There are a lot of things that some of us apply on our steak. I suggest just going with the good old salt and pepper. You can always brush your steak with sauce a minute before it’s cooked. Just remember to apply your salt and pepper generously at least 40 minutes prior to cooking it on the grill.

3. When cooking ribeye steak on regular grills, experts recommend flipping the meat regularly (but not too much) to help the temperature work its magic and cook the meat evenly. However, if you’re using a grill with a lid, you can simply leave it covered and let the meat cook for an hour. Once that amount of time has passed, you can lift the lid up and flip your meat.

4. Searing your meat is a wonderful idea. You may use canola oil or also blend it with olive oil for additional flavor. Brush some oil on your steak to let it sear while cooking. This way, the end product will show a scorched coating and a nice medium-rare, pink inside.

5. Don’t forget to use your thermometer because it will help you identify whether the steak is already cooked in your preference or the otherwise. Here’s a quick guide:

  • Rare – 125 to 135 F
  • Medium Rare – 135 – 145 F
  • Medium – 145 to 150 F
  • Well-Done – 150 to 160 F

6. To give your meat beautiful grill marks, simply lift them up and turn them 45 degrees sideways. That should give them charred marks for gorgeous plating.

7. There’s no need to tent your steak. Tenting is a process wherein food items are covered with foil to reflect heat and avoid overcooking. Simply move your meat to a cooler side on your grill or transfer them to a trenched cutting board or a serving plate.

8. Don’t make your guests eat steak that has just been removed from the grill. That’s really too hot. Let your meat cool down for 10 minutes. During this time, you can cook your veggies and corn on the grill.

I hope that you find my tips really valuable. If you want to serve the most delectable barbecue dishes, only use the best barbecue grill in town. Get yours now from La Caja China!

Article Source: http://EzineArticles.com/?expert=Diane_Louise_Villanueva
http://EzineArticles.com/?Tips-For-Cooking-Ribeye-Roast-On-The-Grill&id=8722763


March 1, 2015 Butcher's Guide

Cuisinart Electric Knife What You Need To Know Before you Buy

electric knife.Still002You can spend a lot of money on grilling and BBQ gear especially if you’re getting into competitions… so before you buy here’s a few things you need to know before you buy an electric knife...

Black & Decker EK700 9-Inch Electric Carving Knife, White
Cuisinart CEK-40 Electric Knife

Hamilton Beach 74250 Carve ‘n Set Electric Knife with Case, White

Rapala Rechargeable Cordless Electric Fillet Knife

Some are less than twenty bucks so think about the following…

  1. Cord length… it’s usually our first annoyance – look for a knife that wont force you to purchase an extender.
  2. Blade length -7 & half inches may not “cut it” when it comes to large turkey… compare the length of the blade – not necessarily the length of the handle.
  3. Can you remove the blades? That means is it easy to clean? Can you find Replacement blades ?
  4. Finally – how is the Grip? – Hard to tell online but think about a slick finish…. remember hand could be greasy – and you really want it to be able to lock into the on position?

Top sellers:

Black& Decker EK7009 inch

Hamilton beach

Rival 1250

And Rapala makes a battery rechargeable version for about $100 –

Some competitive cooks that slice through a lot of brisket go cheap and consider them almost as a disposable item replacing often. We’ll put links to a few of the most popular in the notes here and for tips tricks and reviews find what you love at barbecuetricks.com.>See The Electric Knife Video Here


https://barbecuetricks.com/wp-content/uploads/2015/03/electric-knife_1.mp4

February 1, 2015 Butcher's Guide

Guide to Beef Cuts

A Guide to Beef Cuts for Homemakers

beef cuts

Photo:flickr.com/photos/eprater

By Anne Del Rio

What do you look for in meat especially beef? One is freshness. The other is tenderness. Many consumers go to the supermarket, buy the beef and bring it home in a plastic pack. In most cases, you cook the beef without even knowing what part of the cow it came from. Yet, it is advisable that you know the primary beef cuts. This helps in preparing meals and learning cooking techniques for meat.

For a start, prime cuts especially for steaks are more expensive than less desired parts. A smart cook should also know the techniques in making beef more tender and sumptuous. Nonetheless, some mouth-watering flavors also come from inexpensive cuts such as the flank steak. Simply learn the technique in making the meat soft. Some of the most popular beef varieties are the tenderloin, rib, chuck, shank, sirloin, loin, brisket, and round.

Filet mignon or the small and soft boneless steak comes from the tenderloin. While the name sounds French, this beef cut is a favorite of many nationalities. It is said to be the most sumptuous part with authentic silky-smooth consistency as well as less fat content. Sirloin comes from the cow’s rear beyond the loin. It may not be as tender as the loin but it is still well-liked by beef lovers. You can grill, pan-fry, or broil this meat cut.

Ribs are less inexpensive than the sirloin. However, fat content is higher. Strips of fact can be found in this lean meat. Skip the sauce because of the delicious flavor. Simply put some salt and pepper while cooking. Rib eye steaks are normally cut to one inch and 1/2 up to two inches. In fact, the rib consists of some of the finest cuts like prime, short and rib eye roasts. Cooking should be done longer over dry heat. It is perfect for smoking and grilling.

Shank is located at the front part of the brisket or breast. This particular beef cut has a lot of collagen. It is used in various recipes that require gravy sauce. Shank is normally sold as one whole along with the entire bone. However, it can also be cooked as ground beef. It is perfect for moist cooking. Make sure that the bone is still attached. At times, the shank is seen in a cross cut with the meat attached to it. The fibrous protein is emitted during the cooking process. Shank is usually used in preparing broth and soup.

If you are looking for meat wholesalers in Perth, call the top butchers in Western Australia, McLoughlin Butchers Western Australia, by clicking on this link: www.mcloughlinbutchers.com.au.

Article Source: http://EzineArticles.com/?expert=Anne_Del_Rio
http://EzineArticles.com/?A-Guide-to-Beef-Cuts-for-Homemakers&id=8815261


September 11, 2013 Butcher's Guide

Knives: Types, Safety, and Care

Knives: Types, Safety, and Care

Cutting BoardBy Jodi L Level

We all know it’s hard to buy knives; there are so many different lengths, materials, handles, and sets. What do I choose! Well here is a list of the different types of knives and their uses to choose from.

Paring Knife – It’s used for many small multipurpose jobs such as topping and tailing vegetables, removing skins from onions and preparing small fruits.

Turning Knife – This one has a very small curved blade used to turn vegetables for presentation.

Filleting Knife – It has a medium length blade that is thin and flexible so it can bend while cutting along the bone of fish.

Boning Knife – This one has a short to medium blade, that’s strong and has ridges, and is used to cut away the meat from the bone.

General Chef’s Knife – It has many different uses such as slicing, dicing, shredding, and chopping. It is used on fruits, vegetables, meat, and poultry.

Palette Knife – Blunt but flexible it’s used to flip things over while they’re cooking, pick things up from the pan and transfer them to the plate, and spreading butter or cream on things.

Carving Knife – It’s long and a thin blade should be sharp, and is used to cut meat.

Serrated Knife – Designed to cut certain things such as bread or vegetables with firm skins; it assists in the sawing motion that is used to cut these items.

Safety first!

Now that you know about all the different types of knives, you need to know how to be safe with them, right?! Here are some basic safety tips for using your knives:

  • Always place a knife on the bench to give to another person, rather that pass it by hand to the person.
  • Never hold knives in the air or hold them with fingers overlapping the cutting zone.
  • Don’t use the knife as a screwdriver or can opener.
  • Don’t wave a knife around, point with it or turn around with it in your hand. Place on the bench and then turn to talk to others.
  • Never transport food on the blade of a knife.
  • Never leave knives in sinks or under items. Blades are hazards when not in a visual range.
  • Always keep the knives separate and individually contained, wrapped or held with the point of the knives secured, this includes in your toolbox or even in the picnic basket. Never hide knives under anything.

Keeping your knives the sharpest

Last but not least, making sure you have sharp knives is very important. If they are dull, you have to apply more pressure to slice through things, which creates a higher risk of the knife slipping, and cutting you.

Storage – Don’t put your knives in a loose draw with other knives or utensils, because they rub against everything else, damaging the blade.

The best way to store them is to put them in a knife roll, or a wood block, which has individual compartments for each knife, making sure they don’t touch each other. But if you’re using a wood block, make sure the knives don’t rub against the wood sides when you’re taking them out, or putting them in. Another way to store them is on the wall, with a magnetic strip.

Cutting Boards – Never cut things on extremely hard surfaces such as glass, ceramic plates, and granite counters, as they can dull your knives. Instead, use bamboo and wood boards, because these are much softer materials.

Dishwasher – Don’t wash your knives in the dishwasher, because it can also dull the blade. Instead wash them by hand in the sink, and place in a plastic drying rack, not touching one another. If you do wash them in the dishwasher, make sure the knife is in a plastic silverware divider.

NEVER use your knives for opening cans, unscrewing rivets, or opening packages, as all these will damage the blade.

http://www.cookwareneeds.com is the place to go to find the knives you need and any cookware you might want. Make sure to check out the website each month for a new special offer.

Article Source: http://EzineArticles.com/?expert=Jodi_L_Level
http://EzineArticles.com/?Knives:-Types,-Safety,-and-Care&id=7891510


April 14, 2012 Butcher's Guide

Here’s The Beef 101

Beef 101Where’s the beef?  Here’s the beef!  A new info graphic guide to what 25 percent of American’s eat daily.  Stats… nutritional info… cuts… take a look and soak it up!  More in our Butcher’s Guide.

Beef Infographic

Source: FrugalDad

Beef 101

December 4, 2011 Butcher's Guide

Grinding Meat at Home – Burger Tricks and Tips

burger pattyHow To Make Burger With A Grinder

By Matt LeClair

Thinking about making your own beef, venison, pork, turkey, or chicken burger? One way that you can do it is with a meat grinder. The process of making your own burger with a grinder is actually pretty simple. Here are the steps:

Prepare The Meat

The first step involved in the process of making burger with a grinder is preparing the meat. In most cases you’ll start out with a large chunk of whatever type of meat it is that you are grinding. You need to cut this large piece of meat into small 1 inch by 1inch cubes. If you prefer, you can make the cubes a bit larger to save time since this step can be quite time consuming.

Large pieces of meat have to be cut into smaller chunks so that they can be fed through the grinder without causing it to back up. Not only does doing so help keep your grinder running smoothly, but it also helps speed up the process by not causing you to stop intermittently.

The Grinding Process

Once you have the meat the you would like to turn into burger prepared, the next step of the process involves feeding it through the grinder. For this step you can use an actual meat grinder or you can use a KitchenAid with a meat grinder attachment. While the KitchenAid won’t work as well as an actual grinder, it will still help you get the job done.

The grinder is equipped with a top loading tray where you will place the meat that you intend to run through the grinder. When ready, load a handful of meat chunks onto this loading tray, turn the grinder on a low to medium speed, and then begin feeding the meat into the grinder with the feeding tool. A few things to keep in mind before you being this process: make sure you have a bowl or some sort of container to catch the meat as it comes out of the grinder, and be sure that you have the right blade attachment for making burger. There are a number of different blade attachments that can be used to grind, mince, and slice meat as it is fed through, so you want to make sure you’ve got the right one for making burger.

Press the meat down into the feeding tube until all of the meat has been fed through the grinder. Continue on by grabbing another handful of meat and placing it in the loading tray. Repeat the process of loading and feeding meat through the grinder until all of the meat has been processed.

Packing and Storing The Burger

The final step in the process of making burger with a grinder involves packing and storing the burger once it has been through the grinding process. One of the best things you can do to extend the shelf life of your burger is pack and seal it using a vacuum sealer. Doing so will remove air from the packaging and keep the burger in an air-tight environment where it is protected from freezer burn and harmful bacteria.

Thinking about getting yourself a meat grinder? Learn about popular meat grinders at http://infomedley.com/meat-grinder/.

Article Source: http://EzineArticles.com/?expert=Matt_LeClair
http://EzineArticles.com/?How-To-Make-Burger-With-A-Grinder&id=6728758


September 4, 2010 Butcher's Guide

Cutting Board 101

Cutting BoardHow to Select the Perfect Cutting Board

By Tim T Russell

A kitchen would just not be a kitchen without a cutting board. In fact, the cutting board has become a main tool of our kitchens as it provides us a safe place for food preparation and cutting. In today’s kitchens you will find all kinds of cutting boards varying in size, shape and material. It’s up to you to decide which of them would be the best choice for your kitchen.

In the beginning most all cutting boards were made from hardwoods, like the butchers block would see in your local market. But in today’s kitchens cuttings boards are made of many different materials each one having their own advantages and disadvantages.

Wood has always been the overall best choice for your cutting boards. Wooden boards are made a couple of ways, end grain boards are thicker heavy duty boards made for heavy chopping and edge grain boards are thinner and lighter for everyday use. Wooden boards also come in many different patterns and wood spices, Maple, Black Walnut, Black Cherry, Sapele and the list goes on. The different patterns and wood spices are a personal and décor choice for you to choose, what looks best in your kitchen. But if you are the professional chef that uses your board every day under heavy use an end grain maple board will be your best choice. Also any end grain board will be easier on your knifes edges. Some disadvantages of wooden boards, they do require hand cleaning and sanitizing “no dishwashers” then treating with cutting board oil. If cared for properly they will last a very long time. The bottom line is wood is safe, simple and looks great.

Plastic cutting boards are generally the most affordable and you can find them in a large variety of different designs, sizes and colors. The plastic boards also come thick or thin, hard or flexible. The flexible ones are great for transferring food into pots and containers and they are also easy to store. The downside to the flexible ones is the fact that they will not last as long as the thicker boards. This is because sharp knives will eventually cut through the thin material. The hard thicker plastic boards are very durable. Plastic boards are thought of as being the safest board to use as they are easy to sanitize and clean. But just because they are plastic doesn’t mean you don’t have to sanitize, these boards can harbor bacteria in the cuts on the board therefore needing to be sanitized.  Plastic boards do have the capabilities of being put into a dishwasher as long as they fit.

Glass boards are another popular type of board that can be found in many kitchens. These glass boards come in a variety of shapes and colors in order to suit your kitchens décor.  They are also resistant to heat, very durable, easy to clean and they are very sanitary. However glass boards will dull the edges of your knifes very quickly and can even damage them. These boards also pose a danger as they can become very slippery during use creating a cutting hazard to you. They are also very heavy and more expensive than wooden cutting boards.

Bamboo is also a well known cutting board that is actually grass. They have become popular in kitchens today because of their inexpensive cost. The best feature of these boards is that they take it easy on the edges of your knife but they do scar, but you can sand them down in order to create a smooth surface. You will find that they can easily catch bacteria growth in the cuts, so you need to make sure you sanitize them each time you use them. One big disadvantage the vast majority of these boards come from China and there has been a lot of controversy over the resin holding these boards together is it safe or not?

It is recommended to have two or more cutting boards of any type to avoid cross-contamination. This means that you will have one for your meats and the others for your fruits, vegetables and breads. This will also make you more productive; since you want have to wash the cutting board thoroughly between items. If you’re having a hard time deciding  on your cutting board choice just remember to select the largest size that will fit in your work area, but it should also fit into your sink for easy cleaning. Color, design and how will I use the board should also be part of your decision. You can never go wrong with a well made wood cutting board.

Article Source: http://EzineArticles.com/?expert=Tim_T_Russell
http://EzineArticles.com/?How-to-Select-the-Perfect-Cutting-Board&id=4957679

  • Go to page 1
  • Go to page 2
  • Go to Next Page »

Primary Sidebar

Welcome To BBQTricks!

Hey Y'all... Thanks for stopping by. I'm Bill West. I blog about BBQ and occasionally country music. When it comes to BBQ I try to find solid time saving tips and tricks to make the grilling life a bit easier. It's life hacking for the backyard cooker. Read More…

Your Gateway to Barbecue Information

This site is a member of The Smoke Ring BBQ Webring A linked list of BBQ websites

Next BBQ Site - Next 5 BBQ Sites - Prev BBQ Site - Random BBQ Site

Join the BBQ ring or browse a complete list of The Smoke Ring BBQ Webring member's BBQ sites

If you discover problems with any of The Smoke Ring BBQ Webring sites, please notify the Ringmaster

fb

Footer

DISCLOSURE:

Posts on this site may contain affiliate links. If you purchase something via one of these links you won’t pay more but the site operator gets a small commission. Or as I like to call it: “beer money.”

Copyright © 2023 — Barbecue Tricks • All rights reserved.