• Skip to primary navigation
  • Skip to main content
  • Skip to primary sidebar
  • Skip to footer
  • Big Book of BBQ Tricks
  • Resources
  • Free E-CookBook / Newsletter
  • Smoking Meat 101 Book
  • BBQ Blueprint Book
  • Electric Smoker Cookbook
  • Wood Pellet Grill Smoker Book
  • Temperature Guide
    • Seafood
    • Pork
    • Poltry
    • Beef
  • About Me
  • Shop
  • Sitemap

Barbecue Tricks

BBQ Tips and Tricks

Tricks

July 9, 2011 Featured

BBQ Sauce Canning Tip

canned barbecue sauce

Photo: Flickr/davef3138

The Canning How-To on Barbeque Sauce

By Todd Mohr

These canning how-to tips came out of necessity. You see, I’ve been making my own barbeque sauce since I was a kid, but it caused conflict in my household.

I loved using the sauce as a grilling marinade so I’d make gallons of my “New York Attitude” Barbeque Sauce and portion it into used plastic Wonton Soup containers. The shear number of containers would fill my Mom’s refrigerator.

I had to find a better way to preserve my sauce without taking up the whole fridge. “People have been preserving food for generations,” I thought to myself. “They didn’t have refrigerators or Chinese take-out containers, how did they do it?”

At the time, I probably had to go to the library and look through the encyclopedias. That seems laughable now, but even as a child, I knew there was a better way waiting for me. I found it with a 125 year old device, the two-part lid canning jar.

The inventors of these jars are really the creators of every canning how to instructions from that day forth. The idea is simple. Their jars consist of a flat lid with a rubber washer to seal the jar. A band fits over the lid, securing it to the jar but also allowing air to escape.

Under boiling water, air leaves the jar between the two parts of the lid. When it’s cooled, it creates a vacuum, sealing the jar in an anaerobic environment. This not only preserves the sauce, but keeps it safe from bacterial growth as well.

Hot water canning is meant for highly acidic products like tomato sauce, marinades, and perfect for my barbeque sauce. At sea level, water boils at 212F or 100C. This is certainly hot enough to let the two piece lid do its job, and the acid content of the sauce will keep it safe.

The Precise Canning How To Steps:

  1. Inspect all jars, lids, and bands for defects.
  2. Wash all jars, lids, bands, and any other equipment that will come in contact with the sauce.
  3. Place a round cake cooling rack in the bottom of a very large stock pot and fill with water.
  4. Bring the water to a full, rolling boil.
  5. Place the empty jars in the boiling water to sanitize them.
  6. In a small saucepan or bowl, remove some boiling water and place the flat lids in the hot water.
  7. Prepare your barbeque sauce and keep it very hot.
  8. Remove the jars from the water bath, one at a time, and fill with barbeque sauce
  9. Be sure to leave 1-2 inches of “head room” between the sauce and the lid.
  10. Wipe the rim clean of any spilled sauce
  11. Stir the jarred sauce with a wooden stick to drive out excess air
  12. Remove the flat lid from the warm water and place it on top of the jar.
  13. Secure the lid with a band and hand-tighten only.
  14. Place the filled jar, standing up, into the boiling water canner.
  15. Wait 15 minutes and remove the jar to cool.

(Add 5 minutes for every 3000 feet above sea level)

As the barbeque sauce cools, you’ll hear the vacuum created as the jar lids are sucked toward the interior of the jar. Soft “ping”, “ping”, a symphony of suction is created and the jars are now safe for storage. Any jar lid that still yields to pressure when pressed with a finger has not sealed correctly. It should be refrigerated and not stored at room temperature.

The canning how to instructions are different for low acid products, because there’s greater risk of bacterial growth. Items like vegetables or protein-based soups must be canned in a high-pressure canner because the boiling water bath does not get hot enough to assure the safety of the food.

As a child, I simply wanted to preserve refrigerator space. What I discovered is a process that’s been around for more than a century. Home canning saves money, preserves fresh ingredients, and is a fun and easy hobby when you know the canning how to steps.

See the entire Canning How To video here.

Chef Todd Mohr’s passion for cooking with fresh ingredients has improved the health and well being of thousands all over the world. His FREE video seminar, How To Cook Fresh, reveals the top 3 mistakes everyone makes when choosing fresh ingredients.

Article Source: http://EzineArticles.com/?expert=Todd_Mohr

http://EzineArticles.com/?The-Canning-How-To-on-Barbeque-Sauce&id=6408039


June 11, 2011 Cook

Control Your BBQ Zone

bbq grill knobControlling Temperature Zones in Your Outdoor Gas Grill
By Marsha Hinde

Today, the best outdoor gas grills have a cover or lid. You can leave the cover up while grilling or you can leave the cover down. When the cover is down, you turned your outdoor gas grill into an outdoor oven – you’re using indirect heat to cook your food in a 360 degree grid pattern. The only difference is that your indoor oven does a much better job of maintaining even heat than your outdoor grill. So how do you gain control over the temperature in your gas grill?

Creating delicious foods on your grill, even if it’s only hot dogs, requires precise temperature control because the compounds in the food react differently at different temperatures. “For example, meats are composed of protein, water, fat, collagen, and some sugars, and each component changes drastically at different temperatures. Fats render at one temp, water evaporates at another, collagens melt at another, sugar caramelizes at another, the Maillard reaction (a.k.a. browning of proteins) occurs at another, and carbonization (a.k.a. charring or burning) occurs at yet another temp.” ( Meathead Goldwyn)

With today’s modern gas grills with multiple burners, it is much easier to set up temperature zones for cooking your food perfectly. High end grills, such as the SUN 5 Burner Infrared Gas Grill, have gone a step further to help the grill master achieve perfect temperature control. They have incorporate Gourmet Heat Separators between the individual Flavor Zones, enabling you to shield the heat produced by one burner from the remainder of the grill. Thus, you can have the left hand side of your grill cranked up all the way, producing excellent direct (or radiant) heat while you have no burners lit on the right hand side, producing indirect (or convection) heat. (See the directions at the end of this article on setting up your grill depending on the number of burners it has.)

This set up provides an excellent way of running a sear grill on one side and a finish grill on the other. The most common mistake made in grilling food is to cook meat over direct heat until it is considered done. This produces a charred, tough piece of meat. All the juices have dried up from the direct heat. That’s what direct heat does. When using an internal grill thermometer (not the one built into your grill) the indirect heat side should produce a temperature between 200 and 225 degrees. This will slowly finish your meat without drying out the flavorful juices we all look forward to,

To avoid the catastrophe or ruined meat, sear both sides of your meat on the direct heat side of the grill and then move it to the finish side of the grill – where the indirect, convection heat will cook it to perfection, retaining those juices that run down your chin as you eat that perfect steak – one that you can now produce over and over again.

For the best chicken you ever ate, do the opposite. Cook the chicken over indirect heat until it’s almost done. Then transfer it to the direct heat and watch as the fat under the skin renders into the chicken and the skin crisps up to golden perfection. You’ll have your family begging for more!

All beef and pork roasts should be cooked over indirect heat to prevent loss of moisture and flavor. It you like the outside crisp, place the roast over direct heat for the last 10-15 minutes. You’ll have a roast that will have everyone begging for more.

And fish – fish should always be cooked only over the indirect heat since it has less fat than other meats. Cooking over indirect heat will retain its delicate taste and moisture. Just don’t forget to baste it once or twice during cooking.

The two zone method of grilling is an excellent way of grilling multiple foods at the same time. Start your steaks over the direct heat and your vegetables and fruit over the indirect heat. Most vegetables and fruit contain a high quantity of natural sugars and will burn or char when placed over direct heat. Indirect heat will grill them to perfection. Most fruits and vegetables will also benefit from a light basting or two during the grilling process.

As you get ready to move your meat to the indirect heat side, place your fruits and vegetables on the warming rack to finish cooking. And voila! When the meat is done, everything else is ready too! No more eating your barbeque meals in stages as the food is ready. You can now enjoy it all at once – just like a five star dining room.

Grill Set Ups for Direct and Indirect Heating (indirect heating on the right).

(2) Two Burner Grills: Left Grill on High; Right Grill Off

(3) Three Burner Grills: Left Grill High; Middle Grill Medium; Right Grill Off

(4) Four Burner Grills: From Left to Right – High, Medium, Off, Off

(5) Five Burner Grills: From Left to Right – High, Medium, Low, Off, Off

Practice the art of indirect heat next time you grill. It’s a technique well worth learning. Remember, practice makes perfect. Happy Grilling…

Marsha Hinde

President of Great Joys Enterprises, LLC in Tampa, FL http://www.TheBestOutdoorGrills.com http://www.PerfectOutdoorGrilling.com

Marsha Hinde is a business owner, teacher and designer. She has taught “How to Conquer Your Barbeque” and specializes in creative and unique outdoor entertainment. She designs Custom Outdoor Kitchens and sells the components needed to create the barbeque island of your dreams.

Marsha owns The Best Outdoor Grills.com which provides the finest gas grills available on the market today. With a Lifetime Warranty and a 100% Customer Satisfaction Guarantee we provide great value for our customers. Add to that free shipping and you know you are dealing with a No Risk vendor.

Be sure to visit her site to subscribe to her newsletter and recipes. Get new recipes and entertaining ideas weekly.

Article Source: [http://EzineArticles.com/?Controlling-Temperature-Zones-in-Your-Outdoor-Gas-Grill&id=6306185] Controlling Temperature Zones in Your Outdoor Gas Grill

May 8, 2011 Featured

The Best 10 Tips for Smoking Meat and Using BBQ Smokers

smoked meat

Smoke Is Good

By Luther Caddell

In the near future the seasons will change and spring & summer will be here once more. Accordingly, the chance for relaxing outdoors and igniting the grill is just around the corner. You, as a your family’s skilled grill expert, are expected to cook up some mouth-watering, delicious grub. Relax, we are on-the-spot to lend a helping hand. Thus, the most helpful ten pieces of advice for smoking food and grilling with BBQ smoker grills. this advice is certain to have your meals worshiped by all.

Plenty guess that smoking food can be an awfully arduous and daunting affair. Smoking food is something that everyone can pull off. But few have the perseverance for. firstly, you need the right equipment. You have your pick of a wood smoker, charcoal, electric or gas smoker A modest upright smoker may be priced at less than fifty dollars online. However you Will not be capable of using it for much food.

Finally for the ten tips:

1. When you originally shop for your portions, go over with the butcher how long to smoke and grill and also what kinds of wood they suggest. They ARE the meat professionals and can give you helpful guidance.

2. You have got to carefully pick the flavor of wood you will grill with. There are available a few great cooking chips. Apple, Alder, Cherry, Hickory, Maple, Oak and Pecan and even more. An individual Wood chip contains its peculiar unique taste, thus select intelligently as which wood would compliment the meat the greatest.

3. As you are setting up the barbecue smoker grill you will need to build your fire pile on one side and position the food on the other side as far as you can do from the embers. Try to remember smoking your food is all about cooking the meal at a very,very slow pace. Consequently causing the great flavor to go completely within the food.

4. When you are using coal, it sometimes takes forty five minutes to burn down before you can rest your food in the grill. Thirty minutes for a self lighting charcoal. You should always use brand-new coal.

5. Leave all the fat on the food as you are smoking and grilling meat. It will up the great flavor to the food and this fat melt off into the pit or grill.

6. Keep the heat low in your smoker. This will usually serve to keep the portions tasty.

7. There should not be any flames as you are smoking your meat. If it flares up, take off the food and increase the rack distance above the flames. Or, spray down the flames using water.

8. As you smoke make sure to get a sear on the meat. Don’t flip it over till the surface is a crisp dark brown or almost black.

9. Before serving briskets, roast turkeys or chickens, allow the meat to sit and rest for 5 minutes before serving. Serve steaks and pork chops right after cooking.

10. Don’t leave your meat to remain in the smoker when it is done or it will dry out.

OK finally,, always remember to cook more than you intend to eating for one meal. Due to your great cooking, all are certain to return for more than two servings. And so, put your smoker grills, BBQ smokers and electric smokers to full use. Undoubtedly, everybody loves smoked and grilled meat.

in order to discover the smoker grill BBQ chefs are raving about check out these popular [http://bestbbqsmokergrills.com]BBQ smokers.

Article Source:  The Best 10 Tips for Smoking Meat and Using BBQ Smokers

April 24, 2011 Featured

Three Tips For Tenderizing

Three quick tricks for London Broil and tenderizing beef. Step through the process of preparing this easy and fantastic grilled feast.

London Broil Can be a tough cut of beef.  Here are three simple tricks to maximize tenderness in the beef for your next barbecue with friends.  It always starts with a nice clean looking London Broil.  This method and recipe below also works great with a flank steak or skirt steak for Fajitas.

Tip/Trick 1 – Whack It

First use that hammer thingy you’ve seen around kitchens for years.  The good old fashioned way to beat the raw beef into “submission.”   You’re almost pre-chewing it… but in the end your BBQ will still look pristine.   The thicker the cut the more you can

London Broil

hammer it.  Another trick  I show in the video is to wrap the slab in plastic to avoid shirt staining splattering.

Tip/Trick 2 Marinate

Secondly, use a nice marinade to soften the newly damaged fibers.    Some grillers may choose to use a high acid marinate to boost the tenderizing effects.

Tip/Trick 3 Go Against The Grain

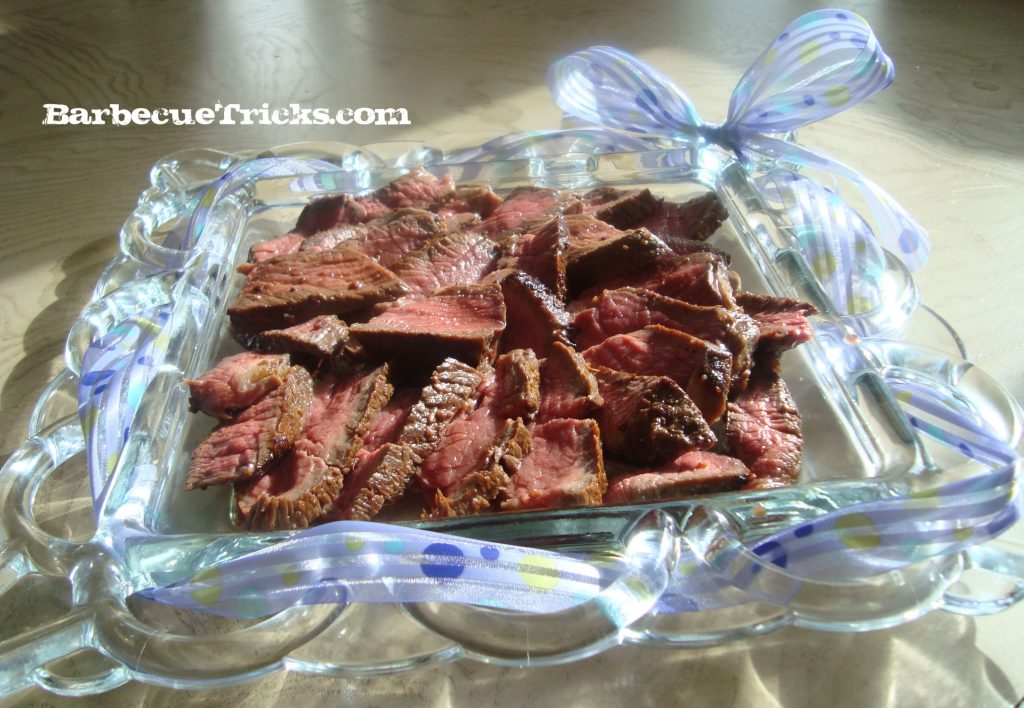
Third, let the cooked meat rests for ten minutes or so (it’s pretty important but usually people get in too much of a hurry).  Carve your London Broil AGAINST the grain of the meat fibers or perpendicular to the strands of beef in pencil thin slices.     It’s another level of  jaw grinding your guests don’t have to deal with and the presentation is awesome.
The Not So Secret marinade here relies on a dose of smoke but it’s super easy.

March 27, 2011 Featured

Grilled BBQ Ribs A Trick For Texture

Ribs

BBQ Grilled Ribs

Can You Really Grill Pork Ribs?  By Paul Yates

I’ve been a BBQ enthusiast for many years now and in the early years it was really only about grilling. You see coming from Europe most of my influences were for what Americans call grilling, the idea of hot smoking really isn’t part of European culture. That’s now starting to change and I hope that I can do my bit to support that change.

Some of that clearly is to do with the weather. The closest culture to America has to be England and frankly there isn’t a place on Earth that can be more damp and dreary when it wants to be. Not the sort of weather that promotes outdoor cooking as a hobby.

In my formative years most of my grilling was done in mainland Europe (much, much warmer and drier than Blighty) I’d grill anything and everything that the butcher had to offer. I often think about the different countries of Europe and the different things they sell. For example, go into a butcher in Germany and ask for lamb and he’ll look at you blankly and say no……don’t plan a holiday in Germany unless you like beef, pork, pork and more pork!

Having said that Pork is in abundance, it’s still difficult to get hold of ribs. If the Germans don’t buy them, who does? Maybe they’re all shipped to the States where they know how to cook them?

When I did eventually get to grill ribs it was as individual ribs rather than a side – big mistake. The ribs were dry, not my best effort. So can you really grill ribs and get a decent result or am I flogging a dead horse?

I think the answer is yes you can but with one caveat:-

You have to appreciate grilled ribs for what they are and not make a direct comparison with smoked ribs. Grilling is one technique, smoking is another they should exist side by side and not compete with each other.

Flavor-wise, a lot is down to the sauce or the rub, the difference is more about the texture. A grilled rib will have a much firmer texture to it as opposed to the tender fall of the bone results that you get out of the “low and slow” BBQ smoker. Grilling is a direct heat cooking process and this heat will cause muscular tissue to contract hence making for firmer results.

That said it’s important to give a grilled rib every opportunity to tenderize so to make good grilled ribs I believe that the best way is to break the process down into 3 parts.

  1. Marinade the ribs. By definition a marinade is a liquid that contains an acid and it’s this acid that helps to tenderize the meat.
  2. Pop them in a pan of boiling water for 15 minutes. This cooks the ribs and you can also add flavors to the water.
  3. Grill for ten minutes. Your not really cooking the ribs here, just mobilizing any fats to add some smoky flavor and get a bit of external caramelization.

When done, add the homemade barbecue sauce of your choice and enjoy grilled barbecue ribs.

Paul Yates writes gas grill recipes and reviews meat smokers.

Article Source: http://EzineArticles.com/?expert=Paul_Yates
http://EzineArticles.com/?Can-You-Really-Grill-Pork-Ribs?&id=6032075

March 6, 2011 Featured

Grilling Fresh Vegetables

As the weather starts to think about getting warmer in the South (at least we can hope), we begin to plan our outdoor meals. One of my favorite things is grilled fresh vegetables, but as a friend once told me, it isn’t necessary a given that they will turn out good.

So, let’s talk about perfect grilled veggies. Of course, some of that is subjective, but I believe charred on the outside yet tender on the inside sure beats overcooked and mushy, or undercooked and too crunchy. If you cook them about 1o minutes on a hot grill, they will likely come out burned on the outside and raw on the inside, but if you cook them just 10 minutes on a medium fire they won’t cook long enough. What are the BarbecueTricks.com secrets? As with anything, good food takes time – low and slow is best. All veggies are not created equal – they don’t cook at the same rate, as a general rule, cook them over a MEDIUM fire for about 16-20 minutes.

The seasoning is also very important – bland is not good no matter how it’s cooked! Try using different oil-based dressings, such as Italian dressing, to marinate your veggies at least an hour before grilling. Just before skewering or loading into a grill basket (shown), sprinkle lightly with salt, pepper and garlic (and cayenne if you’re like me). If you do not use an oil-based dressing, try a sprinkle of Greek or Cajun seasoning and toss in a little olive oil before cooking. After cooking, sprinkle a little more dressing over all to coat and serve immediately.

So, if you follow these simple guidelines below, and have properly seasoned your favorites, you will be rewarded with pride-of-the-neighborhood grilled vegetables!

Zucchini, Onion & Yellow Squash – Grill over medium heat 18 – 22 minutes. Turn as needed for even cooking.

Mushrooms, Eggplant, Bell Peppers – Grill over medium heat 16 – 18 minutes, turning once.

ENJOY!

January 30, 2011 Recipes

Tortillia Chips Made Easy

nacho chipsTortillia chips can be easy to make at home.  The recipe is as easy as three ingredients. Click through the video for the easy step by step.

The best things about these home made chips is the buttery taste and the sturdy firmness of the chip.  In fact, you’ll have a hard time finding a chip that can stand up to guacamole and spicy bean dip any better than these.

Add some salt right after frying and serve ’em hot.

Tortillia Chips
Fresh corn tortillias
Vegetable oil
Salt

January 23, 2011 Cook

Rib Membrane Removal Tip

Video thumbnail. Click to play
Click to Play
How to quickly and easily remove the slippery membrane from a rack of ribs. ; Barbeque fanslike to remove the silver skin for better seasoning penetration.
Tags: bbq, barbecue, barbeque, ribs, billwestbs, membrane, cooking, grilling

January 17, 2011 Tricks

BBQ Trick Using Sugarcane Chopper As Tool

Using a sugarcane machete for a great barbecue tool trick. The knife is available from http://bbq.backstage.gq
Tags: tips, tricks, grill tools, bbq, barbecue, barbeque, burn barrel, competitions

January 5, 2011 Cook

Tricks for How To BBQ A Whole Chicken On A Rotisserie

rotisserie chickenAuthor: Larsen Markston

Rotisserie chicken from the grocery shop is becoming a delicious last minute meal. It really is delicious, but if you discover how to BBQ a whole chicken on your own rotisserie you will understand how significantly greater it tastes with not significantly additional work than the trip to the grocery. You are going to have to have a grill which has a rotisserie, a whole chicken, butter or olive oil with seasonings, and about 1-1/2 hours of cook time to get a yummy home-cooked chicken.

The initial action is setting up your rotisserie on your grill. You can find rotisseries made for both gas and charcoal grills. Follow your manufacturer’s directions and make guaranteed that it rotates freely and is ready to go. Locate a drip pan with about 1/2 inch of water within the grill to catch excess fat drippings and prevent flare ups and to add moisture to the roasting chicken. Fire up the grill to high and let it to heat up while you prepare the chicken.

Rinse the chicken inside and out with cold water. Get rid of the giblets and excess fat, I prepare those up separately for my kitties to be a special treat. Pat the chicken dry inside and out using a paper towel. It is possible to rub butter and salt inside the cavity or include some garlic or onion if you like for additional flavor. You are likely must truss the chicken if your rotisserie is a spit with out a basket. To truss the chicken you need to tie the legs and wings to each other so they will not flop around in the course of cooking possibly getting burned or throwing the spit off center. The least complicated solution to do this really is with heat-proof butchers twine or non-coated wire.

After the bird is trussed it’s set being spitted on the rotisserie. Slide the spit through the entire body in the chicken and make certain the pronged pieces at either end of the spit are secured to the chicken. These are to enable the chicken to turn using the spit so the chicken cooks evenly on all sides. Place the spit on the grill according to the manufacturer’s directions and you’re prepared to go. Turn off the burner or move away the charcoal directly beneath the chicken so the high temperature is less direct.

Baste the chicken every 20 minutes to 1/2 hour with butter or olive oil mixed with whatever seasonings you like. You would like to let the chicken cook on it’s very own for your most part. Leave it alone and don’t lift the lid of the grill any more than you must letting the heat out. In the event you like to use a glaze being a finishing touch, apply it during the very last 10 to 20 mins of cooking.

The full preparation sounds far more complicated than it really is. After you find out how to BBQ a whole chicken, the set up time is really a snap. The cooking time will depend on the size of the chicken and the heat of the grill. When the chicken is on the rotisserie and cooking, it needs minimal attention and enables the cook to tend to the rest of the meal, the guests, or just set your feet up for any bit and enjoy the cooking smells.

Article Source: http://www.articlesbase.com/cooking-tips-articles/tricks-for-how-to-bbq-a-whole-chicken-on-a-rotisserie-2912331.html

About the Author

I don’t cook in BBQ competitions, but sure do enjoy grilling for my family and trying out new recipes. For more ideas and recipes for Competition BBQ recipes visit BARBECUECOOKBOOK.INFO

  • « Go to Previous Page
  • Page 1
  • Interim pages omitted …
  • Page 5
  • Page 6
  • Page 7
  • Page 8
  • Page 9
  • Page 10
  • Go to Next Page »

Primary Sidebar

Welcome To BBQTricks!

Hey Y'all... Thanks for stopping by. I'm Bill West. I blog about BBQ and occasionally country music. When it comes to BBQ I try to find solid time saving tips and tricks to make the grilling life a bit easier. It's life hacking for the backyard cooker. Read More…

Your Gateway to Barbecue Information

This site is a member of The Smoke Ring BBQ Webring A linked list of BBQ websites

Next BBQ Site - Next 5 BBQ Sites - Prev BBQ Site - Random BBQ Site

Join the BBQ ring or browse a complete list of The Smoke Ring BBQ Webring member's BBQ sites

If you discover problems with any of The Smoke Ring BBQ Webring sites, please notify the Ringmaster

fb

Footer

DISCLOSURE:

Posts on this site may contain affiliate links. If you purchase something via one of these links you won’t pay more but the site operator gets a small commission. Or as I like to call it: “beer money.”

Copyright © 2025 — Barbecue Tricks • All rights reserved.