• Skip to primary navigation
  • Skip to main content
  • Skip to primary sidebar
  • Skip to footer
  • Big Book of BBQ Tricks
  • Resources
  • Free E-CookBook / Newsletter
  • Smoking Meat 101 Book
  • BBQ Blueprint Book
  • Electric Smoker Cookbook
  • Wood Pellet Grill Smoker Book
  • Temperature Guide
    • Seafood
    • Pork
    • Poltry
    • Beef
  • About Me
  • Shop
  • Sitemap

Barbecue Tricks

BBQ Tips and Tricks

Tricks

December 4, 2010 Cook

Grill Marks Made Easy

Chicken On The Grill

BBQ Chicken

Ever wonder why steaks look so much better on TV?

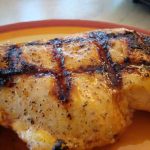
For some reason that diamond shaped stamp of caramelization equals the true sign of a perfect steak.

Any BBQ cook should know the secret to professional presentation GRILL MARKS. Gotta have ’em. It’s mainly a matter of paying attention from the start.

  1. First, crank up the heat like you would on direct heat grilling. Heat Helps.
  2. Immediately clean the grill grates and oil with a wet (with oil) napkin.
  3. Place the meat on the grill in the same direction so you’ll mark them the same. Once you set it down — LEAVE IT ALONE – until:
  4. After one fourth the cooking time simply rotate the piece either 45 degrees (for diamond) or 90 (for squares).
  5. At the halfway point… flip and repeat from step three.
  6. One side typically looks better than the other. Put that side up.
November 17, 2010 Featured

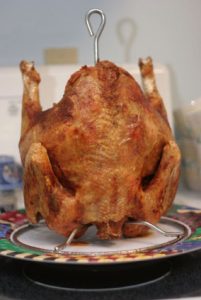
Turkey Fryer Tricks

turkey fried

Fried Turkey

Tips And Tricks For The Turkey Fryer
By Chet Hastings

There is always a learning curve with any new appliance or gadget. The turkey fryer is no different. There are some simple tips that can get you started quicker and with greater confidence. One of the first questions is usually, “How do I know how much oil to put in the pot?” This is an important question because if too much oil is in the pot and heated then it will most likely overflow the pot or boil over the edge when the turkey is placed in the pot.

A good method to use to determine the exact amount of oil needed with the bird you are going to fry is to place the bird on the stand in the pot and then fill the pot with water to about 2 inches over the bird. Now remove the bird and note the water level. Make a measurement from the top of the pot to the top of the water level.

Now all that is needed is to dry the pot and the turkey. Fill the pot with oil to the same level that the water had reached without the turkey. When the oil is heated you can now safely insert the bird with confidence that the level is proper. Even though some pots have an etched or stamped mark indicating the top oil level it might always be a good idea to run your own test with the turkeys you are going to be using in order to save oil and also for added safety.

Oil can be used for times as long as 4 or 5 hours to cook additional turkeys as long as the temperature remains at the recommended 350 degrees. Be sure not to let the oil rise higher than 375 degrees or it will began to smoke and break down and become rancid. Oil is reuseable if it is properly drained, filtered and properly stored.

Keep in mind that the more the oil is used the greater the chance it can retain minute amounts of sediment which could affect the flavor of the finished bird. Experience would be the best teacher as you get more and more use from your turkey fryer. If your oil has been used a lot and you are not sure of its quality run a simple test by frying a few potato wedges in a sample of the oil. Tasting these will quickly tell you if the oil has gone rancid. You should use a funnel equipped with a filter to strain the oil when removing it from the pot and placing in back in the storage container.

Of course it goes without saying that the oil needs to be completely cooled before draining. Handling hot cooking oil is a sure path to injury or at the least a terrible mess. In a very short period of time I am sure you will become rather fond of your turkey fryer as you receive more and more compliments about your new cooking skills and you are not a slave to an oven for 4 or more hours to roast a turkey.

Find some great tips and bargains here: Stainless Steel Turkey Fryer and here:
Choosing A Turkey Fryer

Article Source: http://EzineArticles.com/?expert=Chet_Hastings
http://EzineArticles.com/?Tips-And-Tricks-For-The-Turkey-Fryer&id=5384722

November 6, 2010 Featured

BBQ Grill Cleaning Tips

fire grill

Hot Grates

Thoroughly Clean Your Barbecue Top to Bottom

By Anthony P Langston

The Grill

Existence will be much easier if the dirt is loosened before scrubbing. A fast way to do this would be to wash at the end of a cookout when the bbq is still hot, and the muck hasn’t had time to cake on yet. If you are still entertaining and don’t fancy this, or simply overlook, there are still options available. For lidded bbqs, a neat way of softening up grime is actually to place a water-soaked newspaper or equivalent inside and use a gentle heat again for 30 minutes approximately. This will essentially steam clean the whole inside, and you’ll chuckle as you lightly wipe away the grime afterwards. Obviously this is simple for gas versions, however for those who have charcoal try using a few small bits of fire wood or even other easily flammable material to obtain some warmth going, or just a few coals if you must. Keep close track of the newspaper though and ensure it does not burn or you will have more mess on your hands! Regardless of whether you steam or not, chemical cleansers will also be a great choice. Take away the grill and place on some newspaper, and spray liberally with stove solution or other spray on cleansers (like you would use in your kitchen) and leave for an hr or so.

Now it’s time to get scrubbing up. Do not use balled up pieces of foil on your nice brand new barbeque grill, instead make use of special scrubbing stones or even scrapers which you can purchase to break off difficult, brittle grime. Much softer mess can be taken off with a regular soft cloth or skillet scourers. Be cautious with enamel-coated grills, you need to loosen grime very well first and then make use of a mild pressure as possible. Lastly, give the bbq grill a good wash and leave in order to dry.

Inside

For those who have were able to steam-soften the inside of the bbq itself then things should be easier. For straightforward grilling with charcoal bbqs, scoop or tip out any coal mess, as well as clean up the final bits with some damp kitchen roll. Now wipe the areas down with a soft cloth covered in spray solution, lightly scrubbing any kind of stubborn areas. If there are places which have burned on food you cannot get rid of, you may have to spray on some stove cleaner and leave for some time but read the cleaner directions to ensure it is suitable for the surface in question (i.e. enamel, painted, steel etc). Don’t worry about the base where the hot coals sit as this is unlikely to be looking great as scuffs and burns build up here. So long as it’s clean and free from aged waste materials you will not get any nasty smells in the next cookout. Gas bbqs can be a little more tricky. Many places can be cleaned just as with the methods above, but gas outlets and lava rocks etc add extra work. Start by removing any lava rocks or ceramic coals and put all of them into a bucket of warm soapy water. If you can now thoroughly clean round the burners and flavouriser bars with ease – great. Nevertheless, you might have to remove certain parts to clean them properly, so consult your manual, and remember to not start removing any gas-ferrying parts that you’re unclear about. Put them back when you are done, and wash the actual lava rocks/coals in the bucket if needs be and wash them in freshwater. You may find these need changing after a year or so if they are accumulating grime. Finally, rinse the interior of the charcoal or gas barbecue with a hose pipe or perhaps a bucket of water until it appears nice and sparkly, and replace the lava rocks etc. Replace the grill and stand back to admire your work.

Outside

The outside of the bbq is easy. Simply clean it down with a damp cloth, adding a suitable solution – normal cleaning up liquid ought to be good, but you can get stainless steel polishing spray or other material-specific cleaners. Gas control buttons can often be removed to clean, which is essential as you do not want dirt to accumulate and trigger stiffness. Be careful with any kind of flaky paint or chipping enamel – you can always retouch these places but make sure you seek advice from either a manual or even the manufacturer first on what precisely to use. Once clean, buff the outside with a dry cloth and add any preservative films you want. Many people recommend cleaning down stainless steel models with oil (even baby oil) to keep the elements at bay, but don’t worry too much. It is smart to take time to protect any wooden areas though with a dedicated barbecue wood oil treatment. Please, please beware of chemical preservatives or treatments you utilize somewhere else in the home. Some may be flammable and have no place on a bbq!

Now it is all clean and polished, it will be ready for the following cookout. If you want to reduce work later on, try spraying the actual grill with oil before you decide to cook to really make it more non-stick. In addition, if the coal area is looking tired, add a thin coating of sand which will safeguard this. Don’t forget to cover your bbq or put it in the shed if you have 1. You will be grateful you did whenever you roll it looking all gleaming for the next time.

At BBQbarbecues you can view our whole range and other services that we do such as Gas BBQs, Charcoal Barbecues, Patio Heaters, Wood Fired Ovens and Patio Heaters.

Article Source: http://EzineArticles.com/?expert=Anthony_P_Langston
http://EzineArticles.com/?Thoroughly-Clean-Your-Barbecue-Top-to-Bottom&id=5324050

October 3, 2010 Tricks

12 Tips For Low and Slow Smoking

Get That Great Smoked Flavour With Barbecue Smokers

By Mick Jonesey

brinkmann smokerSo what are they really all about? The following report includes some fascinating information about barbecue smokers–info you can use, not just the old stuff they used to tell you.

If your barbecue smokers facts are out-of-date, how will that affect your actions and decisions? Make certain you don’t let important barbecue smokers information slip by you.

Do’s and DON’T’S:

1- Please don’t mix up barbecue smokers with Grilling – This is one of those greenhorn things that forever differentiate loyal barbecue smokers enthusiasts from the ignorant public. Remember, grilling is a fast, hot fling you have with a steak, burger, or hotdog..whilst barbecue smokers depicts the day long relationship you have with a rack of ribs, a pork shoulder, a beef brisket, etc. A lot more finesse is needed for barbecue smokers, as well as lots of time

2 – Lighter Fluid – Unless you savour the taste of petroleum distillates (i.e. Petrol, lamp oil, paint thinner), don’t even try it. Your barbecue smokers food is going to have a while to get acquainted your fuel source, and we don’t want smoke to be substituted by fumes.

3 – Self-lighting briquettes – these little lazy guy lumps are in essence lighter fluid sponges.see above.

4 – Liquid Smoke – This stuff is made by burning green wood and liquefying the resulting smoke. If properly cooking barbecue over wood coals, WHY WOULD YOU EVEN CONSIDER IT? The only place I’ve seen it used, where it might make sense, is in barbecue sauce, but even that is debatable. Everywhere else, including jerky, is fraudulent. It’s like opening up a can of Spaghetti-O’s and calling it Fine Italian Pasta.

5 – Ovens – At NO TIME should an oven be considered as part of the barbecue smokers procedure. Therefore, it is IMPOSSIBLE to make barbecue smokers ribs in the oven. You can make some great oven-cooked ribs, but please don’t call them barbecued.

6 – Boiling Ribs – the ultimate taboo..Most of the taboos listed above have one or two exceptions that will keep you from getting hung, but this one NEVER EVER EVER EVER should a rib of ANY type come into contact with boiling water unless you’re making soup. If you need to boil them to make them tender, hang it up and order take-out.

7 – Crock Pot w/Barbecue Sauce – Ugh, a cross between the oven taboo and the boiling ribs taboo..need I say more? Throw some foil in the mix and you’ve just insulted the entire community.

8 – Best Cooker – asking a man what the best barbecue smokers rig is, is akin to asking him who the best ball team is. Everyone has an opinion, and everyone else disagrees. Be very wary when asking for this opinion topic, as it could easily get out of hand..and if you use the word ceramic or egg in your question..you better DUCK!

9 – Favorite Meat – very regionally sensitive discussion. Various parts of the nation have their own version of barbecue smokers, which involves different cuts of meat from different animals. Generally speaking: east is pork ribs, southeast is pork shoulders and whole hogs, south is beef and brisket.

10 – Wet or Dry – sauced or on the side. Very much like meat, this preference is displayed along regional lines, with the eastern folks liking the sweet and/or vinegary sauces, and the Texans liking the barbecue smokers or DRY situations.

11 – Lump or Briquettes – Here’s one near and dear to my heart. When I started this barbecue smokers hobby, I had a Brinkman Offset, a pile of hickory logs, and a bag of a certain brand of charcoal briquettes. Some fine fine barbecue smokers cooks tell me that they don’t notice anything different between fuels, but others say that there is a nasty, bitter, acrid, chemically smell/taste they find when using certain royal and kingly briquettes..and I’m inclined to agree.

12 – Cooking with flaming logs or glowing coals – right off the bat, I’ll say that BOTH are right.but one is much harder and, for me, much more expensive. The conventional purists insist that the original barbecuing pitmasters would burn their wood all the way down to coals before adding food to the pit. Then, they would add glowing coals to the pit as the cook progressed, preburned in another area. But, when cooking with blazing wood, you must be careful to have just the right fire going or you’ll ruin your food with bitter creosoted smoke. (small hot fire with almost invisible smoke) When using barbecue smokers with preburned coals, you don’t run that risk but you waste a lot of wood and spend a lot of time preburning and shoveling.

find out more… http://www.barbecue-smokers.net/

Article Source: http://EzineArticles.com/?expert=Mick_Jonesey
http://EzineArticles.com/?Get-That-Great-Smoked-Flavour-With-Barbecue-Smokers&id=5094369

September 11, 2010 Featured

Grate Better Best: Choosing Grill Grates

fire grill

Hot Grates

How to Barbecue Better Using Cooking Grates

By Jonathan Goodman

Cooking grates come in different types and materials, and each has its own advantages, depending on its use and the preference of the cook. Grill grates hold your food when you are barbecuing or grilling. So let us take a look at the choices available when it comes to outdoor cooking grates.

When it comes to popularity, cast iron grates seem to be the choice. The heavier wide cast iron grates can hold heat for a long time and cook evenly. As a result, you get well seared, quickly cooked food. The only problem with  iron grill grates is maintenance. Apart from the regular cleaning, you must ensure that cast iron grills are well seasoned before you use them and this must be done periodically even when they are in regular use. They do come with manufacturers instructions on how to season them. While it is not a difficult task to season them, neglecting to do it can result in rust. If you do keep them well seasoned, cast iron can be as good as nonstick grates and appear to last longer than a lifetime.

A better option, if you want the advantage of longer heat but not the associated maintenance hassle with cast iron, you can opt for porcelain coated iron grates. These combine the quality of durability, as well as avoid the problem of rust as long as the porcelain coating is intact. Over time, the porcelain coating can crack, chip or wear off unless you are really careful when you handle it. At the time of cleaning, it is better to use brass bristles in place of metal scrapers with hard edges.

Stainless cooking grates for grills are less durable than iron; however, with good care, these can also last a long time. You also get steel grates coated with porcelain just like cast iron grates coated with porcelain. One problem, however, is that these grates are quite thin and too widely spaced to hold heat. While this does not really affect smoking or indirectly cooking huge portions of meat, beef, steaks and chops could pose an issue since you will not get those attractive grill marks. Serious chefs prefer wider grates.

If you compare stainless cooking grates for grills, porcelain enameled cast iron cooking grates and porcelain coated cast iron grates, porcelain coated cast iron grates let you cook at lower temperatures because there is longer retention of heat. Stainless steel grates come with the longest warranty followed by porcelain coated cast iron grates and the porcelain enameled ones.

Generally, it is better to buy stainless cooking grates for bbq grills so that they are not prone to rust. Often we find barbecue grills that are perfect with all the features we want at a price that is hard to refuse, yet does not have the kind of grate we want. In such cases, you can always check with the manufacturer. For example, you can opt for Weber porcelain enameled cast iron cooking grates that give you the advantage of long lasting grates that retain excellent heat and are supposed to be easy to maintain. But most weekend barbecuers feel that it is hard to keep it seasoned because they get so heated. This manufacturer also offers the option of choosing stainless cooking grates for the grills. These are easy to clean before cooking. By coating them with oil, you can keep food from sticking to it. Importantly, the grill marks are prominent. Another big advantage of stainless steel is its lightweight property making it easy to handle particularly while adding wood or briquettes to your smoker box. Stainless steel is also a good material for camping cooking grates.

About The Author: Jonathan Goodman is the owner of Market Merchants an online retailer specializing in home and garden products. My passion for bbq grilling and fireplaces is the core focus of Market Merchants. I am a member of the Hearth Patio Barbeque Association (HPBA), the National BBQ group (NBBQ), and the Kansas City Barbeque Society (KCBS). We sell these products because we love them and are passionate about consumer living needs. So whether its furniture and decor, home improvement, kitchen and dining, or outdoor living Market Merchants brings a dedicated commitment to the customer and a passion for high quality products. Visit Market Merchants for a wide selection of cooking grates from our grill accessories department.

Article Source: http://EzineArticles.com/?expert=Jonathan_Goodman
http://EzineArticles.com/?How-to-Barbecue-Better-Using-Cooking-Grates&id=1144397

August 8, 2010 Featured

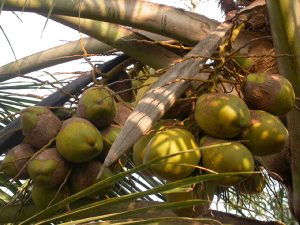
Coconut Charcoal For BBQ

coconut_charcoal

Smoke That Coconut

Just saw Coconut Charcoal offered at the Whole Foods Market andhad to find out more.  Although we have not tried it on the test grills it sounds like coconut coal could be as clean burning as it gets.  Let us know what you think!

Have You Tried Coconut Charcoal For Your Family Barbecuing?

By Jeco J

For centuries, people in Indonesia have recognized the use of coconut shells not only as a natural raw material to produce handicrafts, but also as an alternative and / or supplement to traditional lump charcoal, to improve and prolong the heat produced for cooking.

Coconut charcoal is an environment-friendly green alternative charcoal with many advantages that will make your barbecuing experience fun and help protect the environment. No single tree is cut to produce coconut charcoal. The characteristics of charcoal vary from one product to another. Charcoal variation results in different burning times, odor, and ash produced. Nevertheless, it is a common misconception that all charcoal is roughly the same. Coconut shell charcoal burns at 7,000 kilo calories. The unique manufacturing process of Coconut shell allows the charcoal embers to produce very little, to no smoke, and no more than 4% ash waste is produced when all the embers are burned completely.

Depending on air exposure and the type of barbecue grill you will be using, one kilogram of coconut charcoal (about 33 briquettes) roughly provides the same cooking “power” as produced by 2 or 2 ½ kilograms of traditional lump charcoal. Additionally, barbecuing with coconut charcoal, which has a very low content of volatile matter, ensures that soot formation, if any, will be minimal. This in turn reduces the cleaning time considerably.

With relatively stable heat created over approximately 2 – 2.5 hours duration, family barbecuing becomes environmentally friendly, more convenient, enjoyable, and more economical as less charcoals needed for replenishment during cooking. Have you try to use coconut shell charcoal for your barbecuing?

Jungle Notes was set up as a green article resource site so that readers across the world can come together and share this information. Visit Jungle Notes now and read more green article!

Article Source: http://EzineArticles.com/?expert=Jeco_J
http://EzineArticles.com/?Have-You-Tried-Coconut-Charcoal-For-Your-Family-Barbecuing?&id=4760312

June 26, 2010 Featured

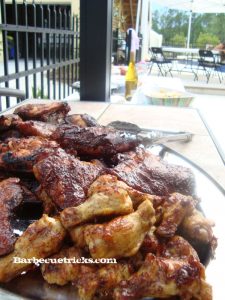
How To BBQ Chicken

Chicken On Platter

Chicken Your Guests Will Crow About

By Tauqeer Ul Hassan

BBQ chicken that has been cooked perfectly will taste delicious. Although it seems that with its increased popularity and careless manner of BBQ cooking, many people cannot enjoy this.

When the chicken has been barbecued improperly, it looks still pinkish in the center and burnt on the outside. Not only it will affect the taste but it also becomes unhealthy.

Here is a guide to BBQ chicken in a good way it can be enjoyed.

Things Needed:

– Chicken pieces

– Gas grill or charcoal grill

– Brush for the sauce

– Meat thermometer

– Marinate

– Rub or seasonings

– Side dishes

– Oven

– Sauce

BBQ Chicken

Procedure:

Step 1:

First, select the type of chicken which has to be barbecued. Legs and thighs are preferred by some while others like skinless and boneless chicken breasts. If barbecuing more than one chicken part is desired, then the cooking times would have to be adjusted. White meat like breasts and wings cook faster than dark meat like legs and thighs.

Step 2:

Now, pick the grill which is desired to be used. This will rely on how one wants to cook the barbecue. This will also depend on the neighborhood one is living in plus the lifestyle. If a person is a beginner at grilling, then the gas type is recommended. However, this might not be easy to use during the holidays.

Step 3:

The chicken has to be marinated. This process will allow the flavor to sink in to the chicken making it taste great after it is grilled. A marinate flavor can be selected as preferred. There are variations available from lemon pepper to teriyaki. If the chicken is marinated in the fridge, it has to be made sure that it is not left in there for more than 48 hours. At room temperature, it has to be leaving it for an hour.

Step 4:

When the chicken has been marinated, it can be now rubbed with the seasonings. This will depend on the type of flavor which is needed to be given to the BBQ chicken.

Step 5:

The chicken has to be pre-cooked by pre-baking. The ideal temperature for baking it is 360 degrees in the oven until partially cooked. This will seal in flavors and will ensure that the chicken has been cooked before it goes to the grill. Others do boiling. However, boiling takes away the flavor and makes it taste weak.

Step 6:

Now the grill has to be made ready while the chicken is baking. If a charcoal grill is being used, ignite the coals and they should be left to burn until a white coating of ash appears on the coals. In case of gas grill, it has to be preheated to a medium heat temperature of 360 degrees. The grate also has to be sprayed.

Step 7:

Put the seasoned chicken on the rack and cover it with the grill lid. It should be given at least half an hour to cook. With time, it has to be checked and turned after every five minutes for ensuring that it is evenly cooked. The pieces can also be rotated to balance the cool and hot spots on the grill.

Step 8:

The BBQ has to be glazed again with the seasoning nearly 10 minutes before taking chicken off the grill.

Step 9:

After grilling, the chicken pieces can be checked with a meat thermometer. The bone should be never touched when the thermometer is inserted. The internal temperature of the meat must be 175 degrees.

Step 10:

Finally, the BBQ chicken is ready. It can be served with delicious side dishes like coleslaw, pasta salad, potato salads, baked beans and biscuits.

Preparing BBQ chicken is not a boring work, it is fun and these easy steps will help to make a perfectly barbecued chicken that everyone will love!

You might also be interested in learning how to can fruits and vegetables and how to BBQ chicken.

Article Source: http://EzineArticles.com/?expert=Tauqeer_Ul_Hassan
http://EzineArticles.com/?How-to-BBQ-Chicken&id=4014080

May 16, 2010 Featured

Three Tricks For London Broil

London Broil – Three Keys to a Most Economical and Flavorful Meal

By Bill Purkins

London Broil

London Broil is probably one of the best kept secrets of the budget minded cook and grocery shopper. Consider that ground beef currently runs about $2.99 a pound on sale (prices last checked May, 2010), while London Broil can be had on sale and with a store shopper card for just $1.69 a pound! That’s just 42.2 cents a serving, which makes it a star baby in our show, truly one of the cheapest cuts of meat you can find.

Yes, you’ll probably have to wait for it to go on sale to get a deal like this, and you’ll also likely have to buy a several pounds, but a price like that, it’s well worth it, and the obvious thing to do is to cut it up into meal sized pieces and freeze them. One key to a successful London Broil experience is to tenderize it. This cut can be tough by nature and if you spend a few good minutes pounding it with a mallet it helps break up some of the muscle. Avoid scoring the meat or stabbing with a fork though. This will result in too much of the good juices being lost to the cooking pan.

Another key to making this cheap cut of beef shine is to marinate it. And there are a million London Broil marinades out there on the web, so here at Dollar a Day Gourmet we’re not going to try to shove one down your throat. Ideally, if you come to enjoy London Broil and make it a frequent feature at your dinner table, you will try different marinades until you find one or two you like best, and after a couple of successes we advise you to be adventurous and modify one until it becomes your very own.

Many recipes call for you to marinate 4 to 6 hours or so, but strongly advise you to marinate your London Broil overnight. In either case, in the refrigerator. But please heed the overnight advice. The extra time is well worth it for a more flavorful dish. Use a gallon sized ziploc bag. It’s simple, economical, super easy, and there’s no mess to clean up. Just toss the bag afterwards and there’s no pan to wash.

Finally, before serving be sure to cut into thin slices, across the grain. This will contribute to more tenderness. So, three secrets for a good London Broil:

1) Tenderize

2) Marinate overnight

3) Cut across the grain

Otherwise? Follow your recipe and enjoy this economical and flavorful dish.

Was this article helpful, or do you have a helpful suggestion or recipe?

Visit http://www.dollaradaygourmet.com

Article Source: http://EzineArticles.com/?expert=Bill_Purkins
http://EzineArticles.com/?London-Broil—Three-Keys-to-a-Most-Economical-and-Flavorful-Meal&id=4227144

November 18, 2009 Tricks

Carving a Turkey

BBQ Turkey Carving

There are different views on carving a turkey. The cooking method – be it smoked, roasted, or rotisserie barbecued – shouldn’t be a factor. Some slice right off the breast of the bird while other chefs (like Bobby Flay) prefer a bit more sophisticated method and presentation.

Watch as Hilton Head’s Palmetto Bay Sunrise Cafe owner Paul Stewart demonstrates how to trim your bird while considering the texture of the grain of the breast meat.

September 8, 2009 Competitions

BBQ Smoking Wood – Guide

Smoking wood for barbeque is a must if you are cooking low and slow.  The only question is “what kind of BBQ wood do you use?”

The answer is a matter of taste and what’s available.   In the South East the mainstay is Hickory.  In Texas it’s all about Mesquite.     Some swear by Oak or the sweet smell of Apple wood.   To make it even more complicated others will mix a combination of woods or use aged oak whiskey barrels!

Here’s a quick guide on where to start when you’re picking wood.

Cooking Wood Chart
Acacia Mesquite Family – Strong Most meats, beef, vegetables
Alder Delicate with a hint of sweeness Fish, pork, poultry, light meat game birds, great with Salmon
Almond Nutty & sweet smoke flavor, light Ash Good with all meats
Apple Slightly sweet, but dense, fruity smoke flavor Beef, poultry, game birds, pork and ham
Apricot Milder flavor and sweeter than Hickory Good on most meats
Ash Fast burning, light but distinctive flavor Good with fish and red meats
Birch Medium hard wood with a flavor like Maple Good with pork and poultry
Cherry Slightly sweet, fruity smoke flavor Good with all meats
Cottonwood Very subtle in flavor Good on most meats
Grape Vines Aromatic, similar to fruit woods Good with all meats
Grapefruit Medium smoke flavor with a hint of fruitiness Excellent with beef, pork and poultry
Hickory Pungent, smoky, bacon-like flavor, the most common wood used Good for all smoking, especially pork and ribs – Most popular in the South
Lemon Medium smoke flavor with a hint of fruitiness Excellent with beef, pork and poultry
Lilac Very light, subtle with a hint of floral Good with seafood and lamb
Maple Mild smoky, somewhat sweet flavor Good with pork, poultry, cheese, vegetables and small game birds
Mequite Strong, earthy flavor Most meats, especially beef, most vegetables – Most popular in Texas
Mulberry Sweet smell and reminds one of apple Beef, poultry, game birds, pork and ham
Nectarine The flavor is milder and sweeter than Hickory Good on most meats
Oak The second most popular wood, heavy smoke flavor, red oak is considered the best by many Pitmasters Good with red meat, pork, fish and heavy game
Orange Medium smoke flavor with a hint of fruitiness Excellent with beef, pork and poultry
Peach Slightly sweet, woodsy flavor Good on most meats
Pear Slightly sweet, woodsy flavor Poultry, game birds and pork
Pecan More like Oak than Hickory, but not as strong Good on most meats
Plum Milder and sweeter than Hickory Good on most meats
Walnut Very heavy smoke flavor, usually mixed with lighter wood, like Pecan or Apple. Can be bitter if used alone or not aged Good with red meats and game
NOTES: New Variation: Whiskey Barrell – Aged Oak from Jack Daniels barrells
  • « Go to Previous Page
  • Page 1
  • Interim pages omitted …
  • Page 6
  • Page 7
  • Page 8
  • Page 9
  • Page 10
  • Go to Next Page »

Primary Sidebar

Welcome To BBQTricks!

Hey Y'all... Thanks for stopping by. I'm Bill West. I blog about BBQ and occasionally country music. When it comes to BBQ I try to find solid time saving tips and tricks to make the grilling life a bit easier. It's life hacking for the backyard cooker. Read More…

Your Gateway to Barbecue Information

This site is a member of The Smoke Ring BBQ Webring A linked list of BBQ websites

Next BBQ Site - Next 5 BBQ Sites - Prev BBQ Site - Random BBQ Site

Join the BBQ ring or browse a complete list of The Smoke Ring BBQ Webring member's BBQ sites

If you discover problems with any of The Smoke Ring BBQ Webring sites, please notify the Ringmaster

fb

Footer

DISCLOSURE:

Posts on this site may contain affiliate links. If you purchase something via one of these links you won’t pay more but the site operator gets a small commission. Or as I like to call it: “beer money.”

Copyright © 2025 — Barbecue Tricks • All rights reserved.