• Skip to primary navigation
  • Skip to main content
  • Skip to primary sidebar
  • Skip to footer
  • Big Book of BBQ Tricks
  • Resources
  • Free E-CookBook / Newsletter
  • Smoking Meat 101 Book
  • BBQ Blueprint Book
  • Electric Smoker Cookbook
  • Wood Pellet Grill Smoker Book
  • Temperature Guide
    • Seafood
    • Pork
    • Poltry
    • Beef
  • About Me
  • Shop
  • Sitemap

Barbecue Tricks

BBQ Tips and Tricks

Grill

January 25, 2018 Featured

Weber Q 220 Unboxing

Weber QEver get a present that seems daunting to put together?  We figured the Weber Q 220 Unboxing may help.  The Weber Q 220 portable grill came in a big box and a second biggie came with a grill cart for the stand with wheels. Check out the video HERE for the unboxing (youtube).

Weber Q 220 Assembly

Overall the challenge of putting it all together wasn’t too bad.  The Weber Q 220 Unboxing took  about thirty minutes. The plasticky (in a good way) stand took another thirty minutes.  Total time was about an hour. I’m sure if you really focused in you could get it done faster. I stopped for a beer :).

As you can see after the Weber Q 220 Unboxing I was able to quickly fire up a hotdog. I’ve since grilled several steaks and burgers.
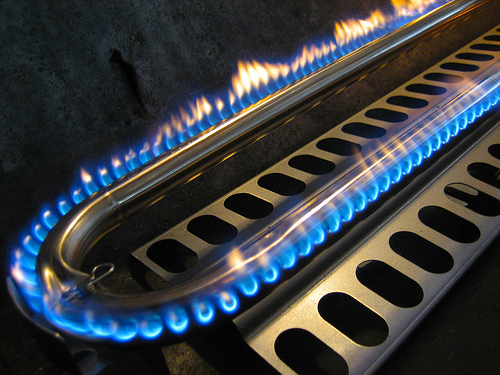
Fire Power

I still feel like I’m not getting as strong or as hot of a flame as I think I should.  Next step may be to try to return the reulator attachment (some other online reviews give props to Weber for good support on this).    I have had sketchy regulators in the past and my conclusion is that they are all maybe a bit too safe for safety purposes.

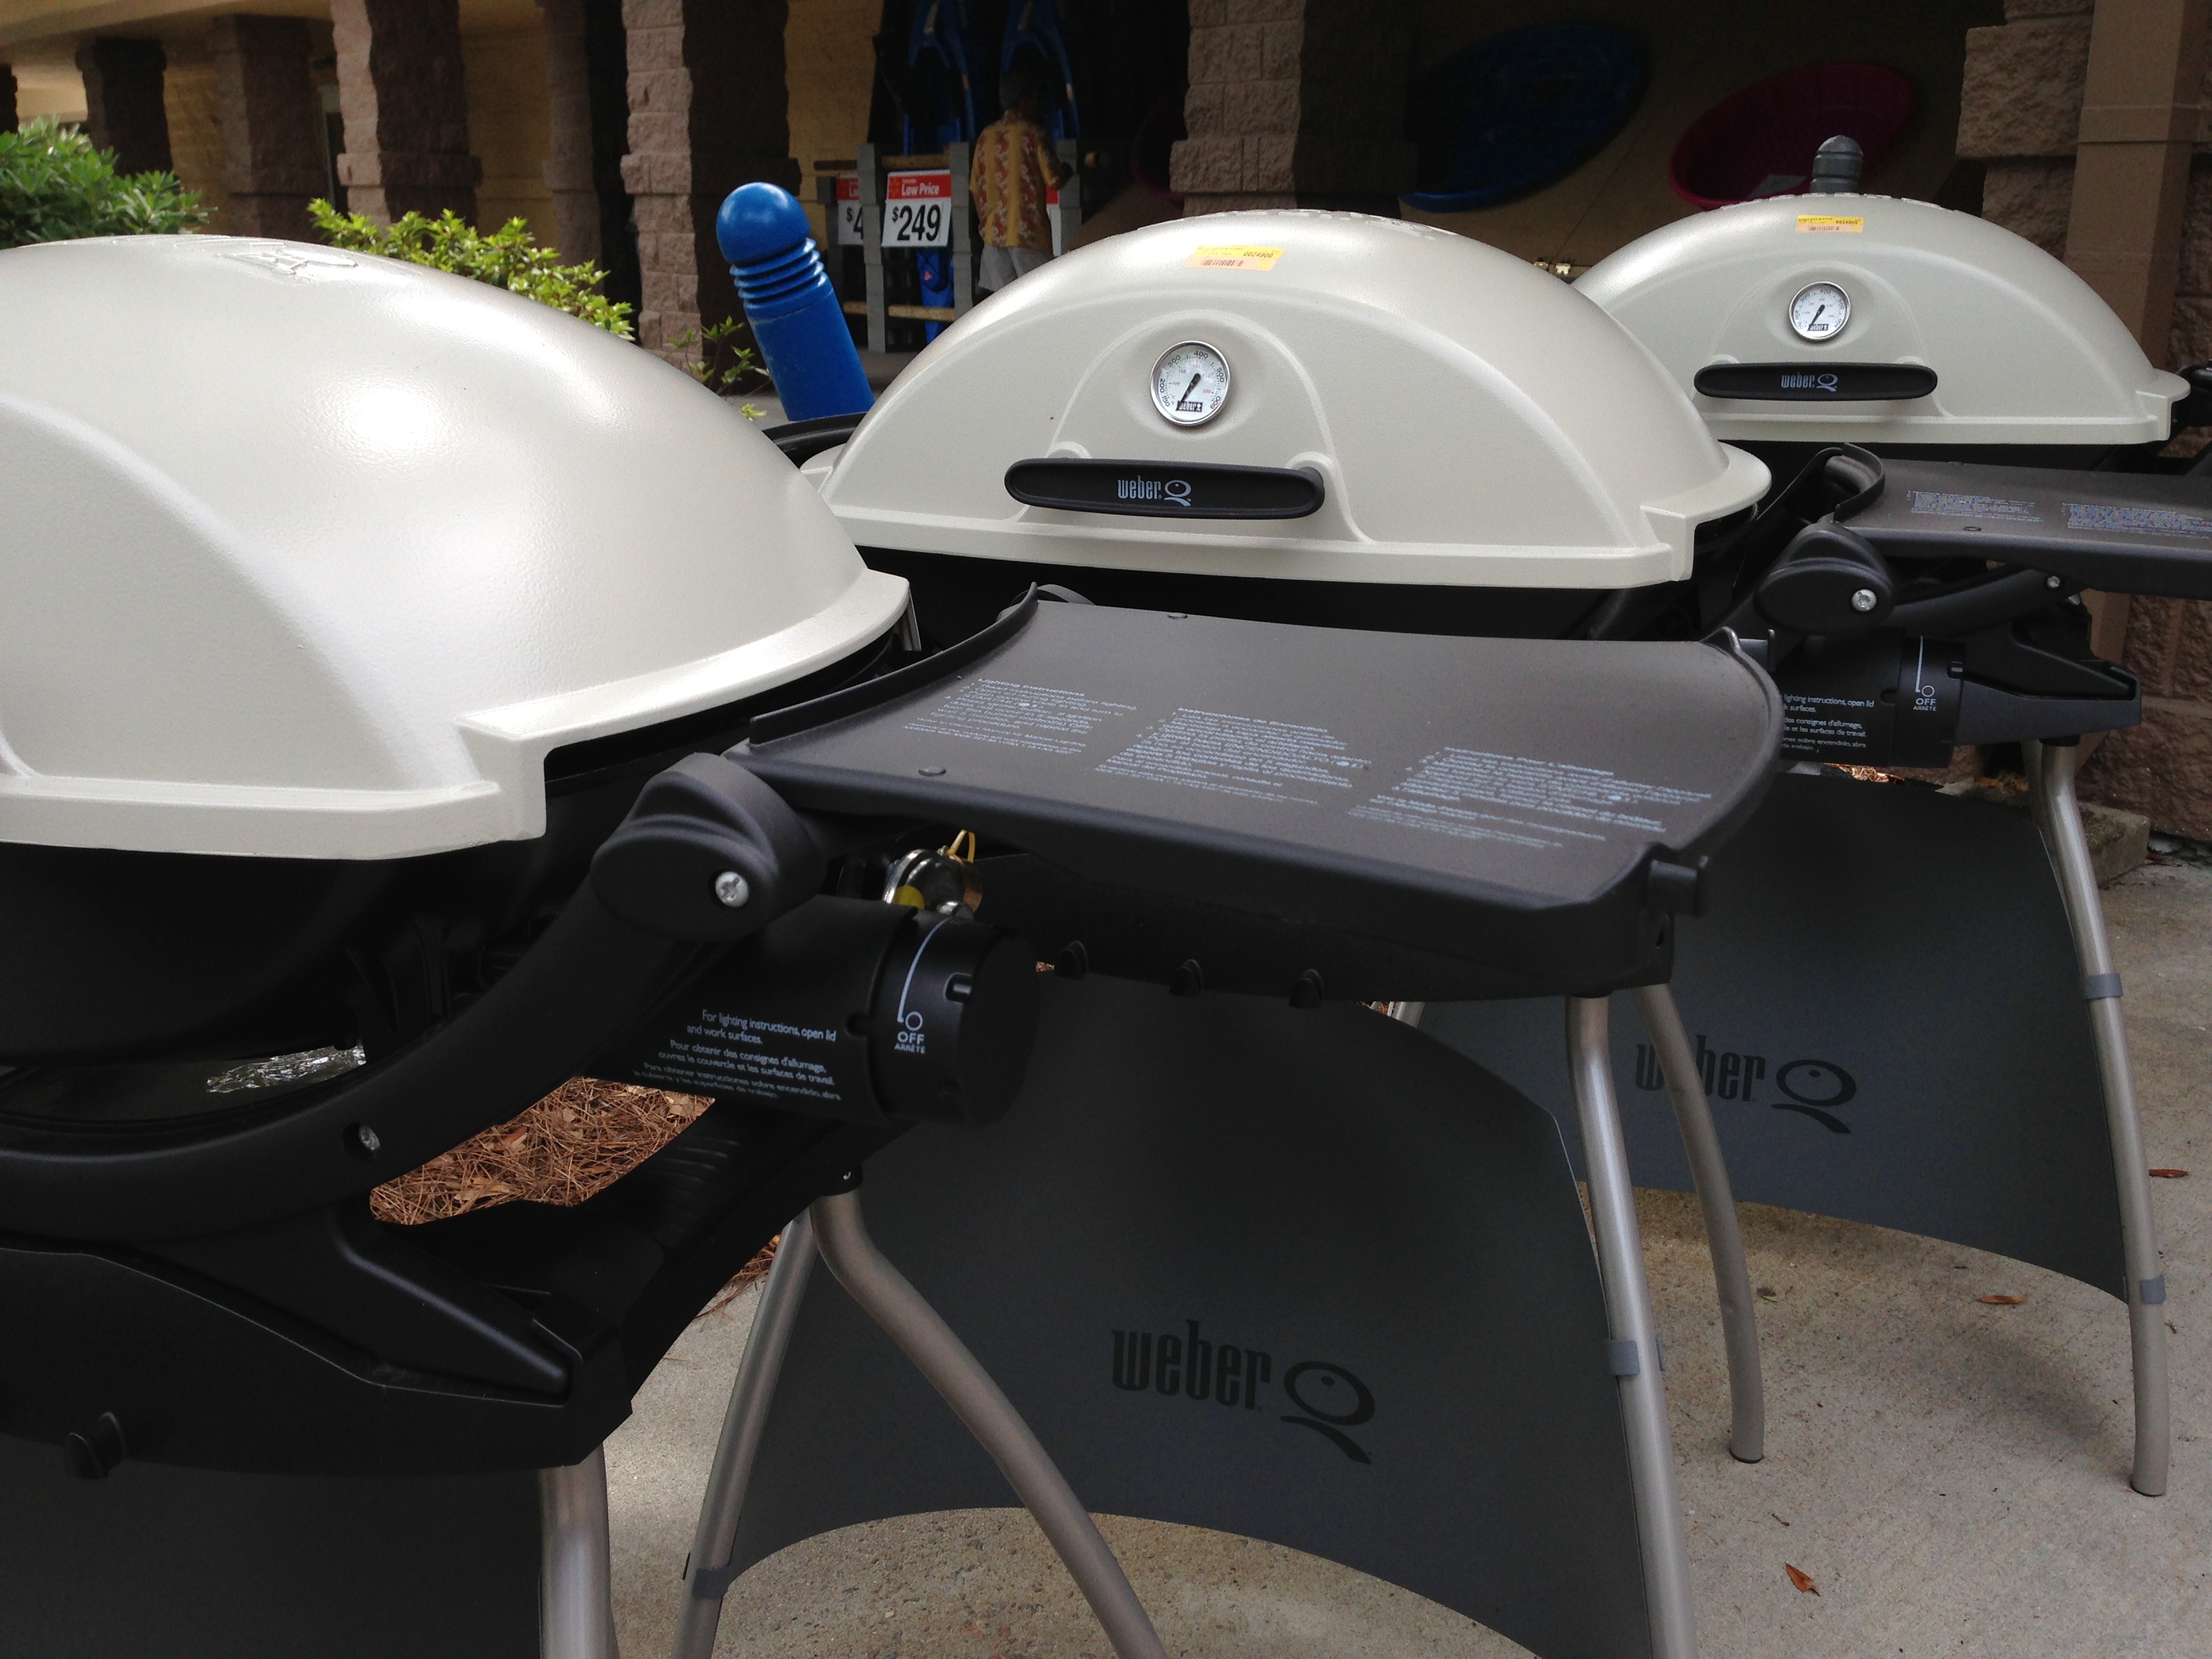
The Weber Q 220 Stand

The Weber Q220 works great with or without the stand (looks pretty nifty with or without too).  Extra note if you plan to try to use the Weber Q with a larger propane tank as I do in the video you will need the special adapter hose. Purchased separately.

Overall – and a really very simple Weber Q 220 grill with easy assembly. The conclusion is it’s a nice form factor that’s well constructed. It’s sturdy steel where it matters and plastic most everywhere else (nice for grimy ‘que cleanup).

May 2, 2017 Featured

Kamander Charcoal Grill Unboxing

Kamander charcoal grillChar-Broil has released the Kamander Charcoal grill and it looks to be a big green egg killer.

It’s a double walled steel insulated “kamado style” charcoal grill that crushed the price of it’s green counterpart. The cost at amazon is around $350 but assembly is definitely required with the Kamander Charcoal Grill.

Construction was easy. But recommended for two people. It took about 90 minutes with just me.

I think you cant beat the price of the Kamander Charcoal grill compared to the ceramic cookers that seem so heavy and – perhaps – fragile with ceramic construction.

The Kamander Charcoal Grill’s best features:

  • It’s not too heavy (easy to move)

  • cool to the touch (even when approaching 800 degrees inside)

  • good looks and heavy duty latch / handle

  • held a nice low steady temperature

Take a look at the accompanying video and I time lapse unboxing and initial firing.  I was also impressed at how well the Kamander Charcoal Grill held a stable low 250 degrees.   Plus even at high temperatures (I got it over 700 degrees f ) the steel exterior remained relatively cool to the touch.

If you hate the thought of piecing together a grill like this I did discover Amazon has a service offering expert assembly for under $60.

The materials are solid.  The wheels on the Kamander are a nice, heavy, solid rubber.  The latch and front handle are also “heavy-duty” and chunky.   Nice seal on the rim too.

Still, the weight of the whole grill is said to be 115 lbs and easier to handle than i imagined for double walled steel.

We liked the sturdy stainless steel shelf and the stand are are included in the model. With the Big Green egg a lot of the extras – like a drip pan – are additional purchases.

A quick search of prices for Big green Egg vs others shows that the price for most Big Green eggs were close to a thousand bucks except a tiny version that was priced at approximately $650. Other brands like Kamado Joe are a bit lower priced vs Big green egg.

December 24, 2016 Gadgets

Weber Performer Deluxe Charcoal Grill Review

Weber Performer Deluxe Charcoal Grill Review

weber performer deluxeBy Devendra Mali

Weber have been making grills for a long time, but they’re not regarded as an old-fashioned company, because everything they do is so innovative. As the market for grills continues to grow, they keep responding with new pioneering designs to keep buyers interested. One of these designs was a bowl shaped cooking area which is now well-known and easily recognizable worldwide. Another huge Weber success was perfecting the art of grill grate manufacture, and both of these are present on the Weber Performer Deluxe 22-Inch Charcoal Grill, which has become Weber’s standout product. We’re going to discuss it here; taking a tour through all the features and identifying some potential flaws. Ultimately after reading this review, you’ll have an idea about whether a purchase would be right for you.

Pros:

  • 363 square inches of cooking space
  • 22-Inch cooking bowl
  • Easy Set-up
  • Porcelain-enameled surface for ease of cleaning
  • Removable timer
  • Excellent grates

Cons:

  • Design could have been more visually pleasing
  • Inaccurate lid-thermometer

Size/Portability

The Performer Deluxe weighs 99 pounds, but they’ve installed great wheels, so you’ll be able to roll it out into the back garden with very little effort. The measurements are 41.2 inches in length by 28.5 inches of width and the height is 50.2 inches, so it’s a pretty big unit, that offers lots of space for all your cooking needs, but if you want to transport it you’ll have to take the Performer apart and re-assemble. Fortunately the assembly is doable in 15 minutes, following the instructions in the manual, so you’ll be able to take it with you for camping trips and tailgating parties. If you recognize the bowl, that’s because it’s the same design Weber used on the Original Kettle Grill, with the difference here being the inclusion of the wheeled cart with extra space for food preparation. The shopping cart style design could have been a little more pleasing to look at, but it would be harsh to labor this point, because this is one absolutely incredible grill, for reasons I’ll explain in the performance section.

Performance

I mentioned the bowl was the same as on the Original Kettle, and while this is true, when it comes to design and how it looks; there’s more to it than that. In gas grilling, BTU output and grates determine a products success, whereas in charcoal grilling, grates are all-important. Grates retain heat, and disperse it outwardly, enabling food to cook, and the speed at which they do this, along with how evenly they hold heat inside, is the difference between greatness, and an average taste. Weber did something magical here with the grates; they’re the perfect thickness, are made of solid cast-iron, and cook food in a way Weber have tried to re-create on other grills like the Original Kettle, but never quite succeeded. These grills are very good, and with the Performer, you get magical moist flavor-filled end results that have no parallels. When you pair these grates, with the added benefit of the bowl system enabling you to cook whole chickens and turkeys, as well as stake and ribs, you get outrageously good value.

Have you ever started cooking, and you got called inside almost immediately, only to run back out fearing your food might be burnt? Have you ever been grilling, and felt like you’d rather be watching TV until the food is done? Usually, you’d be risking an imperfect dinner, but Weber have helpfully included a detachable timer, so you can take it with you wherever you go, and always be in full control of your barbecue. This is classic Weber, to have an idea of what specific things would make grilling easier for customers, and adding them on.

In this same vain, the ash-catcher on the Performer Deluxe, will also please customers. Isn’t it annoying to see ash flying around as you cook? Well, the Performers ash-catcher is enclosed so none escapes, and ash will stick to its surface at the bottom. When you want to clean it out, the ash will simply fall into a garbage bag. The whole grill is just as easy to clean, with Weber’s porcelain-enamel coating, so one wipe will completely clean the grill, ready for its next use. This way you can enjoy your 363 square inches of space, rather than worry about how long it’s going to take to scrape all the debris off it.

The only thing I’d say against the Performer is that they tried to sweeten the deal by including a lid thermometer, but it doesn’t work very well and isn’t all that accurate. Fortunately though, the Performer does heat up quickly and reaches temperatures of over 470 degrees; just don’t rely on the thermometer to tell you that.

Conclusion

These are the best grates in existence, outside of commercial grills used at restaurants. Weber have also provided 363 square inches of space, an easy to clean surface, detachable timer, a great ash-catcher, and extra space to prepare food. This is a phenomenal grill, and that’s why it’s so popular, even though it does have an unreliable thermometer. The Verdict: A supreme new high in grill manufacture.

For more grill reviews, comparisons and guides please visit: http://divinegrill.com/

Article Source: http://EzineArticles.com/expert/Devendra_Mali/1791050 http://EzineArticles.com/?Weber-Performer-Deluxe-Charcoal-Grill-Review&id=9492698


March 20, 2016 Tricks

Grill Gas Check Tip

It’s happened to a lot of cookers… GAS issues! Not what you may be thinking but it could also happen to you! You’re in the homestretch of a day of prepping for the cookout. Chicken’s on… and the gas on the… grill is… slowly… dying.
Running out of propane is easy to do because it’s so hard to see through metal! (Although I have seen some transparent plastic tanks recently that look great.) Most of us don’t have a gas gauge either.
Here’s one tip for your next cook out:
You can estimate how much gas you have left in your propane tank by heating up some water to a boil (you can do this in the microwave or ins

ide). Make sure you have enough hot water to gently heat the SIDE of the propane tank in question. Tilting the tank on a bit of an angle, pour the hot water up and down the entire side of the tank from bottom to top.  Not too hot on the water (nothing that could get dangerous) just warm enough so you can tell a difference.
The level of liquid propane inside can be determined by feeling the new temperature of the tank with your hand. Where your hot water has succeeded in heating the tank is where it’s empty. Where the tank is noticeably cooler is where you have some remaining liquid propane.
If there is no noticeable difference you’re probably all out.

July 19, 2015 Featured

Grilling for Beginners: 8 Easy Marinades for a Delicious Barbecue Dish

marinateBy Adrian T. Cheng

Flavor is what defines whatever you cook on the grill. The longer you marinate your meat, the more flavorful it will be. Keep in mind that chicken is ideally marinated for a minimum of 20 minutes and a maximum of 12 hours, beef, pork and lamb for a minimum of 3 hours and a maximum of 24 hours while fish and other seafood will be most flavorful if marinated for a minimum of 10 minutes and a maximum of 20 minutes only.

So whether you’re in the mood for just a classic steak or something more festive, here are 8 quick and easy meat marinades for grilling:

Classic Steak

Perfect for grilled beef, pork or chicken.

What you need:

  • 4 garlic cloves, minced
  • 1/2 cup soy sauce
  • 1/3 cup olive oil
  • 1/4 cup Worcestershire sauce
  • 2 tbsps. brown sugar
  • 2 tsps. balsamic vinegar
  • Ground black pepper to taste

Sweet and Spicy

Best for grilled chicken and pork and can be used as a glaze as well.

Photo:Flickr.com/adactio

Photo:Flickr.com/adactio

What you need:

  • 2 cloves garlic, minced
  • 1 cup ketchup
  • 1 cup hot sauce
  • 1/4 cup Dijon mustard
  • 1/4 cup soy sauce
  • 2 tbsps. fresh lemon juice
  • 1 tbsp. or more brown sugar

Classic Grilled Seafood

Use for any kind of fish. Works great for shrimp, too.

What you need:

  • 2 garlic cloves, minced
  • Rind of 1 lemon
  • 1/4 cup olive oil
  • 2 tbsps. lemon juice
  • 2 tbsps. chopped parsley
  • 1/4 tsp. black pepper
  • Salt to taste

Mexican Style

Great for grilled beef or chicken.

What you need:

  • 4 cloves garlic, minced
  • 1/2 cup olive oil
  • 1/2 cup fresh lime juice
  • 1/3 cup white vinegar
  • 1 tbsp. onion powder
  • 1 tbsp. paprika
  • 2 tsps. oregano
  • 2 tsps. sugar
  • 1 1/2 tsps. salt
  • 1 tsp. cumin
  • 1 tsp. ground black pepper
  • Chili powder to taste

Italian Style

Ideal for chicken, pork, fish and shrimp.

What you need:

  • 3 cloves garlic, minced
  • 1 cup vegetable oil
  • 1/3 cup white wine vinegar
  • 2 tbsps. mustard
  • 1 tbsp. sugar
  • 1 tsp. mixed dried herbs
  • Salt and pepper to taste

Korean Style

Perfect for beef, chicken or any kind of seafood.

What you need:

  • 8 garlic cloves, crushed
  • 1 red apple, grated
  • 1 brown onion, finely sliced
  • 3 tbsps. soy sauce
  • 2 tbsps. brown sugar
  • 1 tbsp. sesame oil

Japanese Style

Can be used for beef, chicken and seafood.

What you need:

  • 3/4 cup mirin
  • 1/4 cup soy sauce

Greek Style

Best for grilled chicken, lamb and seafood.

What you need:

  • 2 garlic cloves, crushed
  • 1/2 cup extra-virgin olive oil
  • 1/4 cup fresh lemon juice
  • Zest of 1 lemon
  • 1 tbsp. oregano leaves
  • 2 tsps. thyme leaves

These recipes are for 1-1 1/2 kg. of meat. Enjoy these simple yet deliciously flavorful marinades for your meat the next time you grill!

Adrian T. Cheng is a food blogger and a BBQ expert. Through years of grilling experience, reviewing various top quality grill accessories and trying delicious and unique recipes, he is sharing his knowledge with everyone through his blog. For more grilling secrets, tips, recipes and more, head over to Adrian’s page.

Article Source: http://EzineArticles.com/?expert=Adrian_T._Cheng
http://EzineArticles.com/?Grilling-for-Beginners:-8-Easy-Marinades-for-a-Delicious-Barbecue-Dish&id=9047563


November 23, 2014 Gadgets

Rotisserie Chicken and Rotisserie Turkey

rotissthisCLICK FOR VIDEO There’s something about a rotisserie chicken.

They’re everywhere these days in supermarkets – slow roasting by the dozen on display in industrial cookers the size of your guest bedroom. But the truth is if you have a rotisserie kit (it may have come with that fancy new grill and is now in a box in the attic somewhere) it’s actually pretty easy.

Every attempt we made with our gas powered Sam’s Club spit and electric motor set up ended with incredibly succulent and golden brown bird.

There’s only about four ingredients.

Here’s an updated video overview using turkey: http://youtu.be/xqB5mLKevxI First start with a clean bird – Chicken and small Turkey seem to work equally as well. Rub lightly (watch for too much salt) with BBQ Tricks house seasoning UNDER the skin and over the entire outer surface of the skin. Rub seasoning generously inside the cavity of the bird (remove any “spare parts.” Let the bird rest (upright if possible) uncovered in the refrigerator for about four hours to allow the seasoning to take and also to dry the skin a bit (this helps to crisp the skin later). My hunch is you could bypass all the above and still have an incredible meal but the little things do make a difference. Remove the bird and let it come to room temperature about an hour before you plan to cook. two or three hours before you plan to serve. Before you put the chicken or turkey on the spit mark the location of the grill’s burner with two marks (with a Sharpie Permanent Marker) so you’ll always know exactly where to slide the meat in the future. The most important thing to accomplish is to balance and secure the bird firmly on the rotisserie prongs so that the entire mechanism rotates smoothly on the spit. Use trussing to help if needed. Test it by rolling the spit ends on a flat surface or even on your hands. After you have it on a hot grill it’s very difficult to adjust. Also use pliers to secure thumb screws. You don’t want an end to slide.

rotisserie poultryFinally make sure the spit is secure in the motor mechanism. Confirm there is no way for it to slide out (does it sound like it happened to me?)! After you start the spin and cook come back and sight check everything after five minutes. Let it Cook til golden brown checking infrequently for one to two hours. Our 4.72 lbs chicken took just over two hours.

When golden check the temperature with a good thermometer and remove to a cutting board to rest. BBQ Tricks House Seasoning 2 Tablespoons Kosher Salt 1/2 Tablespoon Fresh Ground Black Pepper (grinding is a little bit more work but worth it) 1/2 Tablespoon Garlic Powder add Paprika for color

June 1, 2014 Featured

Pros and Cons of Gas & Charcoal

Charcoal

charcoal chimney

Warmer weather is finally here, and that means it is officially grilling season!


There are few things that feel more like summer than standing around a grill with friends on a warm evening. While some people fire up their grill without putting any thought into how they will be cooking their meal, others are dedicated to certain methods and techniques.

Some people prefer the convenience of using a gas grill, while others are fiercely loyal to charcoal. Traditionally, grills are designed to cook with either gas or charcoal. If you like to use both fuel sources, hybrid grills are a great solution.

There will always be a debate about which fuel source is best when it comes to grilling. Here is a quick guide to help you determine which fuel source is best for the cooking at hand:

 
gas burner replacementGas
There is one advantage that gas grilling has above all other fuel sources: convenience. To start a gas grill, you simply have to turn a knob and press a button. Once lit, you have an easily controllable heat source to cook your food. Gas grills are also relatively easy to clean because there are no leftover ashes.
While gas grills are probably the easiest to use, grilling enthusiasts often have one major complaint: a lack of flavor.

  • Pros: Easy to light and control temperature, very little clean up.
  • Cons: Gas adds no flavor to food, and produces a more moist heat.


Lump Charcoal
When you burn wood in the absence of oxygen, the remains of this natural process is lump charcoal.
One of the great aspects of lump charcoal is how quickly it gets extremely hot. This typically takes only 10 to 15 minutes. Because lump charcoal gets so hot, it can sear foods rapidly. It also produces a very dry heat, which creates that delicious, caramelized crust on the outside of your food.
This quick heating process makes lump charcoal great for grilling foods that cook quickly.
Once lump charcoal reaches maximum temperature, it loses heat quickly, which can be disadvantage. If you want to use lump charcoal and sustain a high temperature, you will need to replenish the charcoal periodically. Because you are using charcoal, there will be ash cleanup involved.

  • Pros: Lights quickly, burns hot, great for searing.
  • Cons: Burns quickly, more expensive, takes time and effort to light.


Briquettes
Briquettes are similar to lump charcoal in how intensely they burn, but the similarities end there. One of the easiest ways to discern them is to look at their shape. While lump charcoal is inconsistently shaped, making it difficult to stack, briquettes usually have a uniform shape.
An advantage briquettes have over lump charcoal is that they burn for long periods of time, which makes it easier to cook at a more consistent temperature than lump charcoal.
While lump charcoal is created through an all-natural process, briquettes are not. Briquettes typically contain additives that help them light, burn and keep their shape. These chemical additives will give off a distinct smell when they are lit, but if you wait to start cooking until all the briquettes are covered in white ash, that smell shouldn’t transfer to your food.

  • Pros: Burn time, consistent temperature, cheaper.
  • Cons: Chemical smell, ash to clean.


Author Bio:

This is a guest post by Arianna on behalf of Kalamazoo Outdoor Gourmet. Visit kalamazoogourmet.com to find out more about our hybrid grills.

February 22, 2014 GrateTV

Pizza on The Grill – Tips and Tricks

BBQ PizzaPizza is not often associated with the world of BBQ.

However BBQ Pizza On The Grill can be an easy and fun way to show off your grilling prowess and entertain friends.

The first tip is to use a pizza stone.  That may sound unusual or expensive but they’re not really. Here are a BUNCH of pizza stones for less than 20 bucks.  In our video here we used a pizza stone for a home oven and it works great.  Just heat it up slowly to high heat to avoid cracking.

Secondly – keep it simple.  Pre made dough (gasp!!) is super easy and is usually tastier than what you can make on your own with those little yeast packets that have been in your cabinet too long.  Go to your favorite pizza joint and see if they sell dough balls.   Probably do.

grilled pizzaAlso, you can pile on the toppings if you want but try to keep your topping layer thin to allow the pizza to cook from the top down too.

Lastly, and this could or should have been mentioned first:  Dust your pizza peel, your stone and your prep board with a coarse corn meal.   It really helps the pizza slide on and off the pizza stone without stretching out of shape.

There are lots of ways to BBQ pizza (another method below) but take a look at the video and see if our tips for BBQ Pizza On The Grill can help you too!

WATCH — HERE –>>>http://youtu.be/3rYCZP5r-tU

How To Make Pizza On Your Barbecue

By Vinny DiLeo

Barbecue Pizza! Why barbecue a pizza? The simple answer is fast cooking.

To make great pizza your pizza should cook fast and fast cooking is one of the secrets to making a perfect pizza pie.The main reason is that barbecues can reach very high temperatures! Some of the best pizzas that I have tasted were cooked in wood burning ovens. For centuries people around the world have been cooking in wood burning ovens. These ovens and also, professional pizza ovens can reach the high temperatures of 800 to 1200 degrees. At these high temperatures a pizza cooks in only 2- 5 minutes.

Here are three ways that you can make pizza on a barbecue.

First, Heat your barbecue to the highest temperature that it will reach. My barbecue reaches 600 degrees. Stretch your dough out into a small circle that will fit on your barbecue.

1. Use a wooden peel. (This is a shovel like tool used to put pizza or bread in the oven) First spread cornmeal on your peel. The cornmeal acts like tiny ball bearings helping to slide the pizza off the peel on to the barbecue. Put your stretched dough on your peel and place all your toppings on it. When your barbecue is heated to temperature, use a little jerking motion to slide your pizza off of the peel on to the barbecue grill. This method cooks your pizza directly on the grill. Close your barbecue top and check your pizza in a few minutes. It won’t take long before the crust of your pizza begins to char. You want some charring all around your crust. Be sure to take your pizza out before the cheese starts to burn.

2. The second method that I use is less messy. I stretch out a large piece of aluminum foil and lightly spray olive oil on it. After stretching my dough out, I place it on the aluminum foil. Put your pizza sauce, toppings and cheese on it. Now, crimp the ends of the aluminum foil so that you can grab it and pick up the whole pizza on the aluminum foil. Carry the pizza over to your heated barbecue and place it on the grill and close your barbecue. Check your pizza in a few minutes.

3. The third way is to use a pizza stone on your barbecue. I have tried fire bricks, clay tiles and pizza stones. They all work fine. Heat your pizza stone in your barbecue for at least 30 minutes before placing your pizza on it. When your barbecue is up to temperature use the same technique of sliding your pizza off of the wooden peel as described in my first method.

Your pizza crust should slightly puff up after cooking and be a little charred around the edges. Remember, your pizza is only as good as the pizza dough that you make. To find out some of the secrets that I use to make a chewy, great tasting crust check out my web-site at http://www.perfecthomemadepizza.com

Chef Vinny DiLeo is very passionate about pizza and Italian cooking. You can find some of his award winning recipes and pictures of his barbecue pizza at his website at: http://www.perfecthomemadepizza.com/pages/recipe_resource.html

Article Source: http://EzineArticles.com/?expert=Vinny_DiLeo
http://EzineArticles.com/?How-To-Make-Pizza-On-Your-Barbecue&id=1171029


February 22, 2014 Featured

Winterizing Your Grill

Winterizing Your Grill

winterize grillBy David Felt

So you’ve got your heater on and your windows draft proofed. But there may be something you’re forgetting that also needs special preparation in the winter time. Your grill will last much longer if you take these steps in winterizing your grill.

Start by thoroughly cleaning your grill. It’s a dirty job but getting all of that that grease and grime off now will be easier than cleaning it off when you go to use in the summer. Start up your grill and let it run on high for about 15-20 minutes, this will burn off any food that may have accumulated. Turn it off and let it cool, then use a good degreaser and really scrub it.

    • Clean the grates the same way. By letting them heat up it’s loosened a lot of that grease and will now be much easier to clean.


    • Clean the outside of the grill with a wet cloth. Clean the carbon that has built up on the inside of the lid as well. Do not use a scouring pad on the outside, this will damage the paint and thin the metal. If you are going to use an abrasive cleaner, test it on a small spot first and see how the surface reacts.


    • Take this opportunity to make any small repairs your grill may need. Replace any lines or washers that appear worn. Clean the lines and your propane tank as well. Find anything that needs to be replaced now, and order it. By the time you’re getting the grill ready during the summer you will have all the parts at hand.


    • Take a plastic bag and wrap your grill’s burners. This will prevent any moisture from settling on the element causing them to rust. Coating the burners and interior metal parts with cooking oil will also prevent moisture from building. The plastic bag will also prevent any insects or small animals from turning your grill into their winter home.


  • Store your BBQ for the winter. If it is moveable put your grill in the garage or shed. If not buy a good grill cover that will keep dirt, rain and snow from accumulating on it. If you already have a grill cover, check it beforehand. Make sure there are no rips or tears in the cover that can leave the grill susceptible to the elements. Spending $30 on a new grill cover now is better than spending $300 on a new grill in the summer.

Taking these steps to winterize your grill will ensure that come summertime your grill is in condition to fire up and start grilling.

David Felt is an account manager at Modern Propane and a grill master. He understands that the quality of food coming off a grill greatly depends on the grill itself. You can find out more about Modern Propane at http://www.modernpropane.com

Article Source: http://EzineArticles.com/?expert=David_Felt
http://EzineArticles.com/?Winterizing-Your-Grill&id=8219117


July 16, 2013 Featured

Choosing The Best Grill Brush For Porcelain Enamel Coated Grill Grates

Choosing The Best Grill Brush For Porcelain Enamel Coated Grill Grates

stainless steel grill brish

Flickr/StevenDepolo

By Stanley N Lew

One typical issue when purchasing a barbecue grill brush is whether or not it will damage your cooking grid. The last thing you want is to scratch the grates of your expensive Weber BBQ. Thankfully, with just a bit of study it is really simple to ensure you purchase the best grill brush for your BBQ.

How delicate your grate is, and how susceptible it may be to damage and scratching, is based upon the material the grate is made from. The most tough material that is frequently used is stainless steel. These grates are really strong and resistant to rust and corrosion. Porcelain coated grill grates, on the other hand, are much more delicate. The porcelain coat is relatively brittle and can chip and crack. No only does this minimize the non stick capability of the grate, it also exposes the metal underneath the enamel to moisture. Cast iron grill grates are really tough, however must be kept oiled to stop rusting.

Many grill brushes are completely safe for use with most grills, however there is one noteworthy exception. NEVER EVER use a scraper on porcelain coated grill grates! That will definitely lead to you chipping the porcelain enamel. Apart from that, most brushes are fine with most grates.

The 2 most typical materials used to make the bristles for BBQ brushes are brass and stainless steel. Brass is softer, so less likely to scratch the grates, however this softness also means the bristles become flattened much more quickly. As a result, brass grill brushes need to be replaced regularly. Stainless steel grill brushes are much more long lasting, as a result of their stiffer bristles. Nevertheless, this extra stiffness means that they can sometimes scratch the grate. This is why people often recommend brass brushes for porcelain enamel coated grill grates.

So which sort of brush should you purchase to clean your porcelain enamel coated grill grate?

My recommendation is to go for a stainless steel grill brush with bristles thin enough that they don’t cause damage. The usual belief that you can only use brass bristled brushes for porcelain enamel coated grates is not in fact true. Many stainless steel grill brushes are completely safe to use. Because they will certainly last longer compared to brass brushes, my recommendation is to go with one of these. That way, you get a brush that will not only safely clean your barbecue, but will also last a very long time. To get even more life out your BBQ brush, only use it when the grate is hot. This will make it easy to clean, enabling you to use much less pressure, which ultimately means that your bristles will remain in great condition longer.

Stan Lew is a food enthusiast, with a special love of the barbecue. Visit the following site to read grill brush reviews. Alternatively you can read some grill brush reviews on Amazon here.

Article Source: http://EzineArticles.com/?expert=Stanley_N_Lew
http://EzineArticles.com/?Choosing-The-Best-Grill-Brush-For-Porcelain-Enamel-Coated-Grill-Grates&id=7813334

  • Page 1
  • Page 2
  • Page 3
  • Go to Next Page »

Primary Sidebar

Welcome To BBQTricks!

Hey Y'all... Thanks for stopping by. I'm Bill West. I blog about BBQ and occasionally country music. When it comes to BBQ I try to find solid time saving tips and tricks to make the grilling life a bit easier. It's life hacking for the backyard cooker. Read More…

Your Gateway to Barbecue Information

This site is a member of The Smoke Ring BBQ Webring A linked list of BBQ websites

Next BBQ Site - Next 5 BBQ Sites - Prev BBQ Site - Random BBQ Site

Join the BBQ ring or browse a complete list of The Smoke Ring BBQ Webring member's BBQ sites

If you discover problems with any of The Smoke Ring BBQ Webring sites, please notify the Ringmaster

fb

Footer

DISCLOSURE:

Posts on this site may contain affiliate links. If you purchase something via one of these links you won’t pay more but the site operator gets a small commission. Or as I like to call it: “beer money.”

Copyright © 2025 — Barbecue Tricks • All rights reserved.