• Skip to primary navigation
  • Skip to main content
  • Skip to primary sidebar
  • Skip to footer
  • Big Book of BBQ Tricks
  • Resources
  • Free E-CookBook / Newsletter
  • Smoking Meat 101 Book
  • BBQ Blueprint Book
  • Electric Smoker Cookbook
  • Wood Pellet Grill Smoker Book
  • Temperature Guide
    • Seafood
    • Pork
    • Poltry
    • Beef
  • About Me
  • Shop
  • Sitemap

Barbecue Tricks

BBQ Tips and Tricks

how-to

April 27, 2014 Featured

Ten Burger Tricks and Tips – Lid Up or Down?

burrgerr

hamburger tricks

Burgers are a summertime staple in the USA.   Everybody can handle ’em.   Still – your cook out might just go a bit smoother when you are ready to take on the grill with these quick tips and tricks for America’s favorite BBQ food.

1–Keep it Together…Make your patty out of
good ground beef
.  Use some egg and bread crumbs too.  Not only will it add flavor and moisture but it will help the beef hold together.

2–Chill Out.   Pop the patty in the freezer or fridge for fifteen minutes before hitting the grill  The chill will also help em hold together.

3– The Dent.  You can help keep the patty from balling up by starting with a little dent in the center of the burger.   When the meat cooks the dent will diminish and you’ll have a flatter patty.

4—Plan Ahead.   Have all your supplies on hand.  Think through it before you put the meat on the fire.  A trip back
to the kitchen could mean disaster if there’s a flareup when you are gone…

5- Keep It Clean.   Start with a clean grill – fire it up, brush it clean… oil with towel.   The grill bits left over from Labor Day’s cookout are not flavor this time around!

6–Check Yer Lid.   Lid up?  Or down?… the rule is if the meat is thicker than your palm close the lid.  If thinner… keep your eye on it.

7 – Keep it simple.   Don’t over season.  But DO add a secret ingredient to a few patties for fun and conversation.

8–Get Cheesy.   Add the cheese at the very end…  I use Kraft American singles.

9–Is It Done Yet?  Go medium well.   It’s best to use a thermometer.  Should read about 140 in the middle of the thickest part of the meat.

10–Let It Rest — When you’re done… let it rest.   Cutting or biting in too soon will allow the savory juices to drain out onto the plate.  Plus the cheese is HOT!  Let it rest 15 minutes  it’s tough but  it’s worth the wait.
December 12, 2012 Featured

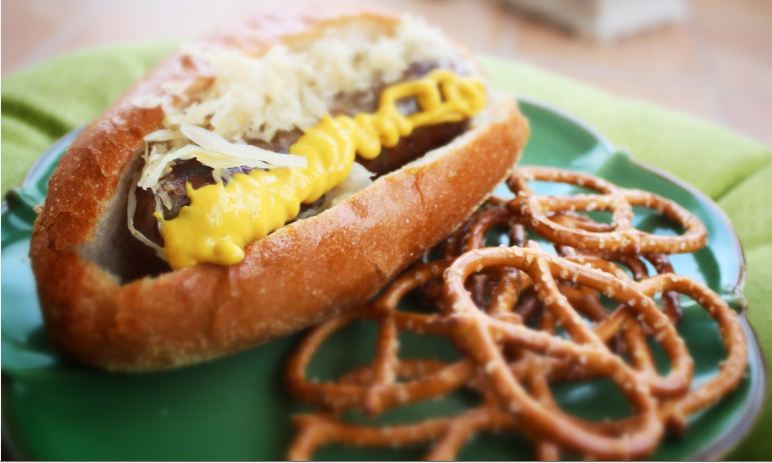
3 Ways to Better Bratwurst and Not Poisoning People

bratA good bratwurst grill master – or brattender as some call them – knows there are several different ways to serve the perfect beer bratwurst.  But the most important thing to know you need to really COOK it.   Bratwurst is almost always sold in stores as a raw meat product.  That means, unlike it’s lowly cousin the hot dog, it is not already cooked and safe to eat per USDA food guidelines for pork.   Bottom line you don’t want to get sick eating raw meat.

There are three common ways to cook brats:


Hot Off The Fire Brats

The most basic way to cook a brat is to brush it with a light oil and grill it over indirect heat for fifteen to 20 minutes.  Indirect heat will allow you to get the internal temperature of the sausage hot enough without over-charring the rest of the brat.   You want the final product to appear golden brown with unbroken skin (but don’t worry too much about that).  Use an instant read thermometer to make sure you reach the recommended 170 degree internal temperature.

Par Boiling Brats

If you want to be extra careful about under cooked brats or just want to shorten the live grilling  time (really?) you can easily  pre-cook or par boil the bratwurst in a pan from the comfort of the kitchen.   Just add one to two inches of your favorite beer into a pan over medium heat.   Add sliced onions and peppers if desired and bring to the lowest possible simmer.  Avoid boiling.  You don’t want to rupture the skin of the brats  by getting the liquid too hot or boiling.  Cook for 6 to 8 minutes and finish off on the grill as described above with a shorter grilling time of 3 to six minutes.

Brat Tub Bath

The most social way to cook brats is by enlisting the help of the legendary BRAT tub.   A simple shallow pan filled with an inch or two of beer, butter and onions that acts as the brats warm bath after our first grilling step. Keep the pan just off the fire and barely simmering so a hot brat is always on hand.  Plus the grill master gets a pass to take his focused attention off the grill to chat and have a beer.

Some other pointers:

Use tongs.  Never a fork.  You don’t want to prick the casing. That would diminish the juiciness of the end product and could encourage  a crazy flare up.

A brush of light oil before the brat hits the grill can help add a crisp texture to the casing.

You can add a lick of smoke even to a gas grill by tossing a foil smoker pouch under the grate before cooking.

Too charred?   Keep it handy some joker always wants the burnt one.

Print
Bratwurst Brat Tub Bath Recipe

Rating: 51

Prep Time: 5 minutes

Cook Time: 20 minutes

Total Time: 25 minutes

Yield: 5 to 10 bats

Serving Size: One Bratwurst

Bratwurst Brat Tub Bath Recipe

Ingredients

  • 2 Tablespoons Butter
  • 5 Bratwurst
  • 2 Twelve ounce Beers
  • 1 sliced Onion
  • 1 sliced Green Pepper

Instructions

  1. Place disposable foil roasing pan on indirect heat on the grill close enough to the heat to stay hot but not boil.
  2. Add butter and after melting fill pan with two robust beers (not lite). Add sliced onions and peppers,
  3. Maintain low simmer and add bratwurst to bath after grilling ten to twenty minutes on indirect heat.
  4. Serve with mustard and fresh baked bun.
3.1
More Recipes at BarbecueTricks.com


January 6, 2010 Video

BBQ Brisket Video

November 18, 2009 Tricks

Carving a Turkey

BBQ Turkey Carving

There are different views on carving a turkey. The cooking method – be it smoked, roasted, or rotisserie barbecued – shouldn’t be a factor. Some slice right off the breast of the bird while other chefs (like Bobby Flay) prefer a bit more sophisticated method and presentation.

Watch as Hilton Head’s Palmetto Bay Sunrise Cafe owner Paul Stewart demonstrates how to trim your bird while considering the texture of the grain of the breast meat.

May 31, 2008 Gadgets

How To Use a Chimney Starter

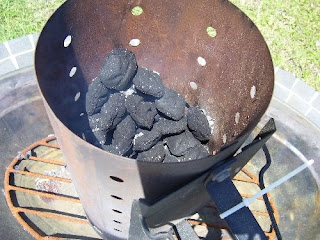
One of the quickest ways to fix that funky fuel taste in backyard barbecue is to ditch the charcoal lighter fluid. Cooks are too often overzealous with the fuel (hey, we’re guys) and it imparts a bit of an aftertaste if you’re not careful. If you DO use lighter fluid make SURE it’s all burned off well before cooking. Better yet… try a Charcoal Chimney Starter.

Chimney starters looks like a jet engine with a handle on the side. They cost about $20 and they’re really easy, safe, and environmentally friendly way too start charcoal.

They do come in different sizes (large is about 7.5 inches in diameter). If you have a small grill stick with the smaller Charcoal starter. Remember with a chimney starter no lighter fluid needed…

Here’s How to light it up:
  1. Find a clean, clear non flammable area to place the Chimney Starter. You could use the grill but you’ll still need a non flammable place to set the RED hot chimney once you’ve filled the grill. A little caution goes a long way. Use gloves.
  2. Fill the larger compartment in the Chimney (the top) with regular or hardwood lump charcoal (recommended!). Match Light or instant lighting (fuel soaked) is not needed.
  3. Compress two large sheets of newspaper loosely into the bottom chamber. The whole key is getting air to everything so don’t pack it in to much.
  4. Set the starter upright on the lower grate on your grill (remove the top one) and ignite the newspaper through the bottom holes using a lighter or match. That’s it.
  5. After about 20 minutes your charcoal should be ready. Wait until the coals on top show some white ash.
  6. Carefully pour and arrange your coals on the grate. Yes Gloves… and be careful where you place that chimney it’ll be blistering hot for about 30 minutes.

April 28, 2008 Tricks

How To: Skin Tomatoes

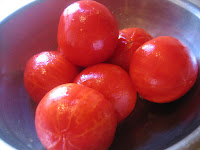
A lot of barbecue masters will use skinned tomatoes for different sauces. This is a great trick to get the thin skinned fruit peeled without testing how thin YOUR skin is!
Why peel it? Some say the skins add a bitter flavor to recipes.
Start with a very clean tomato without any stem:
  1. Get a large bowl of ice water handy. Half ice – half water. Save for later.
  2. “Score” or lightly cut a cross or X on the end of the tomato (this will help peeling later)
  3. Boil a pot of water. (Not the ice water… that’s still set aside).
  4. Carefully submerge tomato in boiling water
  5. Use a slotted spoon o get it out once you can see the skin pulling off
  6. Drop it in the ice bath
  7. Let the tomato chill for about five and a half minutes
  8. NOW you’re ready to peel. Use a small knife to get under and grasp the edge of the skin at the X you made. And yes, after all this… it can still be tricky to get it totally skinned!

Primary Sidebar

Welcome To BBQTricks!

Hey Y'all... Thanks for stopping by. I'm Bill West. I blog about BBQ and occasionally country music. When it comes to BBQ I try to find solid time saving tips and tricks to make the grilling life a bit easier. It's life hacking for the backyard cooker. Read More…

Your Gateway to Barbecue Information

This site is a member of The Smoke Ring BBQ Webring A linked list of BBQ websites

Next BBQ Site - Next 5 BBQ Sites - Prev BBQ Site - Random BBQ Site

Join the BBQ ring or browse a complete list of The Smoke Ring BBQ Webring member's BBQ sites

If you discover problems with any of The Smoke Ring BBQ Webring sites, please notify the Ringmaster

fb

Footer

DISCLOSURE:

Posts on this site may contain affiliate links. If you purchase something via one of these links you won’t pay more but the site operator gets a small commission. Or as I like to call it: “beer money.”

Copyright © 2025 — Barbecue Tricks • All rights reserved.