• Skip to primary navigation
  • Skip to main content
  • Skip to primary sidebar
  • Skip to footer
  • Big Book of BBQ Tricks
  • Resources
  • Free E-CookBook / Newsletter
  • Smoking Meat 101 Book
  • BBQ Blueprint Book
  • Electric Smoker Cookbook
  • Wood Pellet Grill Smoker Book
  • Temperature Guide
    • Seafood
    • Pork
    • Poltry
    • Beef
  • About Me
  • Shop
  • Sitemap

Barbecue Tricks

BBQ Tips and Tricks

poultry

November 23, 2014 Gadgets

Rotisserie Chicken and Rotisserie Turkey

rotissthisCLICK FOR VIDEO There’s something about a rotisserie chicken.

They’re everywhere these days in supermarkets – slow roasting by the dozen on display in industrial cookers the size of your guest bedroom. But the truth is if you have a rotisserie kit (it may have come with that fancy new grill and is now in a box in the attic somewhere) it’s actually pretty easy.

Every attempt we made with our gas powered Sam’s Club spit and electric motor set up ended with incredibly succulent and golden brown bird.

There’s only about four ingredients.

Here’s an updated video overview using turkey: http://youtu.be/xqB5mLKevxI First start with a clean bird – Chicken and small Turkey seem to work equally as well. Rub lightly (watch for too much salt) with BBQ Tricks house seasoning UNDER the skin and over the entire outer surface of the skin. Rub seasoning generously inside the cavity of the bird (remove any “spare parts.” Let the bird rest (upright if possible) uncovered in the refrigerator for about four hours to allow the seasoning to take and also to dry the skin a bit (this helps to crisp the skin later). My hunch is you could bypass all the above and still have an incredible meal but the little things do make a difference. Remove the bird and let it come to room temperature about an hour before you plan to cook. two or three hours before you plan to serve. Before you put the chicken or turkey on the spit mark the location of the grill’s burner with two marks (with a Sharpie Permanent Marker) so you’ll always know exactly where to slide the meat in the future. The most important thing to accomplish is to balance and secure the bird firmly on the rotisserie prongs so that the entire mechanism rotates smoothly on the spit. Use trussing to help if needed. Test it by rolling the spit ends on a flat surface or even on your hands. After you have it on a hot grill it’s very difficult to adjust. Also use pliers to secure thumb screws. You don’t want an end to slide.

rotisserie poultry
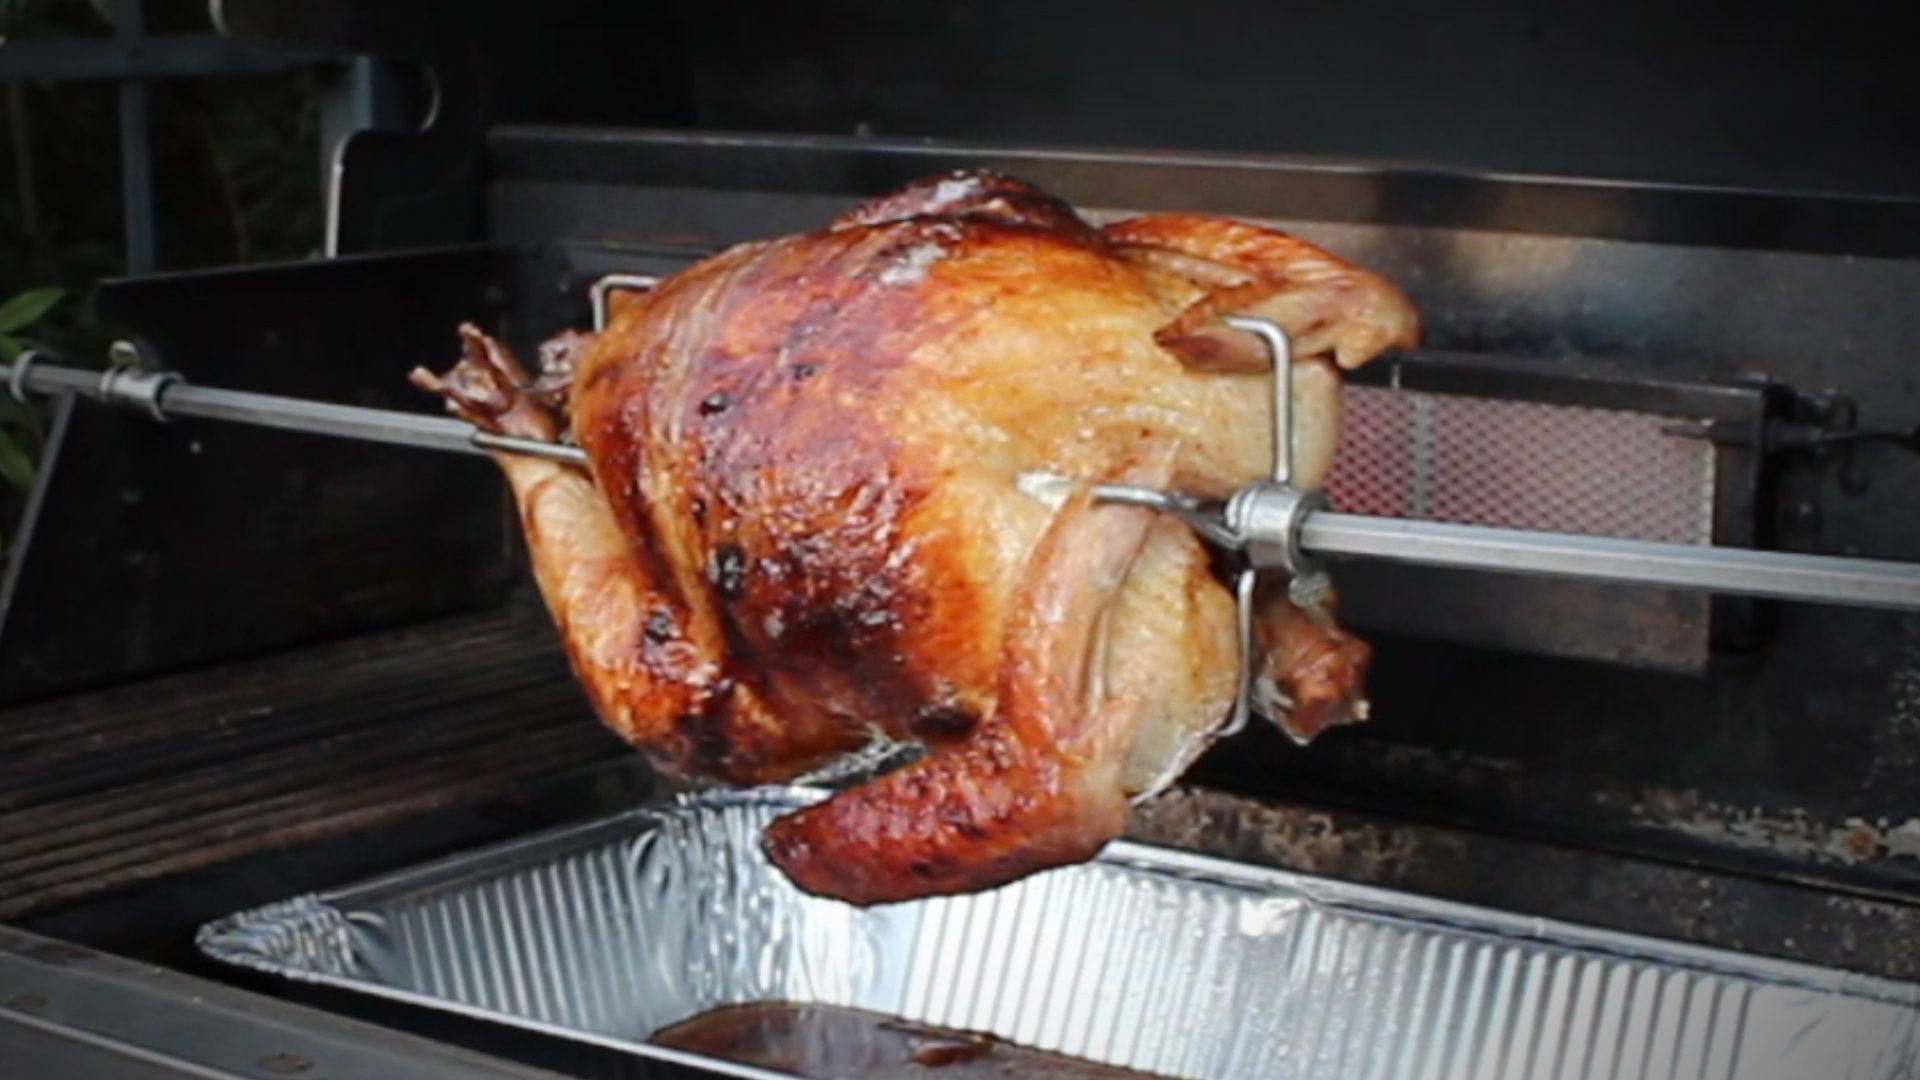
Finally make sure the spit is secure in the motor mechanism. Confirm there is no way for it to slide out (does it sound like it happened to me?)! After you start the spin and cook come back and sight check everything after five minutes. Let it Cook til golden brown checking infrequently for one to two hours. Our 4.72 lbs chicken took just over two hours.

When golden check the temperature with a good thermometer and remove to a cutting board to rest. BBQ Tricks House Seasoning 2 Tablespoons Kosher Salt 1/2 Tablespoon Fresh Ground Black Pepper (grinding is a little bit more work but worth it) 1/2 Tablespoon Garlic Powder add Paprika for color

January 7, 2012 Cook

Beer In The Rear Turkey 25.4

Resting Turkey

Beer In The Rear Turkey

Turkeyon a grill or smoker can be tricky.    It’s easy to get rubbery skin (and that can actually make some people mad).  There’s a lot of expectation on a Thanksgiving dinner especially with skin lovers.

Beer in the Rear Turkey is almost fool proof.  It’s quick and give you a crisp golden skin with a hint of smoke.

The first time I heard about the beer can trick was around 1999 when my morning radio hosts became enamored with a recipe they found called Beer Butt Chicken.  They thought it was so great (probably just liked that the word Butt was in a recipe) they wanted to bring a grill to the radio station and demo it in the parking lot.   I’ve grown to like it too.  So it’s fun to be able to super size the recipe.

This time the poor thing gets violated with not just a regular beer can but you use the big “Foster’s Lager” sized can of beer. You can find it in most grocery stores.   Reserve half and enjoy as you prep.  You’ve earned it. You’re going to want to punch some holes in the top of the can and put some spice rub in the can.  And then you get to the bird…where you clean off the bird really well and make sure you get all the different things out of the inside of the cavity of the bird.  They hide it in different areas… the neck, the gizzards…

Beer Butt Turkey

Caution: It's harder to REMOVE the can...

With the bbq spice rub inside the can… the steam and the beer flavoring will actually steam through the turkey and infuse it with a really super flavor keeping the bird moist from the inside out. You’re not going to get much from the outside-in because the skin of a turkey is kind of like a wet suit.    Rub the spice under the skin (I call this getting to second base with the Turkey).  The skin is really pretty resilient and thick so you’re not going to damage anything.

Then you just insert the can upright inside the bird.     Carefully lower the turkey on top of the can making kind of a tripod of sorts.    If you need a little extra room on the grill you may want to remove the bottom grill grate and put the tripod on a small roasting pan actually on the floor of the grill directly on the burners of the gas grill.  You won’t  actually turn the burners on under the bird.   Set up for indirect grilling heat.  Temperature is going to be 325 to 375 (if you have a temperature gage on  your gas grill – use it this time).    You can usually get this temp/indirect by having one or two gas burners on and the other two off.

To get a lick of smoke use some wood chips in a smoker box on he lit burner or using a tin foil pouch.  Making a smoker pouch really easy.  Then and then just let it cook.

After about an hour – open it up turn the bird around let it cook for another hour or until it gets golden brown on both sides.   Use a meat thermometer in the thickest part of the thigh and cook until you hit at least 160 degrees.

You’ll  want to use gloves and be super careful removing that can.   The liquid is dangerously hot and the can is greasy! Let rest before carving.


Beer In The RearTurkey

In the video demo we used an 11.75 lbs turkeyand cooked for two and a half hours (150 minutes). Approximately 345 degrees Indirect heat.

“Discard” half of the beer.    Add 2 tablespoons Rub into remaining liquid in can.   Using a “churchkey” can opener add additional holes to top of can.  Insert upright under and inside turkey using legs as tripod support.  Grill over indirect heat 2 to 3 hours until temperature measures 160 degrees in the thickest part of the thigh.  Let rest  before carving serving.

Ingredients:

1 wholeTurkey(10 to 18 lbs.)

6 tablespoons of BBQ Rub or Greek Seasoning

1 can Fosters Lager (or 25.4 oz other)

July 15, 2010 Featured

Grilling Turkey with Hoisen

Glaze On Turkey

Turkey only seems to get center stage one time a year and that’s a shame.

There’s nothing quite like a super tender turkey leg drenched in smokey sauce (I totally embarrassed myself gnawing a leg at the local Charleston Riverdog’s minor league baseball game food court the other day).    There’s a ton of different ways to tackle turkey.  Best of all it’s even better (and more impressive for dinner guests) when it’s prepped on the barbecue.

Just entered a cool contest with Honeysuckle White Turkey… I was actually hoping to show off one of my favorite ways to BBQ turkey with a rotisserie spit.   Instead I stumbled on thier teriyaki tenderloin breast fillets.  All I know about Asian cooking I learned from Steamy Kitchen (Jaden there would laugh at my lack of authenticity!).  But  the pre-marinated poultry looked and ended up tasting fantastic and all I really added was smoke.

breast baste

Brushing On the Hoisen

The recipe is really already in the meat (is that cheating?) so here’s a very simple recipe for a Asian Inspired Turkey with more on a smoke pouch from an earlier post.   It really was super easy.

Asian Turkey

1 Package Honeysuckle White Teriyaki Turkey Breas1 Tenderloins

1/3 Cup  Hoisen Sauce

1 Cup Apple Wood Chips ( can substitute Hickory or Oak)

Soak chips in a small bowl for 15 minutes to encourage smoldering.   Wrap the chips sealing tightly in an aluminum foil pouch. Vent with three small holes and place touching grill burner flame.

Once smoke is produced place marinated turkey directly on medium grill for 10 – 15 turning once being careful not to overcook.

Baste each side of turkey with a layer of hoisen sauce to glaze.  Repeat to thick glaze.

November 5, 2009 Featured

Grilling The Ultimate BBQ Chicken

Foul Play

Foul Play

Grilling the Ultimate BBQ Chicken
By Richard Calvin Myers

You don’t have to be a grilling pro to cook like one. So many recipes on the grill only call for a few things to make them phenomenal: fresh ingredients, the right seasoning, and proper cooking time. Just three little things to remember and your food will surprise everyone. One of the most versatile foods in the entire world is chicken. This fine feathered friend of ours has been prepared thousands of ways over hundreds of years. One of America’s favorite ways to eat chicken is barbequed. It’s so simple and delicious, yet people tend to get the formula wrong and their chicken comes out tasting like rubber smothered in ketchup.

The first thing people do wrong is overcook the chicken. They leave the poor little pieces of chicken on the grill for hours until there’s nothing left but dehydrated meat and bone. You want to cook your chicken only to 170 degrees, never more. The idea is to let the chicken rest. Carryover heat will increase the temperature to 180 degrees, the safe point at which you can eat chicken. Chicken will remain juicy as long as it’s not overcooked. Don’t worry about drying it out. As long as it cook it the proper length of time, it will be just fine.

Ultimate BBQ Chicken:

This BBQ chicken recipe is really simple and super delicious. The first thing we’ll want to do is to go shopping. I personally like chicken thighs for this recipe, but you can choose what you wish. Make sure to grab a bottle of your favorite BBQ sauce. The trick here is in the seasoning, we won’t need to make a fancy sauce for these. The seasoning consists of salt and pepper, garlic powder, onion powder, paprika, rep pepper, and some old bay seasoning. Whatever you don’t have already, pick some up.

We want to start the night before you grill and begin to season the chicken. We’ll need to make a quick spice rub. To do this, take two tablespoons of salt and black pepper, 1 tablespoon of garlic powder, onion powder, paprika and old bay, and a ½ teaspoon of red pepper. Combine all these ingredients in a bag or a container, and that’s it. Wash the chicken pieces and let dry thoroughly. After they’re completely dry, rub the chicken liberally with the seasoning. Wrap your chicken in foil or plastic wrap, place in a leak-proof container, and let it sit overnight. Be careful to never cross contaminate when dealing with raw poultry.

On the day you’re ready to grill, cut your burners on medium heat. After your grill heats up, oil the racks well and place your chicken pieces skin side down. Once they start to cook, close the lid. Check on them every 5 minutes or so to make sure they’re not burning. All together, we want to give them 15 minutes on the skin side. After that, turn over and repeat the checking and waiting process. Let them go for another 15 minutes and them begin to sauce your chicken.

Saucing is the last step. Make sure you keep a close eye on your chicken, the BBQ sauce will burn quickly due to its high sugar content. After you finish saucing one side of the chicken and turning it over, the pieces should be ready to turn back over after saucing the opposite side. They should only take about 3 minutes on each side to cook the sauce on. Be careful taking the chicken pieces off of the grill. This recipe is really simple. It’s all in the seasoning. These seasonings play very well with chicken, especially BBQ. The paprika has a nice, deep smoky taste. This recipe will be a hit with even the toughest crowds.

Richard Myers is the contributing author for this website and is an acknowledged expert in the field of grilling. He can be found on the internet at: http://www.TheGrillingCoach.com

Article Source: http://EzineArticles.com/?expert=Richard_Calvin_Myers
http://EzineArticles.com/?Grilling-the-Ultimate-BBQ-Chicken&id=1453183

January 2, 2009 Cook

Poultry’s Recommended Internal Temperature: Is It Done yet?

Looking to safely cook chicken or turkey, without having it come out dry and flavorless? The USDA says to cook until the juices of the wings and thighs run clear. The only way to do it is use a thermometer (see below), and remember the wings and thighs reach a higher temperature faster than the breast. Here are some simple guidelines for safe internal temperatures that will keep your poultry tasting great! All measurements are Fahrenheit.

  • Ground Chicken or Turkey 165 degrees
  • Whole Chicken or Turkey 180 degrees (thighs, wings & legs) / 160 – 165 degrees (breast) Note: This should occur at about the same time.
  • Chicken or Turkey Breast 170 degrees
  • Duck 180 degrees
  • Grilled or Roasted Quail 145 degrees

In general, The USDA suggests poultry be cooked to an internal temperature of 165 before serving. This is lowered from a pre-2006 recommendation of 180 for turkey. Many of us have become too dependant on the “factory installed” thermometer that comes in frozen birds these days. These are likely to err on the side of “over cooked.”


Click For Video

It is important to remember that internal temperature will indeed rise a bit while “resting” off the grill.

One universal tip is to watch for the juices to run clear but the best way to really know is by using an accurate instant read thermometer. You may already have an old dial faced version in your gadget drawer. In theory these are just fine and worked for many years; however I almost always find myself questioning the results. We prefer some of the really good digital instant read thermometer now available. In less than ten seconds you’ll really know what temperature you have.

Cooks Illustrated spends a lot of time researching and testing the best of the best and when it comes to thermometers they suggest a model made by Thermapen for about $80 (based on pin-point accuracy and quick respnse time). But there are a few less expensive models.

NOTE: If the thermometer you’re using needs to be “converted” from Fahrenheit to Celsius use this formula: Subtract 32 degrees from the (Fahrenheit) reading, then divide that number by 1.8. The result is the Celsius.

Primary Sidebar

Welcome To BBQTricks!

Hey Y'all... Thanks for stopping by. I'm Bill West. I blog about BBQ and occasionally country music. When it comes to BBQ I try to find solid time saving tips and tricks to make the grilling life a bit easier. It's life hacking for the backyard cooker. Read More…

Your Gateway to Barbecue Information

This site is a member of The Smoke Ring BBQ Webring A linked list of BBQ websites

Next BBQ Site - Next 5 BBQ Sites - Prev BBQ Site - Random BBQ Site

Join the BBQ ring or browse a complete list of The Smoke Ring BBQ Webring member's BBQ sites

If you discover problems with any of The Smoke Ring BBQ Webring sites, please notify the Ringmaster

fb

Footer

DISCLOSURE:

Posts on this site may contain affiliate links. If you purchase something via one of these links you won’t pay more but the site operator gets a small commission. Or as I like to call it: “beer money.”

Copyright © 2025 — Barbecue Tricks • All rights reserved.