• Skip to primary navigation
  • Skip to main content
  • Skip to primary sidebar
  • Skip to footer
  • Big Book of BBQ Tricks
  • Resources
  • Free E-CookBook / Newsletter
  • Smoking Meat 101 Book
  • BBQ Blueprint Book
  • Electric Smoker Cookbook
  • Wood Pellet Grill Smoker Book
  • Temperature Guide
    • Seafood
    • Pork
    • Poltry
    • Beef
  • About Me
  • Shop
  • Sitemap

Barbecue Tricks

BBQ Tips and Tricks

Archives for January 2013

January 28, 2013 Featured

Rotisserie Roasted Spiral Cut Pineapple

spit roasted pineapple

This recipe is simple.  But you need a proper rotisserie you are comfortable with.

bbq pineappleThe trick is to give the fruit some pizzazz with a nifty spiral cut.

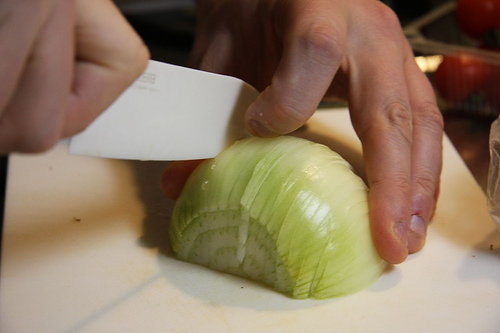
Peel your pineapple with a sharp knife and create a spiral pattern to remove all the unsavory “eyes” along the flesh of the fruit.  These ridges not only look really cool they act as a receptacle for the butter, sugar and cocoa “rub.”

We used a crystal cane sugar because it has a higher burn temperature and it will create a caramel crust.

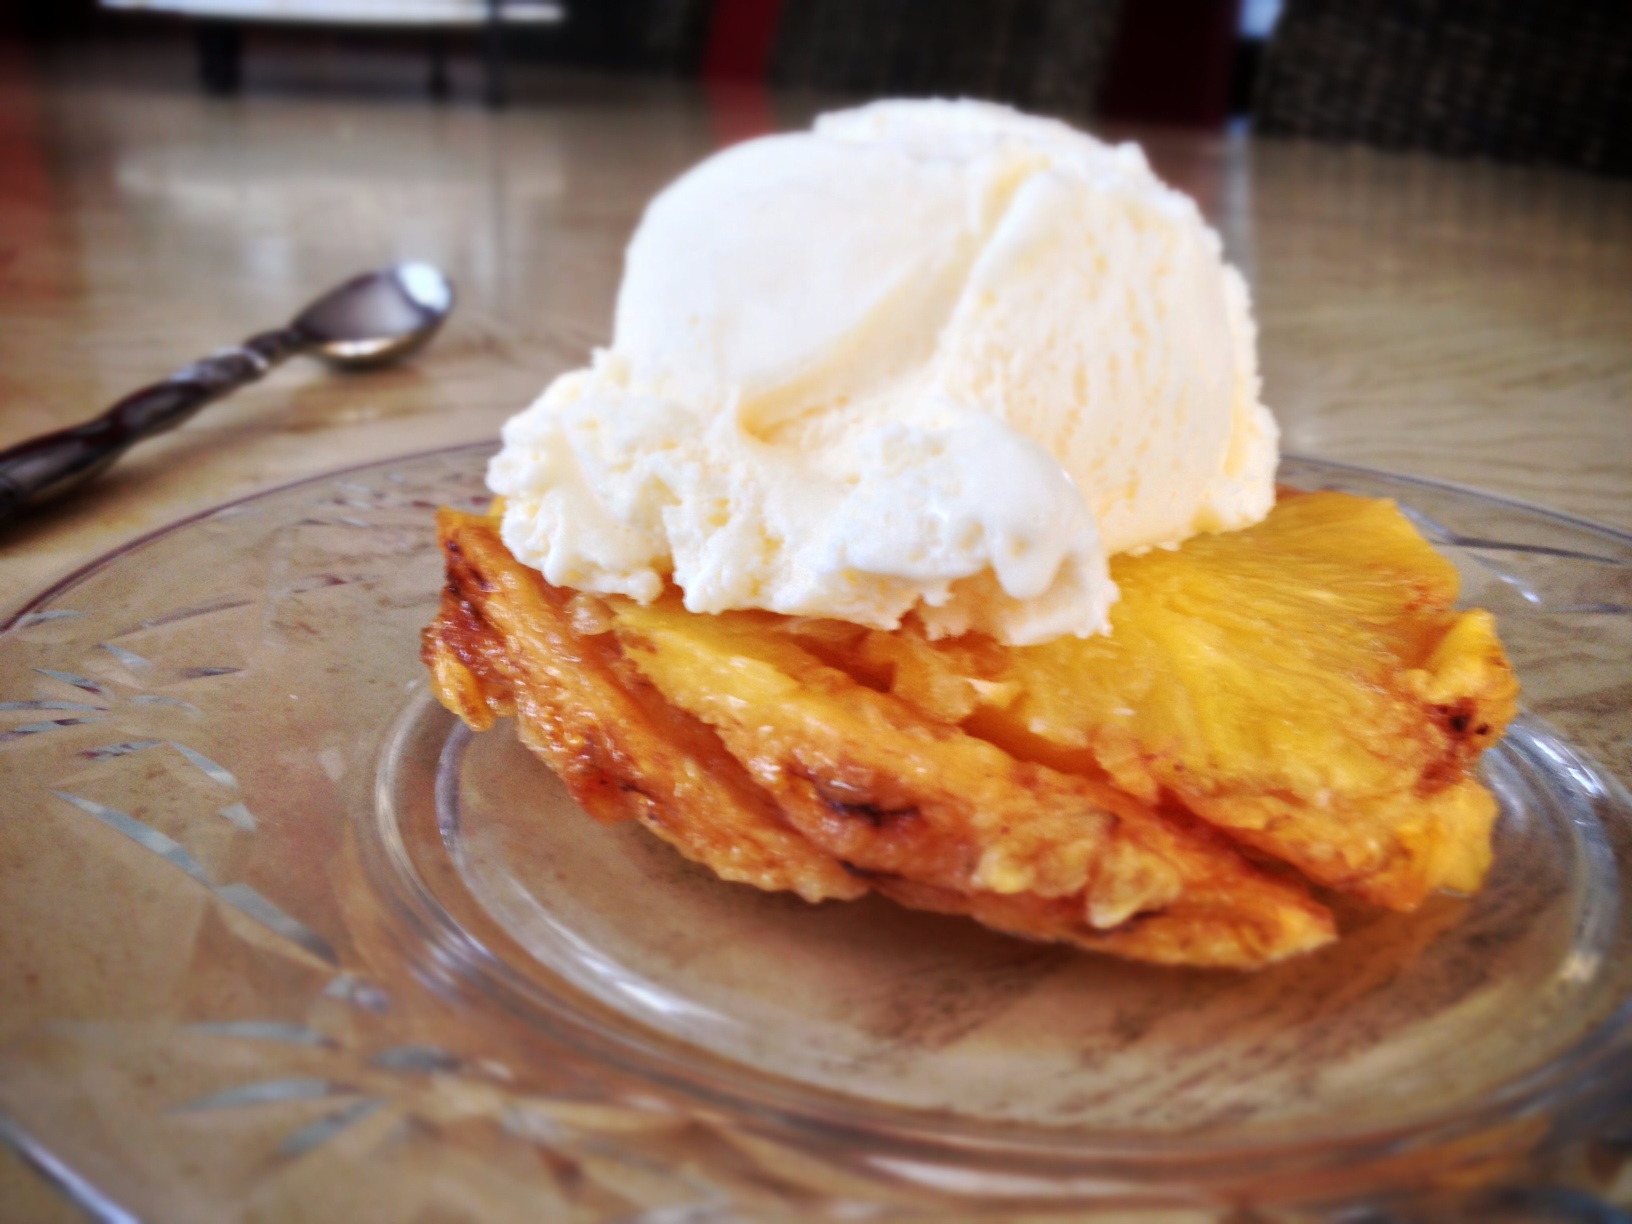
Slice in rounds right off the spit or slice and serve with a dollop of ice cream.  Your barbecue guests with think you are showing off and will love this flashy and delicious desert.


Print
Rotisserie Roasted Spiral Cut Pineapple

Rating: 51

Prep Time: 15 minutes

Cook Time: 1 hour

Total Time: 1 hour, 15 minutes

Yield: 7 thick slices

Serving Size: 1/2 inch rings

Rotisserie Roasted Spiral Cut Pineapple

Ingredients

  • 2 Tablespoons Cocoa Powder
  • 1 Large Pineapple
  • 1 stick of butter
  • 1 Cup Cane Sugar (Sugar In The Raw or Demerara Sugar)

Instructions

  1. Peel pineapple and carve spiral grooves for decoration and to hold sugar mixture. Rub with reserved melted butter, cocoa, and sugar.
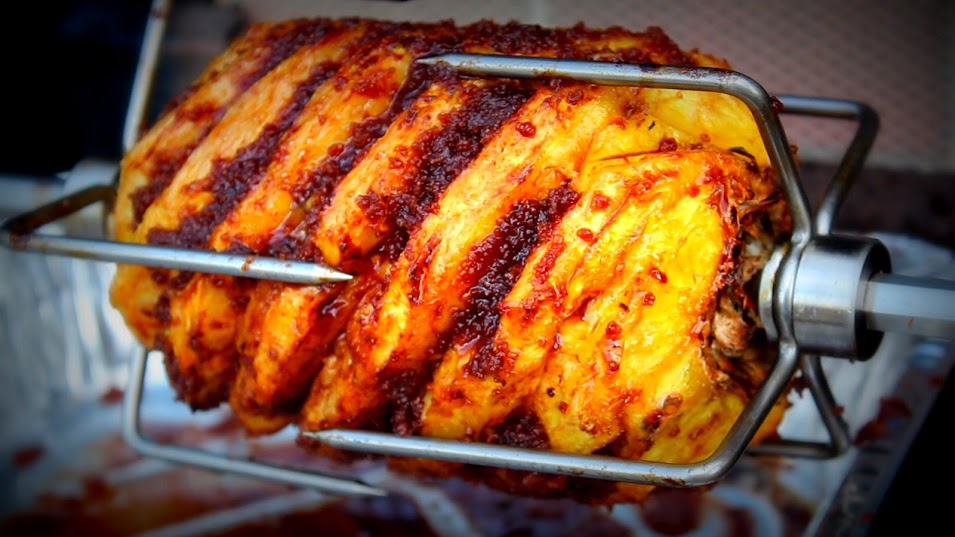
  2. Create "pilot hole" to help drive spit through core of the pineapple and secure with probes and pliers.
  3. Spit roast over a drip pan for 30 to 40 minutes and then coat generously with warmed and combined sugar, butter and cocoa mixture. Continue to spit roast and glaze until remaining paste is gone
  4. Slice and serve plain or with ice cream..
3.1
More Recipes at BarbecueTricks.com


January 27, 2013 Competitions

First Place Competition Chili

1st place chili recipe

I’ll be the first one to tell you I have limited experience in Chili cook offs.    But I tried my hand in a competition at my church this weekend and feel like I’ve come up with a trick for scoring first place in you next chili recipe competition.

Previously I posted a recipe for Third Place BBQ chili here.  Looking back to prep for my latest challenge I realized how lame it was.  Chili seasoning mix… pork loin… fresh tabasco peppers… It wasn’t very authentic (seasoning mix?) or practical (have you seen fresh  Tabasco peppers at the grocery?).

Chili powder ingedients

Chili powder ingedients

A quick call to Jack got me a great tip.  “Make your own chili powder.  You’ll have a better flavor profile than the store bought stuff,” he advised and sent me what had won for him in the past. I took his advice and am now convinced that using a hand crafted fresh batch of chili powder is a real game-changer.  I took first place against about twenty other chili’s I thought were really good too.

The Fist Place chili recipe is below but the real trick is the chili powder.  Fun and easy to make. Use those dried whole chilies you see at the store (you may want to mix and match if you cant find Guajillo, Arbol or Ancho) and toast /roast them briefly in a cast iron pan.  Be careful not to burn them and don’t choke on the potent fumes.  Pull the stems and grind with cumin seeds in a blender, coffee grinder, or spice grinder.  Simple.

arbol chili

Arbol Chiles

Try the recipe below and post in the comments how it fares for you.  It’s a winner. 2 oz. Ancho Chiles – dried and roasted 2 oz. Guajillo Chiles – dried and roasted 1 oz. Chile de Arbol – dried and roasted 5 tablespoons Cumin seeds – toasted and ground 2 tablespoons granulated garlic 4 tablespoons oregano 4 tablespoons smoked paprika Toast whole dried peppers and cumin seeds in a skillet until they slightly start to brown. Let cool and grind to a powder.

Add other ingredients and mix. Yields about two cups.


Print
First Place Competition Chili

Rating: 51

Prep Time: 10 minutes

Cook Time: 2 hours

Total Time: 2 hours, 10 minutes

Yield: 7 quarts or 20 cups

Serving Size: one to two cups

First Place Competition Chili

Home made chili powder is the tricks to making this chili a winner. Find the powder recipe at BarbecueTricks.com. Substitute other ingredients as needed.

This recipe is a chili cookoff first place winner.

Ingredients

  • 1 Tablespoon Cayanne pepper
  • 2 Tablespoons salt
  • 2 pounds pork (pulled or chunked)
  • 2 pounds ground beef
  • 1 cup homemade chili powder (see above)
  • 1 large onion, chopped
  • 1 head of garlic, minced
  • 3 large fresh Poblano peppers, fire roasted, seeded
  • 1 tablespoon smoked paprika
  • 1 tablespoon ground cumin
  • 4 beef bouillon cubes
  • 2 cans (28 oz.) crushed tomatoes
  • 2 bottles (12 oz) of robust beer
  • 2 cans (15.5 oz) of pinto or kidney beans

Instructions

  1. Saute garlic and onions until translucent. Add 1/4 of the meat and chili powder and brown. Salt the meat while cooking. Repeat until all meat is added. Add all other ingredients and simmer for one to two hours.
3.1
More Recipes at BarbecueTricks.com

January 27, 2013 Featured

Brunswick Stew – GrateTV

souper StewSuperbowl time means parties and cooking for friends.   GrateTV put together this SOUPerbowl Brunswick Stew.  We used leftover BBQ to create a great party dish.  Watch the full episode  and see how we made Brunswick Stew step by step HERE.

[button link=”http://gratetv.com/2013/01/brunswick-stew/”]Brunswick Stew Recipe[/button]

January 21, 2013 Featured

Home Made Brats and Sausage

grinding sausageGrateTV took an adventure into creating our own sausage with the Kitchen Aid grinder and sausage stuffing attachment.  Watch as we break it down step by step and find out  more on the step by step method HERE.

We’ve talked about preparing better bratwurst before and you can catch this video and more in our Brat Playlist

January 10, 2013 Recipes

3/2/1 Ribs – A Pitmasters Trick

The 3-2-1 method for ribs seems to be very popular in competition circles.  It’s a barbecue trick that has really caught on.

321 ribs in foilThe trick is to follow the 3-2-1 as time frames.

  • Smoke ribs for 3 hours naked (the ribs naked… but you can be naked too if you want)
  • Wrap the ribs in foil and return to grill for 2 hours (add a bit of liquid maybe brown sugar)
  • Unwrap and put the ribs back on for 1 hour to firm up the crust or “bark”

That’s it.  It’s a simple road map but worth noting that “your mileage may vary” depending on the exact heat of the cooker (base numbers assume holding a stable 225 degrees F) and the size of your ribs.  Practice with your key smoker to get it like clockwork.

I put the method to music.  Give it a look… 2 minutes to brand 3-2-1 into your brain.

January 8, 2013 Cook

No Cry Onion Cutting Tip

cutting onion

First cone out the root core. Flickr/MShades

We go through a bunch of onions at the BBQ Tricks test kitchens and we’re always looking for ways to keep from embarrassing ourselves in front of other good ole boy barbecue cook teams.   So we’ve been wondering if there was an easy way to avoid crying every time we cut an onion.

Lots of suggestions out there. You can wear swim goggles (and some do) or chop in front of a fan or cut under water… probably works.  We’ve even heard that clenching a smoking wooden match stick in your front teeth helps (kinda embarrassing) .   but when we saw this old Life Hacker post it got our attention.

The idea is suggestion is to avoid the toxic fumes you first  just cut out the root end in a cone.    That’s where the “gland” for the toxic fumes are.  Make the cut about a third of the diameter of the onion and about a third deep.  Once it’s out dispose of it immediately and get to choppin’ like “normal.

Other suggestions include  are using milder onions (like a sweet onion from Vidalia, Georgia) or wiping you knife with lemon juice before cutting.

BS?   Do you have a  way that works for you?  Share with us in the comments below.

January 4, 2013 Tricks

DIY: How to Replace Burners on a Gas Grill

DIY: How to Replace Burners on a Gas Grill

gas burner replacement

Flickr / Lantzilla

By Apryl K Padron

No matter what brand gas grill you have eventually you will have to replace the burner. Fortunately finding burners and other gas grill accessories isn’t difficult. They can usually be found at any store selling grilling accessories. It’s easier and cheaper to buy grill accessories online. Using your computer makes it easy to find high quality gas grill accessories at a good price.

Once you have purchased the right BBQ grill accessories you are ready to begin taking out the old burner and installing the new one. The process is relatively simple. It does not require any special training or expensive tools. All you need is a well lit area, an adjustable wrench and the ability to follow simple instructions. It is also important you do not rush. You are working with gas so there is an element of danger. But the average person can safely replace the burner on their gas grill in a few minutes with no trouble at all.

The first step is to turn off the gas leading to the grill. This has to be done at the connection between the grill and the main gas line. For the average gas grill all the person installing the replacement burner has to do is locate the LP tank’s nozzle and close it. Normally this can be done by simply pushing a lever. Check your owner’s manual if you are not sure where the nozzle and the lever used to close it is located. If the lever is rusted or otherwise difficult to turn you may have to place it as well.

Once you have located the LP’s tank nozzle and turned off the gas, the next step is to make sure there is no gas in the system. Sometimes working to remove the burner may create a spark so making sure there is no gas in the line is very important. To do this vent the any additional gas in the lines by simply turning on one of the other burners on the gas grill for a few minutes and allowing the gas to leak out. While you are waiting for the gas to leak out you can use the time to carefully take of the grill grating.

Once the gas has been vented out of the line and the grill grating has been removed you are now ready to locate the nut that holds the burner in place. You can do this by tracing the main gas line on the grill. The burner is usually held in place by a brass nut. Depending on the model gas grill you have you may need to lift the grill slightly to find the nut. Lifting the grill will also make it easier for you gain access to the nut. Once you have located the nut you are ready to begin the process of removing it.

For the next step you will need to use your adjustable wrench. Generally the brass nut is on fairly tightly. Place the adjustable wrench on the brass nut and turn it to the left or counter clockwise. You may need to apply a fair amount of pressure to get it to begin to loosen. Continue to turn the nut until it comes all the way off. Once you have removed the nut taking off the burner should be easy. Simply pull upward. Within seconds the burner should release itself from the gas line. You have now reached the halfway point. You can take a few seconds to see if the burner is indeed clogged or damaged.

Next place the new burner on top of the gas line and replace the brass nut. Carefully turn it to the right (clockwise) to make sure the threads on the brass nut are properly aligned with the threads on the gas line. You will know the threads are properly aligned and not cross threaded if the brass nut turns easily. Continue to tighten it with the adjustable wrench until the nuts can no longer move.

Next turn the gas on. Listen to see if any gas is leaking out. You should be able to smell any leaking gas. If there is no leak the job is done.

Article Source: http://EzineArticles.com/?expert=Apryl_K_Padron
http://EzineArticles.com/?DIY:-How-to-Replace-Burners-on-a-Gas-Grill&id=7426878


January 3, 2013 Featured

Hand and Tooth Pick Temperature BBQ Trick

Grill Marks

Grill Marks

Don’t have a meat thermometer and need a way to know just the right time to pull the steaks off the grill?  Use this simple BBQ Trick that we call the OK Handy method for using the ball of your thumb to determine if your BBQ meat is Rare/ Medium / or Well Done.   It’s easy… plus how to use a toothpick to test the doneness of ribs.  More on the tip HERE or watch the video here.

Primary Sidebar

Welcome To BBQTricks!

Hey Y'all... Thanks for stopping by. I'm Bill West. I blog about BBQ and occasionally country music. When it comes to BBQ I try to find solid time saving tips and tricks to make the grilling life a bit easier. It's life hacking for the backyard cooker. Read More…

Your Gateway to Barbecue Information

This site is a member of The Smoke Ring BBQ Webring A linked list of BBQ websites

Next BBQ Site - Next 5 BBQ Sites - Prev BBQ Site - Random BBQ Site

Join the BBQ ring or browse a complete list of The Smoke Ring BBQ Webring member's BBQ sites

If you discover problems with any of The Smoke Ring BBQ Webring sites, please notify the Ringmaster

fb

Footer

DISCLOSURE:

Posts on this site may contain affiliate links. If you purchase something via one of these links you won’t pay more but the site operator gets a small commission. Or as I like to call it: “beer money.”

Copyright © 2025 — Barbecue Tricks • All rights reserved.