• Skip to primary navigation
  • Skip to main content
  • Skip to primary sidebar
  • Skip to footer
  • Big Book of BBQ Tricks
  • Resources
  • Free E-CookBook / Newsletter
  • Smoking Meat 101 Book
  • BBQ Blueprint Book
  • Electric Smoker Cookbook
  • Wood Pellet Grill Smoker Book
  • Temperature Guide
    • Seafood
    • Pork
    • Poltry
    • Beef
  • About Me
  • Shop
  • Sitemap

Barbecue Tricks

BBQ Tips and Tricks

Blog

February 15, 2015 Sauces

57 Ketchup Trick Relieves Sauce Anticipation

57ketchup
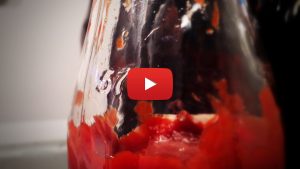
We thought everyone knew this ketchup trick but have been surprised how may people didn’t know about the “57 Ketchup trick” where you hit the 57 on the bottle of ketchup to release the sauce/ketchup from it’s glass prison.  We tested the 57 ketchup bottle trick HERE…

Maybe it’s because the classic glass ketchup bottles are so hard to find.  We had trouble locating anything NOT plastic for this video.

The question remains was the “57” branded on the bottle to actually be used for this purpose or happy accident?

Interesting that Henry Heinz came up with “57 Varieties” from looking at a shoe store slogan.   Some say there were already over 60 sauce varieties at the time but the 5 and 7 were he and his wife’s favorite numbers.  Thank you wikipedia.


https://barbecuetricks.com/wp-content/uploads/2015/02/ketchup_small.mp4

February 7, 2015 Featured

Dry Ribs at Rendezvous

dry_rib_video Dry ribs vs wet ribs is a big argument in barbecue.  The winner of the debate (if there can really be ANY loser when it comes to eating BBQ ribs) is – without a doubt – The RENDEZVOUS.

Memphis Tennessee is the home of the blues – some say the birthplace of rock n’ roll,  Beale Street, Graceland – Sun Studios and The Peabody Hotel (love the Ducks).       And if you traveling are looking for the world’s best BBQ you can surely find contenders in this great southern city.   In fact, down one aromatic alleyway is where You can find what some BBQ say are the worlds best Memphis dry rub ribs (or Memphis style dry ribs).  Dry and savory – still juicy – with seasonings on top and a puddle of vinegar below.

Walk  down this dark (just slightly scary) alleyway – just down from the elegant Peabody Hotel  and Union Ave. and you’ll discover the world-famous Rendezvous… The mother church of dry ribs. Legendary Charcoal ribs they say. Watch Video of our Rendezvous
visit
.

It’s certainly not fancy fare but definitely World class.  You can smell the charcoal BBQ smoke as you enter the dark entrance down age old steps to the historic Rendezvous basement… There is not unusual to find people taking cell phone photos of their food and getting messy (you can eat up stairs too but make sure you take a peek at the history below).

One look inside you can see bow tied waiters with white shirts  bow ties – the same waiters that have likeley work the room for decades -some over 40 years – and on the walls is memorabilia about visits from presidents and performers alike ranging from George Bush to… Elvis and even Jerry Lee Lewis.

Charlie “Mr. Downtown” Vergos opened this place in 1948. Sadly he passed in 2010 but  some of the traditions in the restaurant and even menu items he’s menu items seem to remain today.    The house appetizer is still a sausage and cheese platter.

The Rendezvous barbecue trick is roasting the slabs of ribs one to two feet directly over high heat from hardwood charcoal… For about an hour or 30 minutes per side… Then mopped with a light vinegar sauce and coated with a dusting of spices.  It’s called rendezvous “seasoning” not “rub” because it’s sprinkled on not rubbed in…

The seasoning is paprika based but also features whole celery seed, yellow mustard seeds allspice and coriander too – get the detailed recipe at BarbecueTricks.com search rendezvous

The now coveted dry spices were influenced by Greek roots made its way to the ribs that we are for fire roasted over a charcoal shoot

And they go through a ton of ribs-  One of the benefits of going to the restaurant in person he’s being able to see the magic happen in the hustle and bustle of the smoky open kitchen…  ribs are tossed on bone side down to protect the meat –  Charcoal broiled over high heat in a retrofitted coal chute.  The fuel source is famous… 100% hardwood charcoal…   flipped after about 30 minutes and constantly mop with a mixture of vinegar and spices in the end they get a good coating of rendezvous seasoning that sprinkled on not rubbed in…  Featuring lots of Paprika some coriander Greek influences but less salt than you would expect from a barbecue rub it makes for the perfect bite–

dry rendezvous ribsHere’s a close recipe:

4 tablespoons American paprika
4 tablespoons powdered garlic
2 tablespoons mild chili powder
1 tablespoon fresh ground black pepper
2 teaspoons whole yellow mustard seed
1 teaspoon crushed celery seed
half tablespoon whole celery seed
1 half tablespoon whole allspice seeds
1 dash ground allspice
1 half tablespoon whole coriander seed
1 half teaspoon ground coriander

It’s served with brown sugar and bacon baked beans and mustard tinged coleslaw…

Served on paper but with a white cloth napkin…

I ordered the large order of ribs it was about 19 dollars
And if you can’t make it to Memphis you can still get a taste of rendezvous via their lucrative website at http://hogsfly.com where they ship ribs across the country overnight via FedEx…

If you can plan ahead with a group call ahead and ask about their skillet of shrimp

The restaurant is closed on Sunday so be careful how you plan your weekend…


Print
Dry Ribs at Rendezvous

Dry Ribs at Rendezvous

Ingredients

  • 4 tablespoons American paprika
  • 4 tablespoons powdered garlic
  • 2 tablespoons mild chili powder
  • 1 tablespoon fresh ground black pepper
  • 2 teaspoons whole yellow mustard seed
  • 1 teaspoon crushed celery seed
  • half tablespoon whole celery seed
  • 1 half tablespoon whole allspice seeds
  • 1 dash ground allspice
  • 1 half tablespoon whole coriander seed
  • 1 half teaspoon ground coriander

Instructions

  1. The real trick here is to cook the ribs hot and fast over hardwood charcoal (Royal Oak?) and the seasoning is not rubbed in but adheres thanks to a flavorful splash of a light vinegar sauce. You may wish to crush the whole seeds in a mortar and pestle before blending.
3.1
More Recipes at BarbecueTricks.com


https://barbecuetricks.com/wp-content/uploads/2015/02/rendevous_small.mp4

February 1, 2015 Butcher's Guide

Guide to Beef Cuts

A Guide to Beef Cuts for Homemakers

beef cuts

Photo:flickr.com/photos/eprater

By Anne Del Rio

What do you look for in meat especially beef? One is freshness. The other is tenderness. Many consumers go to the supermarket, buy the beef and bring it home in a plastic pack. In most cases, you cook the beef without even knowing what part of the cow it came from. Yet, it is advisable that you know the primary beef cuts. This helps in preparing meals and learning cooking techniques for meat.

For a start, prime cuts especially for steaks are more expensive than less desired parts. A smart cook should also know the techniques in making beef more tender and sumptuous. Nonetheless, some mouth-watering flavors also come from inexpensive cuts such as the flank steak. Simply learn the technique in making the meat soft. Some of the most popular beef varieties are the tenderloin, rib, chuck, shank, sirloin, loin, brisket, and round.

Filet mignon or the small and soft boneless steak comes from the tenderloin. While the name sounds French, this beef cut is a favorite of many nationalities. It is said to be the most sumptuous part with authentic silky-smooth consistency as well as less fat content. Sirloin comes from the cow’s rear beyond the loin. It may not be as tender as the loin but it is still well-liked by beef lovers. You can grill, pan-fry, or broil this meat cut.

Ribs are less inexpensive than the sirloin. However, fat content is higher. Strips of fact can be found in this lean meat. Skip the sauce because of the delicious flavor. Simply put some salt and pepper while cooking. Rib eye steaks are normally cut to one inch and 1/2 up to two inches. In fact, the rib consists of some of the finest cuts like prime, short and rib eye roasts. Cooking should be done longer over dry heat. It is perfect for smoking and grilling.

Shank is located at the front part of the brisket or breast. This particular beef cut has a lot of collagen. It is used in various recipes that require gravy sauce. Shank is normally sold as one whole along with the entire bone. However, it can also be cooked as ground beef. It is perfect for moist cooking. Make sure that the bone is still attached. At times, the shank is seen in a cross cut with the meat attached to it. The fibrous protein is emitted during the cooking process. Shank is usually used in preparing broth and soup.

If you are looking for meat wholesalers in Perth, call the top butchers in Western Australia, McLoughlin Butchers Western Australia, by clicking on this link: www.mcloughlinbutchers.com.au.

Article Source: http://EzineArticles.com/?expert=Anne_Del_Rio
http://EzineArticles.com/?A-Guide-to-Beef-Cuts-for-Homemakers&id=8815261


January 27, 2015 iTunes

Trick to Peeling Roasted Peppers (it’s in the BAG)

pepperroast.Still003If you’re a fan of great bbq you already know fire roasting does something magical to food. It brings out deep rich flavors in everything from meat to veggies – in fact these days one of the most popular foods to fire roast is the sweet bell pepper.

But fire roasting and peeling roasted peppers at home can be a pain.. Lots of picking and sometimes you’re forced to rinse off flavor along with pesky skin under the tap… we stumbled upon a little trick that can help make the process easy and a less of a mess. All you need is a paper lunch bag.

One of the things hat make bell peppers so popular is the great color they bring to a dish…. We love the red but green Orange… Even purple work too… They store great in the refrigator crisper drawer too… Red peppers area also a favorite because they pack a nutritional punch from ripening on the vine longer. -loaded with vitamin a and c along with folate – all good for pregnant women (so we hear)..

Once you fire roast these guys you get an intensely rich, sweetness with a juicy – almost velvety texture…
You can bake them in a hot oven -400 degrees or so- but since we like to work with live fire – we recommend cooking right on top of live hardwood coals… It’s ok to let them get really black and rotate them around with tongs to char on all sides…

The only thing that’s cooler than cooking directly on live coals is watching your bbq guests react in shock to the scene of you tossing their dinner into the fire!  Roasting with this kind of direct high heat really enhances the char on and under the skin The pepper skin is actually pretty resilient…

And once you’re convinced you have unlocked some of the deep flavors – shake, tap or brush off any residual embers or ashes. And drop the pepper into a regular old lunch bag... Or for some of you that would be the ba from the liquor store… Seal it up and let it rest or for ten minutes… Long enough to let the steam do its trick…
Pretty simple… You can shake it up and and just use the bag to pull the skin off — nice and easy… You won’t believe how easy it peels right off and keeps the trashy skin right in the bag…

Fire Roasted sweet peppers peeled easily with no picking with this paper bag trick… With easy clean up too.

Got a better way to peel a pepper… share in the comments please!


https://barbecuetricks.com/wp-content/uploads/2015/01/pepperroast_small.mp4

January 4, 2015 Featured

Red Velvet Cake Roll

Oh, I know it’s not BBQ… but this looked so good we had to share the awesome recipe and How to for Red Velvet Cake rolls…

red velvet cake roll


RED VELVET CAKE ROLLS

·         1/4 cup powdered sugar

·         4  eggs , separated

·         1/2 cup plus 1/3 cup granulated sugar, divided

·         1 teaspoon vanilla extract

·         2 tablespoons (1-oz. bottle) red food color

·         2/3 cup all-purpose flour

·         1/4 cup cocoa

·         1/2 teaspoon baking powder

·         1/4 teaspoon baking soda

·         1/8 teaspoon salt

Cream cheese filling:

·         8 oz. cream cheese,

·         1 cup powdered sugar

·         1 cup pecans, finely chopped


1.      Heat oven to 375°. Line 15-1/2×10-1/2×1-inch jelly-roll pan with foil; generously grease foil. Sprinkle linen or thin cotton towel with 1/4 cup powdered sugar.

2.      Sequence 01.Still007Beat egg whites in large bowl until soft peaks form; gradually add 1/2 cup granulated sugar, beating until stiff peaks form. Beat egg yolks and vanilla in medium bowl on medium speed of mixer 3 minutes. Gradually add remaining 1/3 cup granulated sugar; continue beating 2 additional minutes.

3.      Place red food color in liquid measuring cup; add water to make 1/3 cup. Stir together flour, cocoa, baking powder, baking soda and salt. Add to egg yolk mixture alternately with colored water, beating on low speed just until batter is smooth. Gradually fold chocolate mixture into beaten egg whites until well blended. Spread batter evenly in prepared pan.

4.      Bake 12 to 15 minutes or until top springs back when touched lightly in center. Immediately loosen cake from edges of pan; invert onto prepared towel. Carefully peel off foil. Immediately roll cake and towel together starting from narrow end; place on wire rack to cool completely.

5.

This is how we roll...

This is how we roll…

Prepare cream cheese filling. Carefully unroll cake; remove towel. Spread filling over cake. Reroll cake without towel. Wrap filled cake with wax paper and wrap again with plastic wrap. Refrigerate with seam down at least 1 hour or until ready to serve. Just before serving, sprinkle top with additional powdered sugar. Drizzle with chocolate syrup and garnish with finely chopped pecans. Cover and keep refrigerated. Makes 8 to 10 servings.

Cream cheese filling: Beat 1 package (8 oz.) softened cream cheese, 1 cup powdered sugar, 6 tablespoons softened butter or margarine and 1 teaspoon vanilla extract in small mixer bowl until smooth.


Click and Watch Video

Click and Watch Video

December 19, 2014 Recipes

Chewy Mexican Brownies

Gotta have dessert, right? Might as well have a kick! Try these taste-tempting pleasers next time you’re up to take a quick dessert somewhere. Want a hint for putting the “chew” in your brownies? Use both butter and vegetable oil as we’ve done here.

Chewy Mexican Brownies
1/3 cup cocoa
1 1/2 tsp cayenne pepper
1/2 cup boiling water
2 ounces bittersweet chocolate, finely chopped
1/2 stick butter
1/2 cup vegetable oil
4 eggs
2 tsp vanilla extract
2 1/2 cups sugar
1 3/4 cups all-purpose flour
3/4 tsp salt
6 ounces semisweet chocolate morsels

Preheat oven to 350 degrees. Line pan with two generous pieces of foil with excess all edges hanging over the sides (for easy pan removal). Spray with nonstick cooking spray. Stir cocoa, cayenne pepper and water together adding up to 2 additional tablespoons of water if needed to get a smooth consistency. Add bittersweet chocolate pieces and blend until melted. Whisk in melted butter, oil, eggs and vanilla until smooth. Blend in sugar, then flour and salt. Lastly, fold in semisweet chocolate chips and pour into baking pan. Use metal if possible as glass dishes retain heat and continue cooking after coming out of the oven. Bake 30 – 35 minutes. When completely cool (an hour), gently remove brownies using foil. Cool further if necessary before cutting into squares and serving.

Option: For an entirely different taste, substitute 1 1/2 teaspoons of instant espresso for the cayenne pepper.

ENJOY!

November 23, 2014 Gadgets

BBQ Tool Hacks

Shopping for new BBQ gear?  Here are a few “Tool hacks” that you can use

when visiting your local Home Improvement store.

Watch HERE

Ready for Thanksgiving? Try Rolling YOUR BIRD:


rotissthis


brush

November 23, 2014 Gadgets

Rotisserie Chicken and Rotisserie Turkey

rotissthisCLICK FOR VIDEO There’s something about a rotisserie chicken.

They’re everywhere these days in supermarkets – slow roasting by the dozen on display in industrial cookers the size of your guest bedroom. But the truth is if you have a rotisserie kit (it may have come with that fancy new grill and is now in a box in the attic somewhere) it’s actually pretty easy.

Every attempt we made with our gas powered Sam’s Club spit and electric motor set up ended with incredibly succulent and golden brown bird.

There’s only about four ingredients.

Here’s an updated video overview using turkey: http://youtu.be/xqB5mLKevxI First start with a clean bird – Chicken and small Turkey seem to work equally as well. Rub lightly (watch for too much salt) with BBQ Tricks house seasoning UNDER the skin and over the entire outer surface of the skin. Rub seasoning generously inside the cavity of the bird (remove any “spare parts.” Let the bird rest (upright if possible) uncovered in the refrigerator for about four hours to allow the seasoning to take and also to dry the skin a bit (this helps to crisp the skin later). My hunch is you could bypass all the above and still have an incredible meal but the little things do make a difference. Remove the bird and let it come to room temperature about an hour before you plan to cook. two or three hours before you plan to serve. Before you put the chicken or turkey on the spit mark the location of the grill’s burner with two marks (with a Sharpie Permanent Marker) so you’ll always know exactly where to slide the meat in the future. The most important thing to accomplish is to balance and secure the bird firmly on the rotisserie prongs so that the entire mechanism rotates smoothly on the spit. Use trussing to help if needed. Test it by rolling the spit ends on a flat surface or even on your hands. After you have it on a hot grill it’s very difficult to adjust. Also use pliers to secure thumb screws. You don’t want an end to slide.

rotisserie poultryFinally make sure the spit is secure in the motor mechanism. Confirm there is no way for it to slide out (does it sound like it happened to me?)! After you start the spin and cook come back and sight check everything after five minutes. Let it Cook til golden brown checking infrequently for one to two hours. Our 4.72 lbs chicken took just over two hours.

When golden check the temperature with a good thermometer and remove to a cutting board to rest. BBQ Tricks House Seasoning 2 Tablespoons Kosher Salt 1/2 Tablespoon Fresh Ground Black Pepper (grinding is a little bit more work but worth it) 1/2 Tablespoon Garlic Powder add Paprika for color

November 18, 2014 Featured

Oyster Months – Oyster Roast Months

Planning an oyster roast? If you need to remember the peak months for oysters and oyster roasts just keep this in mind…

Talk like a pirate!!!

oyster It used to be said that you shouldn’t consume oysters in months without the letter R but due to commercial harvesting and modern refrigeration and other factors it’s just not as big an issue these days unless you’re actually harvesting yourself. Still it’s good to remember that the summer months – that is for most of us watching this episode – are the spawning months for oysters & the meat just isn’t as good – due to how they reproduce the flesh ends up with the a thinner milky texture.

Off season oysters will probably not be as readily available as they will be just due to traditional seasons and when you do find them the price won’t be as good as the R months but don’t be afraid if you see it on a menu in a nice restaurant.

Easy to remember–the Pirates favorite letter is “R” or AAAAhhhhhhrrrrrrrrRRRRR.     Peak months for oysters are September to April when they’re at their best —but for that reason traditional oyster roast are always in colder months they contain the letter “R”– September, October, November, December, January, February, March, April.

In South Carolina the tradition is to steam oysters not really literally “roast” them but steam them on a flat metal pan under wet burlap bags…

Oyster – roast -( the word roast starts with the letter R by the way) the Pirates favorite letter something to remember. for more tips tricks other fun stuff head on over to www.barbecuetricks.com


October 26, 2014 Featured

BBQ Pumpkin for Halloween? Watch This!

stuffed pumpkinEnjoy the Fall harvest on the grill with a fun way to grill a pumpkin for Halloween.   It’s a tasty stuffed pumpkin (or acorn squash) that’s tailor made to warm up a chilly Autumn eve.

Happy Halloween and may you get more treats than tricks!

  • « Go to Previous Page
  • Page 1
  • Interim pages omitted …
  • Page 6
  • Page 7
  • Page 8
  • Page 9
  • Page 10
  • Interim pages omitted …
  • Page 42
  • Go to Next Page »

Primary Sidebar

Welcome To BBQTricks!

Hey Y'all... Thanks for stopping by. I'm Bill West. I blog about BBQ and occasionally country music. When it comes to BBQ I try to find solid time saving tips and tricks to make the grilling life a bit easier. It's life hacking for the backyard cooker. Read More…

Your Gateway to Barbecue Information

This site is a member of The Smoke Ring BBQ Webring A linked list of BBQ websites

Next BBQ Site - Next 5 BBQ Sites - Prev BBQ Site - Random BBQ Site

Join the BBQ ring or browse a complete list of The Smoke Ring BBQ Webring member's BBQ sites

If you discover problems with any of The Smoke Ring BBQ Webring sites, please notify the Ringmaster

fb

Footer

DISCLOSURE:

Posts on this site may contain affiliate links. If you purchase something via one of these links you won’t pay more but the site operator gets a small commission. Or as I like to call it: “beer money.”

Copyright © 2025 — Barbecue Tricks • All rights reserved.