• Skip to primary navigation
  • Skip to main content
  • Skip to primary sidebar
  • Skip to footer
  • Big Book of BBQ Tricks
  • Resources
  • Free E-CookBook / Newsletter
  • Smoking Meat 101 Book
  • BBQ Blueprint Book
  • Electric Smoker Cookbook
  • Wood Pellet Grill Smoker Book
  • Temperature Guide
    • Seafood
    • Pork
    • Poltry
    • Beef
  • About Me
  • Shop
  • Sitemap

Barbecue Tricks

BBQ Tips and Tricks

Featured

October 27, 2012 Cook

Warning! What You Need To Know about Grease Fires

Grease fires are unfortunately an all too common danger in the cooking, and especially the barbecue, and live fire outdoor kitchen environment. Meats marbled with fat, and poultry dripping oil directly on to an open flame can cause real problems for the apathetic pit master. When you set out to grill use extra caution with high fat content meats like ground beef, sausages and skin on meats like chicken and pork.

Of course you should never leave any open flame unattended. It takes mere moments for flare ups to run out of control. By the time you walk inside the house to get a beverage in the refrigerator you could have a blaze on the kettle grill.

First, if you expect dripping oil or any pooling grease at all consider using a drip pan and an indirect heat source (off set flame or coals) before you cook.

Place a sturdy aluminum pan filled with water (juice or beer may be nice) under the grate beneath the meat or drips. This will avoid major flare ups and protect succulent meats from over cooking. Indirect heat like this is usually desired for cuts thicker than the palm of your hand.

Second, make sure you start with a clean grill. A dirty grill can mean pooling oil and grease that can ultimately flare up.

Third, have a dry chemical fire extinguisher handy whenever grilling. It’s O.K. to use the one temporarily from the kitchen (you DO have one in your kitchen right)? Baking soda can also be used to stop a small grease fire. You may need a lot (and baking flour!)

Fourth, NEVER spray water on a grease fire. It will most likely flare up and spread.

Fifth, In the kitchen you can often cover a grease fire with a pan lid. to cut off oxygen. This is very difficult on a grill grate. A heavy wool or flame retardant blanket can sometimes smother a flame.

And finally do not try to move the flaming material. Turn off the burners and if all else fails get away and call 911.

Flare ups can be a real danger with live fire cooking. Keep charcoal grills off wood decks and all grills clear of vinyl siding. In fact its good practice to remove any and all flammable material at least ten feet away from active and hot grills and barbecues. This includes the ground (dry grass can catch fire in an instant in the dry summer months). Use some advance planning and keep it safe.

October 25, 2012 Featured

Bacon Wrapped Stuffed Turkey on GrateTV

Jack Waiboer creates an Ostrich Egg recipe that you’ll want to try on the Grill. Stuffed Turkey rolled up in a crispy Turkey Bacon weave. It’s a poultry explosion. Full recipe here at http://GrateTV.com search “ostrich egg.”

ostrich turkey egg

Bacon Wrapped Stuffed Turkey Breast

October 24, 2012 Featured

See How Easily You can Assemble Your Brinkmann Smoker

brinkmann smoker


If you are looking for an affordable smoker that is easy to operate the Brinkmann Gourmet Charcoal Smoker and Grill is a good choice.

This Brinkmann model (Model # 852-7080-0) is as inexpensive as smokers get so it’s a common choice for a first time smoker.    I was first turned on to the Brinkmann line with the electric model and am now on my second Gourmet Charcoal model.   My trick is to take advantage of the identical parts across the smoker line.   The Gourmet line uses the same size ceramic coated drip pan (despite durability these pans can really wear) grill grates and lids.  The charcoal model is available in black and dark green.

The smokers retail for less than $90 on Amazon – HERE and you can’t find a better deal.

One warning is that there is substantial assembly required.  Give it an hour and you’ll be ready. See my assembly efforts here.

The smoker features a basic thermometer to give you a general idea on when to reload.  However there is no real method to adjust airflow and temperature.  Still, it does the low and slow job.

Use care to clean the charcoal pan, grates and drip pan as these will quickly corrode.  The grates tend to rust quickly but are replaceable with grates for about $8 from Brinkmann.  The affordable grill cover is also recommended.

Use caution swapping parts from the electric model for charcoal use as the paint on the electric smoker seems to break down with high heat.

I have used the Brinkmann in backyard cooking with ribs, chicken, turkey, brisket and pork butts as well as competition ribs and pork butts and it is a nice portable choice.  Note: KCBS (Kansas City BBQ Society) and other competition sanctioning groups require wood or charcoal so the electric model is not an option to compete).

Some seasoned cookers highly recommend the Weber Smokey Mountain cooker as a competition tool.  It is also a good choice but  available at a higher price point.

Brinkmann describes the smoker as:

The Gourmet Charcoal is our top-of-the-line double grill charcoal water smoker. It has two chrome plated steel cooking grills for a 50 pound cooking capacity. The smoker body lifts off the base for easy access to an extra-large charcoal pan, and also allows for quick and easy conversion to a waist high barbecue grill. A heat indicator in the lid eliminates guesswork. Features include porcelain coated steel water pan, front hinged door for easy access to water and charcoal pans, and wooden handles that stay cool to the touch. Includes heavy-duty outdoor vinyl cover.


In summary this smoker is a solid and affordable performer and is somewhat interchangeable with similar models.  A good, easy to use,  smoker for the beginning or intermediate BBQ cook.

October 20, 2012 Featured

Now You Can Have a Star Wars Smoker for less Than 200 Bucks

star wars grill

R-2-B-Q

One trick to great BBQ smokers is that you can build a cooker all on your own for less than $200 by constructing an Ugly Drum Smoker. A “U.D.S.” as some call them.

“If you don’t include the lid you’re talking under $100″ says Seth Watari from Southern BBQ Network.  Watari suggests a search on Craigs List to find deals on the Lids.   Best to find cast-offs from Weber 22” Kettles. Thaey are just the right size for the 55 gallon drums.

Watari very successfully competes in cook-offs throughout the South East and the UDS cookers work great.   His “R-2-BQ”  Star Wars themed smoker recently brought home the grand championship in Best Of Berkeley.   One suggestion: Use high temperature paint where you can to customize. “I use a paint that withstands up to 500 degrees and if your cooker gets over 500 degrees – the paint is the least of your worries.”

One more advanced modification is the thermometer / fan control.  One very popular brand is the BBQ Guru.  The gizmo has advanced features including smart phone control.

The Ugly Drum Smokers are common on the BBQ circuit and you can find more details on how to construct your own HERE.

October 19, 2012 Featured

The Money Muscle Secret

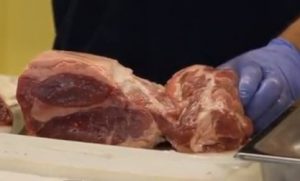
Two Pork Butts with Money Muscle circled. Note fat stripes.


It’s a BBQ secret weapon.  If you’ve ever judged a BBQ contest you may be familiar with what’s called “the money muscle.”  Using it in a judged box is a bbq trick that has become well known.

It’s named “money muscle” because a lot of competitive cookers think it’s the best tasting part of the Boston Butt (or pork butt) and is essential on winning the top level money in pro cook-offs.

How do you find the money muscle? Look at the opposite end of the bone.  It’s tube shaped (with striations and stripes).  You’ll see the bands of fat evenly spaced along the muscle.  When fully cooked that fat should easily melt away and render to provide almost a mini loin that cookers will slice and present in a blind box for competition.       It’s located high on the pork shoulder (read “high on the hog”) and is the beginning of the loin.

That muscle just doesn’t get worked much so it’s super tender.

money muscle

Butt with Money Muscle trimmed for competition cooking

Cookers will also promote bark creation around the money muscle by trimming around the muscle and using a good rub.  Some competitions will disallow full separation from the rest of the but while cooking so often it is carved so  it is still connected.

“You have to trim it up so it’s nice and round and it’s kinda like a little loin.  The great cooks really use that muscle to really showcase their meat” according to champion Pitmaster Jack Waiboer.

The money muscle will cook faster than the rest of the butt (shoot for 180 degrees for the muscle 195 for the rest of the butt).  Once done, the log shaped muscle can be sliced into medallions and presented beautifully in the turn in box.   The addition of a good bark on the succulent meat is a combination that wins over judges (especially in the tenderness category).

See more about the money muscle on THIS Episode of GrateTV


October 7, 2012 Cook

Rotisserie Cooking Is Popular Again

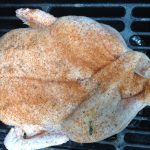
rotisserie chickenWhat’s Causing the Resurgence in Rotisserie Cooking?
By Timothy Daniels

Do you find it a challenge to think about what to cook for large family gatherings? Does the thought of having all your family around at once cause you to panic about catering? Perhaps you should be looking at one of the latest trends. Rotisserie Cooking.

“Rotisserie cooking?” I hear you say. “My mother used to have a rotisserie when we were kids.”

Yes. Well. You know what they say, everything old is new again. And the new item on the block at the moment is rotisserie cooking.

So what is it about rotisserie cooking that has caused a renewal in popularity?

I think there are a number of reasons. Rotisserie cooking is:

• Easy. You can just set it and walk away.

• Great for entertainment, you have time to enjoy the company of your guests while at the same time preparing a meal.

• Slow cooking. This means that the meat is cooked slowly which improves the texture particularly in less expensive cuts of meat.

• Cheaper. Because you can safely use cheaper cuts of meat, cooking for a crowd is less expensive and just as tasty.

• Suitable for one or two, but can also be suitable for a crowd. This type of cooking developed from the need to serve large quantities of people at once. And that meant being able to cook the whole animal at the same time.

• A low-fat cooking method. The way the meat is cooked means that the naturally occurring fat drips from the meat during the cooking process. There is no fat needed to cook the meat, so it is virtually fat-free, certainly no added fat.

So as you can see there are many reasons why rotisserie cooking is having a revival in popularity. Then of course there is also the availability of the new compact machines.

In the past they were large outdoor contraptions, usually rigged up by the man of the house over an open-pit fire or barbeque for some outdoor occasion.

Children had to be kept clear due to the nature of the fire, and as the fat dripped from the joint of meat you had to be careful that the dripping fat didn’t catch fire. From time to time people would get injured which would put a damper on the whole occasion.

No longer! The new generation rotisserie cookers come in all shapes and sizes and are suitable for all budgets. If you have a high-end cooker you can get a spit for those cookers to enable you to use your oven as a rotisserie.

You can buy bench top rotisseries that are suitable for smaller joints of meat, and you can also get larger outdoor machines for large parties and functions.

So now you know why this type of cooking is undergoing a revival in popularity. There is something for everyone with rotisserie cooking. You can spend as much or as little as you like and you can go as large or as small as you want.

The key is to shop around and get the best rotisserie for your needs.

You can get more information on rotisserie cooking at Rostisseries for BBQ and if you want to know about specific rotisseries, at Rotisserie Types

Article Source: http://EzineArticles.com/?expert=Timothy_Daniels
http://EzineArticles.com/?Rotisserie-Cooking-Is-Popular-Again—Whats-Causing-the-Resurgence-in-Rotisserie-Cooking?&id=7301660


September 23, 2012 Cook

Ten Comfort Foods to Grill in Foil


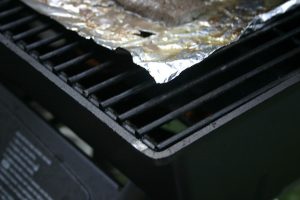
foil on grill

flickr.com/people/42dreams


No Mess Grilling Recipes – Ten Comfort Foods to Grill in Foil

By Terry Retter

One of the most convenient ways to cook food on the grill is preparing them without mess. Grilling in foil is the wisest way to do this. It’s as easy as placing the food on the non-stick side of the foil then seal the packet for a no-mess grilling. This also helps to keep small foods like shrimp or asparagus from falling through the grill grates. Here are 10 comfort foods that you can quickly grill in foil anytime and anywhere:

Spiced Nuts

Combine 2 cups of salted mixed nuts into 1 teaspoon Chipotle chili powder, 1/4 teaspoon each ground cumin and pepper, and 1 tablespoon butter on a sheet of foil. Form a small package then put over grill over medium heat. Turn often for around 10 minutes.

Cheesy Garlic Bread

Toss 1/2 cup shredded cheese, 2 tablespoons softened butter, 1 grated garlic clove and salt. Divide 1 loaf French bread lengthwise and place cut-side up on a sheet of foil. Spread with the cheese mixture then form a packet. Grill for 10 minutes over medium-high heat.

Quesadillas

Sprinkle shredded cheese on one half of a flour tortilla. Top with chopped chicken and cilantro then fold in half to seal. Make more with the same procedure. Seal in individual foil packages. Grill over medium heat, turning once, for about 5 minutes.

Paella

In a pan, combine 1 cup uncooked rice, 1 1/4 cups chicken broth, 6 peeled large shrimp, 2 skinless chicken thighs, 2 sliced dried chorizo, 1/4 cup each pimiento-stuffed olives and roasted pepper strips, and 1/2 teaspoon smoked paprika. Sprinkle with olive oil and pepper then seal pan in foil. Grill in medium high heat for about 30 minutes.

Meatballs

In a mixing bowl, combine 1 pound ground beef with 1 egg, 1/4 cup each breadcrumbs and grated cheese, minced garlic clove and 1/4 teaspoon each salt and pepper. Mix thoroughly then make 1 1/2-inch balls. Arrange in a one layer on a sheet of foil then top with 1/2 cup tomato sauce. Form a packet. Grill over high heat for 25 minutes.

Popcorn

In a disposable pie pan, mix 1 tablespoon vegetable oil and 1/4 cup popcorn kernels. Seal pan in 2 sheets of foil enough to make a dome shape on top. Grill over high heat, shaking, until popping stops. This should be about 8 minutes. Sprinkle with salt.

Chorizo and Peppers

On a sheet of foil, combine 1/2 cup sliced dried chorizo, 2 sliced green or red bell peppers, 1 sliced onion, 2 tablespoons olive oil, salt and pepper. Form a packet. Grill over high heat, turning a few times for 10 minutes.

Mexican Corn

Butter 4 ears corn and sprinkle with cheese, cayenne and lime juice. Seal in individual foil packets. Grill over medium-high heat, turning a few times for 15 minutes.

Salt-Roasted Potatoes

Toss 2 cups kosher salt and 2 sprigs chopped rosemary on a sheet of foil. Cover 1 1/2 pounds baby potatoes with the salt mixture and form a packet. Grill over medium heat, covered, for 45 minutes.

Bread Pudding

In a bowl, fluff up 2 eggs, 1 cup milk, 1/2 cup sugar and 1/4 teaspoon cinnamon. Add 4 cups bread cubes and 1 cup berries then soak for 30 minutes. Butter a sheet of non-stick foil and add the bread mixture. Form a packet. Grill over indirect heat, turning once in a while for 35 minutes.

Find a wide array of Cast Iron Frying Pans and Grills at Your Smart Kitchen. Your online source for quality cookware, bakeware, cutlery, small appliances and related kitchenware at reasonable prices. See something else you may be interested in and contact us. To avail of monthly specials and coupons, become a Chef Wannabee.

Article Source: http://EzineArticles.com/?expert=Terry_Retter
http://EzineArticles.com/?No-Mess-Grilling-Recipes—Ten-Comfort-Foods-to-Grill-in-Foil&id=7198762


August 30, 2012 Featured

Mini Lamb Chops Mini Grill

Tiny Lamb T-Bones on the grill make for a super simple downsized way to barbecue lamb chops using and old time clay charcoal pot (iorning bucket).. Chef Paul Stewart from Hilton Head’s Palmetto Bay Sunrise Cafe show how he keeps it basic but delectable.


After a summer of EXTREME BBQ the GrateTV crew takes it down a notch to the bare essentials.   A small live fire and a batch of lamb chops.   Palmetto Bay Sunrise Cafe Chef Paul Stewart shows us how he fires up tint lamb t-bones.

GrateTV is a weekly BBQ and Grill show hosted by Jack Waiboer and Bill West at http://GrateTV.com

lambchop

August 19, 2012 Cook

Summertime Grilling Tips

Summertime and grilling go together like peanut butter and jelly, but for some, the idea of grilling any type of meat puts the fear of fire into their hearts. Fortunately, you can do it, and the results are well worth the effort. Following are tips and advice about grilling and steak recipes that can turn any novice into a grilling expert.
Choose the Right Cut of Meat

Every good barbecue begins with a quality cut of meat. In fact, the meat can make or break your grilling experience. The butcher at your local market should be able to guide you in the right direction. The following information will provide enough knowledge to put you on the same page as your butcher.

Clean and Prep Your Grill

All grills should be seasoned, however, this doesn’t mean you shouldn’t ever clean it. The biggest aspect of maintaining your grill is making sure the grease catcher is cleaned prior to your grilling season. You will also need to check it periodically throughout the season as grease builds up again.

The actual grill grates should be scraped prior to grilling. To do this, turn your grill on high heat for about 15 minutes. Any barbecue sauce or bits of meat left on the grill from previous cookouts will carbonize. After this has happened, it will be easy to scrape or brush from the grill grate. Most standard grill scrapers come with a brass or stainless wire brush on the backside. Over time, the brush will eventually wear down, fill with grease and carbon and need to be replaced.

Preparing the Meat

Regardless of the type of meat you use, you will need to prep it for grilling by patting it down with paper towels on each side. This will remove the moisture from the surface of the meat, which allows your seasonings to stick and the meat to cook evenly across its exterior.

Seasoning the Meat

Meat should be seasoned prior to grilling (steaks in particular.) An easy steak recipe rub consists of crushed black pepper, sea salt and olive oil. The salt and pepper flavor the steak and the olive oil provides protection from the direct flame. Other seasonings can include your choice of flavored salts, fresh herbs or special spices. Remember, a nicely grilled steak requires very little seasoning, so don’t over-season your steaks.

Grilling the Meat

Once you’ve seasoned your meat to perfection, place it on the grill. On a gas grill, turn the flame down to medium to avoid flare-ups. Be aware that a lean cut of meat will be less likely to flare up than a fattier cut. An easy way to avoid flare-ups on a charcoal grill is to have a spray bottle handy. If there’s a flare up, squire a bit of water on the charcoal at the base of the flame. On a gas grill, close the lid and turn the flame down further. You can also move the meat out of the direct flame with your metal spatula or tongs.

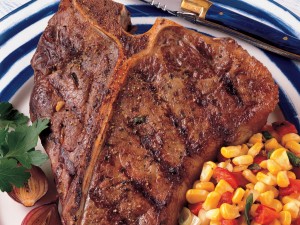
Cook each side of your steak for roughly three to eight minutes (see steak grilling chart.) Poultry and pork generally take a bit longer to fully cook, and most fish takes only ten minutes total. This will create beautiful grill marks on each side and should fully cook the meat. For a well-done steak, leave it on the grill for a few minutes longer per side, but don’t overcook it. Once you’ve finished cooking your meat, pull it from the grill, and let it sit for about ten minutes. This allows the juices to properly distribute themselves throughout the body of the meat, which will add tremendous flavor and moistness. Be sure to close the lid on your grill. Charcoal will go out on its own, but be sure not to dump the ashes too early. If you’re using a gas grill, shut off each of the valves and the valve on the propane tank.

Your grilling session is finished, and it was a lot easier than you could have imagined. Now it’s time to crack open your beverage of choice, and enjoy the spoils of your grilling victory.


August 12, 2012 Featured

Duck On The Grill GrateTV Loony Style

duck on bbq grillGrateTV takes the Loony Toons BBQ up to another level as we tackle duck.   Jack Waiboer and Bill West look at the difference duck’s fatty skin makes to preparation on the barbecue.  From GrateTV or watch here.


  • « Go to Previous Page
  • Page 1
  • Interim pages omitted …
  • Page 14
  • Page 15
  • Page 16
  • Page 17
  • Page 18
  • Interim pages omitted …
  • Page 25
  • Go to Next Page »

Primary Sidebar

Welcome To BBQTricks!

Hey Y'all... Thanks for stopping by. I'm Bill West. I blog about BBQ and occasionally country music. When it comes to BBQ I try to find solid time saving tips and tricks to make the grilling life a bit easier. It's life hacking for the backyard cooker. Read More…

Your Gateway to Barbecue Information

This site is a member of The Smoke Ring BBQ Webring A linked list of BBQ websites

Next BBQ Site - Next 5 BBQ Sites - Prev BBQ Site - Random BBQ Site

Join the BBQ ring or browse a complete list of The Smoke Ring BBQ Webring member's BBQ sites

If you discover problems with any of The Smoke Ring BBQ Webring sites, please notify the Ringmaster

fb

Footer

DISCLOSURE:

Posts on this site may contain affiliate links. If you purchase something via one of these links you won’t pay more but the site operator gets a small commission. Or as I like to call it: “beer money.”

Copyright © 2025 — Barbecue Tricks • All rights reserved.