• Skip to primary navigation
  • Skip to main content
  • Skip to primary sidebar
  • Skip to footer
  • Big Book of BBQ Tricks
  • Resources
  • Free E-CookBook / Newsletter
  • Smoking Meat 101 Book
  • BBQ Blueprint Book
  • Electric Smoker Cookbook
  • Wood Pellet Grill Smoker Book
  • Temperature Guide
    • Seafood
    • Pork
    • Poltry
    • Beef
  • About Me
  • Shop
  • Sitemap

Barbecue Tricks

BBQ Tips and Tricks

Featured

May 6, 2012 Cook

What Is a Teppanyaki Grill?

tepinyakiWhat Is a Teppanyaki Grill?

By Vincent Rogers

There are many ways to cook food these days, the traditional oven, the barbeque for outside purposes and food smokers too. However, you might be forgiven for not immediately recognising a teppanyaki grill.

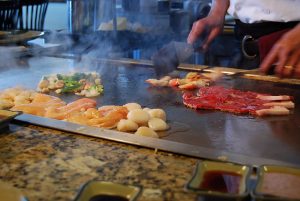
Well if you haven’t ever heard of it before, let alone used or owned one, this grill is hugely popular in Japan and is a very healthy way to cook your food. It’s essentially an iron griddle that is used for skewered marinated food and is normally long, yet compact in its design. Steak and even chopped vegetables can all be cooked on the teppanyaki grill and as a cooking appliance these designs are becoming more popular in the UK. So what’s all the fuss about?

The teppanyaki grill can cook food quickly, so you won’t be left hanging around too long before enjoying the fruits of your labour. With other forms of cooking, it can take a fairly long time before the food is ready, so if you are on a camping trip for example, you can use the grill to quickly make dinner for your hungry family members.

This type of grill is made with quality materials and are incredibly easy to clean, so you don’t have to spend ages scraping away any excess grime or dirt. As a result, you can use your teppanyaki grill over and over again without having to worry about the clean-up operation afterwards. We’ve all been in a situation where we’ve spent longer cleaning the appliance we used than the time it took to cook the food in the first place, so you’ll have no issues here. Some designs even feature a drip tray which will catch the excess oil from your foods, allowing you to enjoy healthier meals

These grills are also easy to use in the home. So say for example you have cooked a meal for some friends and your guest have enjoyed it so much that the vegetables have all gone, you could use the grill to quickly cook some more. You could even do the same for small chopped pieces of meat as it won’t take long to cook, meaning that your guest won’t stay hungry for long.

These portable grills are perfect for parties and social events where you sit down for a meal, and it saves you going to and from the kitchen as all of your food is prepared and eaten in the same place. You can even use them in the home over the winter period which means that you can use the barbecue over the summer and then use the teppanyaki grill during the rest of the year.

They really do add a unique flavour to your food and if you are looking to get hold of one there are a number of online stores that you can contact in order make a purchase. For simple cooking, the teppanyaki grill is worth buying, it’s the perfect portable appliance: easy to clean and can be used on trips away or around the home when you have guests over.

Vincent Rogers writes for a number of UK businesses. If you are looking for a Teppanyaki Gill he recommends Garden Gift Shop.

Article Source: http://EzineArticles.com/?expert=Vincent_Rogers
http://EzineArticles.com/?What-Is-a-Teppanyaki-Grill?&id=7028966


April 14, 2012 Butcher's Guide

Here’s The Beef 101

Beef 101Where’s the beef?  Here’s the beef!  A new info graphic guide to what 25 percent of American’s eat daily.  Stats… nutritional info… cuts… take a look and soak it up!  More in our Butcher’s Guide.

Beef Infographic

Source: FrugalDad

Beef 101

March 22, 2012 Featured

Grilling Bacon Tricks

Bacon Grill

Photo:Flickr/sjsharktank

The Art of Grilling Bacon Wrapped Food
By Bobby Frankel

One of the techniques one needs to master before becoming a barbecue professional is how to grill bacon wrapped foods. Bacon is used to wrap seafood (shrimp and scallops), vegetables (cheese stuffed peppers) and meats such as filets of beef and pork. Wrapping boneless and skinless stuffed chicken thighs in bacon is also gaining popularity. However grilling bacon wrapped foods is not a straightforward endeavor. The two biggest challenges you face when grilling bacon wrapped foods is preventing grease fires and getting the bacon finished at the same time as the food it is wrapped around.

Grease fires are extremely common when cooking bacon wrapped foods. If dripping bacon fat comes into contact with lit charcoal or propane flames them a flare up fire is inevitable. The easiest way to deal with situation is to always cook bacon wrapped food with indirect heat. If the bacon is not directly over a heat source then the probability of a grease fire is greatly minimized. When grilling with indirect heat it is a good idea to use a disposable aluminum drip pan underneath the food. The foil pan will catch any grease and make subsequent clean up much easier.

Once you have taken steps to minimize grease fires you can start working on getting your bacon to cook at the same rate as the food it is wrapped around. This is most easily accomplished by using thinly sliced bacon instead of the more expensive thick cut varieties. This is not as important if you are grilling food that takes 20-30 minutes to finish such as pork tenderloin but is critical if you are working with quick cooking foods like shrimp and scallops.

A second trick to employ with quick cooking food is to partially precook your bacon before wrapping. You can put a few slices of bacon in paper towels and microwave on high for one minute to get you bacon about halfway done cooking. The only drawback to this approach is that it is easy to overcook the bacon which makes it extremely difficult to wrap around your food. A better approach is to blanch the bacon in boiling water for one minute. The blanching approach takes a little more work but helps make sure the bacon remains pliable enough to use as a wrapper.

The final tip for grilling bacon wrapped food is to pay particular attention to your seasonings. Most bacon has a very high salt content. This means that the amount of extra salt you use to season your food should be kept to a minimum.

With a little practice you can avoid grease fires and get your bacon cooked at the same time as the food it is wrapped around. Master these skills and you are one step closer to becoming a grill master.

I am an avid griller who loves to write! I run web sites about Weber grills and pork tenderloins because that’s just the sort of thing I enjoy. I invite you to visit my other sites and take a look!

Article Source: http://EzineArticles.com/?expert=Bobby_Frankel
http://EzineArticles.com/?The-Art-of-Grilling-Bacon-Wrapped-Food&id=6945314


March 9, 2012 Featured

GratePlate Chickens – GrateTV Podcast is Back

February 19, 2012 Cook

BBQ Chicken Can Be Deadly

The Dangers of Eating Undercooked Chicken

By Lynne Evans

You hear a lot of scary stories about people contracting illnesses which have been linked to undercooked chicken and unfortunately the results of eating n undercooked one can be severe and even fatal.

The problem is often that if you cook a chicken after defrosting, it may require a longer cooking time. Cooking in a microwave can be tricky as often I have found, the chicken is still raw close to the bone. You should avoid eating chicken meat which looks bloody. However smoked chicken may remain pink even hen thoroughly cooked, so checking only the color is not recommended.

Chicken can often contain the bacteria Staphylococcus aurea, and this can cause food poisoning. The problem with this strain of bacteria is that it has become resistant to certain antibiotics including penicillin.

Salmonella food poisoning outbreaks are also associated with chicken, and the meat can be infected by human handlers. This can cause a variety of symptoms and cause osteomylitis, where bones are infected, pericarditis which occurs when the bacteria attack the sac surrounding the heart, meningitis when the brain or spinal cord are infected, and hepatitis which is a liver disease, and pneumonia, a lung problem. Salmonella typhi bacteria can be the cause of typhoid fever too. However the symptoms of salmonella poisoning are usually milder with vomiting, nausea and diarrhoea, stomach cramps and these usually only last for one or two days.

Another bacterium which can be present in undercooked chicken is campylobacter which can lad to Guillain-Barre syndrome, which is a temporary paralysis which begins in the feet (you experience a tingling sensation) and moves upwards. This can cause complete paralysis, although this is usually temporary but may result in some weakness which will remain.

Chicken nuggets have recently caused outbreaks of food poisoning, perhaps because people eat them raw or do not realize that they are undercooked because they are coated in breadcrumbs and bite-sized – by the time you realize they are not properly cooked, it is probably too late.

The bacteria mentioned here are killed by cooking chicken at 350 degrees Fahrenheit or 180 degrees Celsius, Gas mark 5. For a fan oven a whole chicken should be roasted at this temperature, while for a conventional oven the temperatures should be 190 degrees Celsius or 375 degrees Fahrenheit. The formula for cooking a chicken is generally recognized to be 20 minutes per pound plus and extra 20 minutes. (454 grams equals one pound weight.)

If you buy chicken products, then read the cooking instructions carefully and follow them to the letter to avoid any illnesses related to undercooked chicken. It’ so easy to get it right that you shouldn’t be alarmed by the food poisoning stories you hear. Chicken is safe to eat as long as you cook it thoroughly.

http://www.herbs-treatandtaste.blogspot.com If you found this article interesting you might like this website, as it contains information about the food we eat and the plants we can use to stay healthy. There are also easy to follow delicious recipes that are usually a fusion of western and eastern cuisines. Why not click on the link and see what it is all about for yourself?

Article Source: http://EzineArticles.com/?expert=Lynne_Evans
http://EzineArticles.com/?The-Dangers-of-Eating-Undercooked-Chicken&id=6868164


January 22, 2012 Featured

Pepper Core Popper, Steamship Rounds and Citrus Acid


This week’s GrateTV.com show looks at at unique pepper core remover and answers a question about a steamship round of beef.

Learn more about the show at http://GrateTV.com


pepper popper

January 10, 2012 Featured

2 Ways To Cook Filet Mignon

beef filet

Photo: Flickr/vincelaconte

By Paul Yates

Filet Mignon (or fillet steak as it is called in English) is the most tender part of the beef animal and so requires some attention when it comes to cooking otherwise you can easily end up with a dry piece of meat and / or something that isn’t as tender as it should be.

It’s tender because the filet mignon is from the beef tenderloin, a little used muscle at the rear of the rib cage and it’s the fact that it is never put under great exertion that it remains so tender. For the same reason it has extremely little fat (if any at all) marbled into it and this also contributes to the tenderness. This particular cut of meat is also renowned for its price (and in my opinion) its lack of flavor.

I accept that this latter point is open to debate but whatever your opinion I do believe that it makes the cooking process all the more important to ensure that the texture is maintained and that the flavor is delivered to the maximum. In addition, it must not dry out.

Many people like to grill their steak and I am no exception so I’m going to start with this as method no.1, yes it’s quick and easy to do but it’s also easy to get wrong. To get the maximum flavor it is so important that your grill plates are super hot because by doing this your steak will quickly crisp on the outside (adding flavor) and seal the juices in so keeping your steak moist. Flip it once and only once, don’t press down on it because this will squeeze out the juices and season it after the cooking and not before. If seasoned (salted) before it will toughen the steak and also the salt will protect the steak from the heat – not what we want. Two minutes for each side of the steak will be perfect.

Method number two is also an extremely popular grilled filet mignon recipe and that is to cook it wrapped in bacon but the great challenge with doing this is get the bacon crispy on the outside without overcooking the steak and drying out the meat.

Essentially you spit roast the whole tenderloin after having wrapped it in streaky bacon (secured with cocktail sticks). The spit roasting over high heat takes about 10 minutes to crisp up the bacon and gently cook the outer area of the tenderloin and then the meat is removed from the spit rod and allowed to cool.

Once cool, the cocktail sticks are removed from the bacon (the bacon stays in situ because it has crisped up nicely) and the part cooked tenderloin is sliced thickly to produce the filet mignon steaks already wrapped in crispy bacon.

It’s then simply a matter of following the recipe above in terms of cooking hot and fast giving each side of the steak about 2 minutes and no more. Season and serve.

Paul Yates is a keen barbecue enthusiast and has written many gas grill recipes fillet steak including this grilled filet mignon recipe with bearnaise sauce.

Article Source: http://EzineArticles.com/?expert=Paul_Yates
http://EzineArticles.com/?2-Ways-To-Cook-Filet-Mignon&id=6794652


January 9, 2012 Featured

Philly Steak and Potatoes

As part of the Foodbuzz Tastemaker Program, I received a sample of Simply Potatoes and was asked to create a recipe to share. A new twist on the old “steak and potatoes”, my Philly Steak & Potatoes dish is a hearty winner for the whole family! Try it and let me know what you think. Seasoned just right, the potato crust gives the dish that flair to take it over the top.

Philly Steak & Potatoes

20 oz pkgSimply Potatoes Shredded Hash Browns

beef

Photo: Flickr/tomspix


¼ cup enriched flour
1 tsp salt
1 tsp black pepper
1 tsp cayenne pepper
1 Tbsp minced onion
1 egg
3 Tbsp Olive oil, divided
1 medium onion, chopped
1 medium green pepper, chopped
8 oz sliced sandwich roast beef
3 Tbsp Worcestershire sauce
1 tsp garlic powder
½ cup prepared Alfredo sauce
8 oz Provolone cheese

Grease a deep dish pie plate and set aside. Mix potatoes, flour, salt, black pepper, cayenne pepper, minced onion and egg until well blended. Press mixture on the bottom and up the sides of the dish. Brush with 2 Tbsp Olive oil and bake at 400° for 25 minutes until lightly browned.

Sauté onion and green pepper in 1 Tbsp Olive oil until blended. Stir in meat, Worcestershire sauce and garlic powder, and cook about 1-2 minutes. Spread Alfredo sauce over potato crust, and top with half the Provolone cheese. Add the beef and veggie mixture, and top with remaining Provolone cheese. Bake at 400° for 10-12 minutes until bubbly.

Serve hot and enjoy!


January 7, 2012 Cook

Beer In The Rear Turkey 25.4

Resting Turkey

Beer In The Rear Turkey

Turkeyon a grill or smoker can be tricky.    It’s easy to get rubbery skin (and that can actually make some people mad).  There’s a lot of expectation on a Thanksgiving dinner especially with skin lovers.

Beer in the Rear Turkey is almost fool proof.  It’s quick and give you a crisp golden skin with a hint of smoke.

The first time I heard about the beer can trick was around 1999 when my morning radio hosts became enamored with a recipe they found called Beer Butt Chicken.  They thought it was so great (probably just liked that the word Butt was in a recipe) they wanted to bring a grill to the radio station and demo it in the parking lot.   I’ve grown to like it too.  So it’s fun to be able to super size the recipe.

This time the poor thing gets violated with not just a regular beer can but you use the big “Foster’s Lager” sized can of beer. You can find it in most grocery stores.   Reserve half and enjoy as you prep.  You’ve earned it. You’re going to want to punch some holes in the top of the can and put some spice rub in the can.  And then you get to the bird…where you clean off the bird really well and make sure you get all the different things out of the inside of the cavity of the bird.  They hide it in different areas… the neck, the gizzards…

Beer Butt Turkey

Caution: It's harder to REMOVE the can...

With the bbq spice rub inside the can… the steam and the beer flavoring will actually steam through the turkey and infuse it with a really super flavor keeping the bird moist from the inside out. You’re not going to get much from the outside-in because the skin of a turkey is kind of like a wet suit.    Rub the spice under the skin (I call this getting to second base with the Turkey).  The skin is really pretty resilient and thick so you’re not going to damage anything.

Then you just insert the can upright inside the bird.     Carefully lower the turkey on top of the can making kind of a tripod of sorts.    If you need a little extra room on the grill you may want to remove the bottom grill grate and put the tripod on a small roasting pan actually on the floor of the grill directly on the burners of the gas grill.  You won’t  actually turn the burners on under the bird.   Set up for indirect grilling heat.  Temperature is going to be 325 to 375 (if you have a temperature gage on  your gas grill – use it this time).    You can usually get this temp/indirect by having one or two gas burners on and the other two off.

To get a lick of smoke use some wood chips in a smoker box on he lit burner or using a tin foil pouch.  Making a smoker pouch really easy.  Then and then just let it cook.

After about an hour – open it up turn the bird around let it cook for another hour or until it gets golden brown on both sides.   Use a meat thermometer in the thickest part of the thigh and cook until you hit at least 160 degrees.

You’ll  want to use gloves and be super careful removing that can.   The liquid is dangerously hot and the can is greasy! Let rest before carving.


Beer In The RearTurkey

In the video demo we used an 11.75 lbs turkeyand cooked for two and a half hours (150 minutes). Approximately 345 degrees Indirect heat.

“Discard” half of the beer.    Add 2 tablespoons Rub into remaining liquid in can.   Using a “churchkey” can opener add additional holes to top of can.  Insert upright under and inside turkey using legs as tripod support.  Grill over indirect heat 2 to 3 hours until temperature measures 160 degrees in the thickest part of the thigh.  Let rest  before carving serving.

Ingredients:

1 wholeTurkey(10 to 18 lbs.)

6 tablespoons of BBQ Rub or Greek Seasoning

1 can Fosters Lager (or 25.4 oz other)

December 4, 2011 Butcher's Guide

Grinding Meat at Home – Burger Tricks and Tips

burger pattyHow To Make Burger With A Grinder

By Matt LeClair

Thinking about making your own beef, venison, pork, turkey, or chicken burger? One way that you can do it is with a meat grinder. The process of making your own burger with a grinder is actually pretty simple. Here are the steps:

Prepare The Meat

The first step involved in the process of making burger with a grinder is preparing the meat. In most cases you’ll start out with a large chunk of whatever type of meat it is that you are grinding. You need to cut this large piece of meat into small 1 inch by 1inch cubes. If you prefer, you can make the cubes a bit larger to save time since this step can be quite time consuming.

Large pieces of meat have to be cut into smaller chunks so that they can be fed through the grinder without causing it to back up. Not only does doing so help keep your grinder running smoothly, but it also helps speed up the process by not causing you to stop intermittently.

The Grinding Process

Once you have the meat the you would like to turn into burger prepared, the next step of the process involves feeding it through the grinder. For this step you can use an actual meat grinder or you can use a KitchenAid with a meat grinder attachment. While the KitchenAid won’t work as well as an actual grinder, it will still help you get the job done.

The grinder is equipped with a top loading tray where you will place the meat that you intend to run through the grinder. When ready, load a handful of meat chunks onto this loading tray, turn the grinder on a low to medium speed, and then begin feeding the meat into the grinder with the feeding tool. A few things to keep in mind before you being this process: make sure you have a bowl or some sort of container to catch the meat as it comes out of the grinder, and be sure that you have the right blade attachment for making burger. There are a number of different blade attachments that can be used to grind, mince, and slice meat as it is fed through, so you want to make sure you’ve got the right one for making burger.

Press the meat down into the feeding tube until all of the meat has been fed through the grinder. Continue on by grabbing another handful of meat and placing it in the loading tray. Repeat the process of loading and feeding meat through the grinder until all of the meat has been processed.

Packing and Storing The Burger

The final step in the process of making burger with a grinder involves packing and storing the burger once it has been through the grinding process. One of the best things you can do to extend the shelf life of your burger is pack and seal it using a vacuum sealer. Doing so will remove air from the packaging and keep the burger in an air-tight environment where it is protected from freezer burn and harmful bacteria.

Thinking about getting yourself a meat grinder? Learn about popular meat grinders at http://infomedley.com/meat-grinder/.

Article Source: http://EzineArticles.com/?expert=Matt_LeClair
http://EzineArticles.com/?How-To-Make-Burger-With-A-Grinder&id=6728758


  • « Go to Previous Page
  • Page 1
  • Interim pages omitted …
  • Page 16
  • Page 17
  • Page 18
  • Page 19
  • Page 20
  • Interim pages omitted …
  • Page 25
  • Go to Next Page »

Primary Sidebar

Welcome To BBQTricks!

Hey Y'all... Thanks for stopping by. I'm Bill West. I blog about BBQ and occasionally country music. When it comes to BBQ I try to find solid time saving tips and tricks to make the grilling life a bit easier. It's life hacking for the backyard cooker. Read More…

Your Gateway to Barbecue Information

This site is a member of The Smoke Ring BBQ Webring A linked list of BBQ websites

Next BBQ Site - Next 5 BBQ Sites - Prev BBQ Site - Random BBQ Site

Join the BBQ ring or browse a complete list of The Smoke Ring BBQ Webring member's BBQ sites

If you discover problems with any of The Smoke Ring BBQ Webring sites, please notify the Ringmaster

fb

Footer

DISCLOSURE:

Posts on this site may contain affiliate links. If you purchase something via one of these links you won’t pay more but the site operator gets a small commission. Or as I like to call it: “beer money.”

Copyright © 2025 — Barbecue Tricks • All rights reserved.