• Skip to primary navigation
  • Skip to main content
  • Skip to primary sidebar
  • Skip to footer
  • Big Book of BBQ Tricks
  • Resources
  • Free E-CookBook / Newsletter
  • Smoking Meat 101 Book
  • BBQ Blueprint Book
  • Electric Smoker Cookbook
  • Wood Pellet Grill Smoker Book
  • Temperature Guide
    • Seafood
    • Pork
    • Poltry
    • Beef
  • About Me
  • Shop
  • Sitemap

Barbecue Tricks

BBQ Tips and Tricks

Cook

September 23, 2012 Cook

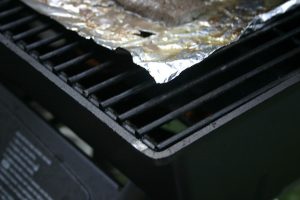
Ten Comfort Foods to Grill in Foil


foil on grill

flickr.com/people/42dreams


No Mess Grilling Recipes – Ten Comfort Foods to Grill in Foil

By Terry Retter

One of the most convenient ways to cook food on the grill is preparing them without mess. Grilling in foil is the wisest way to do this. It’s as easy as placing the food on the non-stick side of the foil then seal the packet for a no-mess grilling. This also helps to keep small foods like shrimp or asparagus from falling through the grill grates. Here are 10 comfort foods that you can quickly grill in foil anytime and anywhere:

Spiced Nuts

Combine 2 cups of salted mixed nuts into 1 teaspoon Chipotle chili powder, 1/4 teaspoon each ground cumin and pepper, and 1 tablespoon butter on a sheet of foil. Form a small package then put over grill over medium heat. Turn often for around 10 minutes.

Cheesy Garlic Bread

Toss 1/2 cup shredded cheese, 2 tablespoons softened butter, 1 grated garlic clove and salt. Divide 1 loaf French bread lengthwise and place cut-side up on a sheet of foil. Spread with the cheese mixture then form a packet. Grill for 10 minutes over medium-high heat.

Quesadillas

Sprinkle shredded cheese on one half of a flour tortilla. Top with chopped chicken and cilantro then fold in half to seal. Make more with the same procedure. Seal in individual foil packages. Grill over medium heat, turning once, for about 5 minutes.

Paella

In a pan, combine 1 cup uncooked rice, 1 1/4 cups chicken broth, 6 peeled large shrimp, 2 skinless chicken thighs, 2 sliced dried chorizo, 1/4 cup each pimiento-stuffed olives and roasted pepper strips, and 1/2 teaspoon smoked paprika. Sprinkle with olive oil and pepper then seal pan in foil. Grill in medium high heat for about 30 minutes.

Meatballs

In a mixing bowl, combine 1 pound ground beef with 1 egg, 1/4 cup each breadcrumbs and grated cheese, minced garlic clove and 1/4 teaspoon each salt and pepper. Mix thoroughly then make 1 1/2-inch balls. Arrange in a one layer on a sheet of foil then top with 1/2 cup tomato sauce. Form a packet. Grill over high heat for 25 minutes.

Popcorn

In a disposable pie pan, mix 1 tablespoon vegetable oil and 1/4 cup popcorn kernels. Seal pan in 2 sheets of foil enough to make a dome shape on top. Grill over high heat, shaking, until popping stops. This should be about 8 minutes. Sprinkle with salt.

Chorizo and Peppers

On a sheet of foil, combine 1/2 cup sliced dried chorizo, 2 sliced green or red bell peppers, 1 sliced onion, 2 tablespoons olive oil, salt and pepper. Form a packet. Grill over high heat, turning a few times for 10 minutes.

Mexican Corn

Butter 4 ears corn and sprinkle with cheese, cayenne and lime juice. Seal in individual foil packets. Grill over medium-high heat, turning a few times for 15 minutes.

Salt-Roasted Potatoes

Toss 2 cups kosher salt and 2 sprigs chopped rosemary on a sheet of foil. Cover 1 1/2 pounds baby potatoes with the salt mixture and form a packet. Grill over medium heat, covered, for 45 minutes.

Bread Pudding

In a bowl, fluff up 2 eggs, 1 cup milk, 1/2 cup sugar and 1/4 teaspoon cinnamon. Add 4 cups bread cubes and 1 cup berries then soak for 30 minutes. Butter a sheet of non-stick foil and add the bread mixture. Form a packet. Grill over indirect heat, turning once in a while for 35 minutes.

Find a wide array of Cast Iron Frying Pans and Grills at Your Smart Kitchen. Your online source for quality cookware, bakeware, cutlery, small appliances and related kitchenware at reasonable prices. See something else you may be interested in and contact us. To avail of monthly specials and coupons, become a Chef Wannabee.

Article Source: http://EzineArticles.com/?expert=Terry_Retter
http://EzineArticles.com/?No-Mess-Grilling-Recipes—Ten-Comfort-Foods-to-Grill-in-Foil&id=7198762


August 19, 2012 Cook

Summertime Grilling Tips

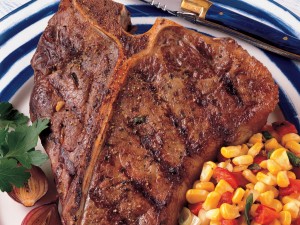
Summertime and grilling go together like peanut butter and jelly, but for some, the idea of grilling any type of meat puts the fear of fire into their hearts. Fortunately, you can do it, and the results are well worth the effort. Following are tips and advice about grilling and steak recipes that can turn any novice into a grilling expert.
Choose the Right Cut of Meat

Every good barbecue begins with a quality cut of meat. In fact, the meat can make or break your grilling experience. The butcher at your local market should be able to guide you in the right direction. The following information will provide enough knowledge to put you on the same page as your butcher.

Clean and Prep Your Grill

All grills should be seasoned, however, this doesn’t mean you shouldn’t ever clean it. The biggest aspect of maintaining your grill is making sure the grease catcher is cleaned prior to your grilling season. You will also need to check it periodically throughout the season as grease builds up again.

The actual grill grates should be scraped prior to grilling. To do this, turn your grill on high heat for about 15 minutes. Any barbecue sauce or bits of meat left on the grill from previous cookouts will carbonize. After this has happened, it will be easy to scrape or brush from the grill grate. Most standard grill scrapers come with a brass or stainless wire brush on the backside. Over time, the brush will eventually wear down, fill with grease and carbon and need to be replaced.

Preparing the Meat

Regardless of the type of meat you use, you will need to prep it for grilling by patting it down with paper towels on each side. This will remove the moisture from the surface of the meat, which allows your seasonings to stick and the meat to cook evenly across its exterior.

Seasoning the Meat

Meat should be seasoned prior to grilling (steaks in particular.) An easy steak recipe rub consists of crushed black pepper, sea salt and olive oil. The salt and pepper flavor the steak and the olive oil provides protection from the direct flame. Other seasonings can include your choice of flavored salts, fresh herbs or special spices. Remember, a nicely grilled steak requires very little seasoning, so don’t over-season your steaks.

Grilling the Meat

Once you’ve seasoned your meat to perfection, place it on the grill. On a gas grill, turn the flame down to medium to avoid flare-ups. Be aware that a lean cut of meat will be less likely to flare up than a fattier cut. An easy way to avoid flare-ups on a charcoal grill is to have a spray bottle handy. If there’s a flare up, squire a bit of water on the charcoal at the base of the flame. On a gas grill, close the lid and turn the flame down further. You can also move the meat out of the direct flame with your metal spatula or tongs.

Cook each side of your steak for roughly three to eight minutes (see steak grilling chart.) Poultry and pork generally take a bit longer to fully cook, and most fish takes only ten minutes total. This will create beautiful grill marks on each side and should fully cook the meat. For a well-done steak, leave it on the grill for a few minutes longer per side, but don’t overcook it. Once you’ve finished cooking your meat, pull it from the grill, and let it sit for about ten minutes. This allows the juices to properly distribute themselves throughout the body of the meat, which will add tremendous flavor and moistness. Be sure to close the lid on your grill. Charcoal will go out on its own, but be sure not to dump the ashes too early. If you’re using a gas grill, shut off each of the valves and the valve on the propane tank.

Your grilling session is finished, and it was a lot easier than you could have imagined. Now it’s time to crack open your beverage of choice, and enjoy the spoils of your grilling victory.


August 12, 2012 Cook

Italian Sausage BBQ Tips and Tricks

sausage bbq

Photo:flickr.com/daveynin

Celebrating The Art Of Grilling With Italian Sausages
By Siddhesh Ramesh Jadhav

For most Americans, grilling evokes a series of relaxing images in the mind. Picture this – a group of friends in the backyard, waiting impatiently while the barbecue is sizzling away and the air is filled with appetizing aromas of food. Their wait is worthwhile because very soon, they will dig in happily into some delicious grilled meat!

Nothing symbolizes the spirit of America more than firing up the grill with family and friends on the Fourth of July. Grilling represents a great American cooking tradition that has taken years to evolve – from the ancient meat-on-a-stick over raw fire to the culinary delights cooked with modern grills.

When it comes to cooking their favorite meat, Americans prefer grilling to other forms of cooking. Grilled meat is juicier and acquires an irresistible taste and aroma that cannot be substituted with any other. Grilled food is also healthier since its fat content is considerably lower. As of 2011, 82% of American households own a grill or smoker and nearly 40% grill all year-round.

Burgers, steak, hot dogs, chicken and pork chops are the most popular foods cooked on a grill. Grilled Italian Sausage recipes are also a favorite at cookouts. There are countless mouthwatering dishes that can be prepared with Italian Sausages. Surprise your friends and family by tossing some Italian sausages on the grill. Let the aroma of these sausages provide a beautiful setting for your evening.

Grilled Italian sausage recipes are abundant and your cooking abilities will be rewarded with any recipe that includes Italian sausages:

� With your choice of bread or bun along with relishes and condiments

� As the main course with side dishes

� Combining it with pasta or vegetables

� Or simply grill and have them on their own!

Things to keep in mind when grilling sausages

Fire the grill, toss on a couple of sausages and cook till they look right. Simple, right? There’s actually more to it. It is important that you not just grill right, but also retain the flavor and avoid total drying of the casing. Three simple rules that should be remembered for every grilling are:

  • Believe in slow and gradual heating: Sausages tend to shrivel up as they are grilled. It is important that you do not immediately expose sausages to high heat, since the outer casing will crack open immediately, releasing meat and fat onto your fire-called ‘spitting’-and this will cause it to flare up. This chars the sausage and leaves a sooty deposit all over your sausage.
  • Say NO to forks: Instead of a fork use tongs or a spatula to turn food. Piercing sausages with a fork releases fat and juices onto the hot coals, causing flare-ups.
  • Use only white/grey charcoal: Grill only over grey-white coals after flames have died down and not over black coal. Gas grills should be set on the lowest or medium setting depending on your requirement.

We recommend a few delicious recipes, like- Italian Sausage Sandwiches, Sausage Skewers and Premio’s Bacon Wrapped BBQ’ED Sausage with Sauerkraut.

Article Source: http://EzineArticles.com/?expert=Siddhesh_Ramesh_Jadhav
http://EzineArticles.com/?Celebrating-The-Art-Of-Grilling-With-Italian-Sausages&id=7221747


May 6, 2012 Cook

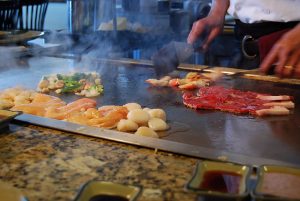
What Is a Teppanyaki Grill?

tepinyakiWhat Is a Teppanyaki Grill?

By Vincent Rogers

There are many ways to cook food these days, the traditional oven, the barbeque for outside purposes and food smokers too. However, you might be forgiven for not immediately recognising a teppanyaki grill.

Well if you haven’t ever heard of it before, let alone used or owned one, this grill is hugely popular in Japan and is a very healthy way to cook your food. It’s essentially an iron griddle that is used for skewered marinated food and is normally long, yet compact in its design. Steak and even chopped vegetables can all be cooked on the teppanyaki grill and as a cooking appliance these designs are becoming more popular in the UK. So what’s all the fuss about?

The teppanyaki grill can cook food quickly, so you won’t be left hanging around too long before enjoying the fruits of your labour. With other forms of cooking, it can take a fairly long time before the food is ready, so if you are on a camping trip for example, you can use the grill to quickly make dinner for your hungry family members.

This type of grill is made with quality materials and are incredibly easy to clean, so you don’t have to spend ages scraping away any excess grime or dirt. As a result, you can use your teppanyaki grill over and over again without having to worry about the clean-up operation afterwards. We’ve all been in a situation where we’ve spent longer cleaning the appliance we used than the time it took to cook the food in the first place, so you’ll have no issues here. Some designs even feature a drip tray which will catch the excess oil from your foods, allowing you to enjoy healthier meals

These grills are also easy to use in the home. So say for example you have cooked a meal for some friends and your guest have enjoyed it so much that the vegetables have all gone, you could use the grill to quickly cook some more. You could even do the same for small chopped pieces of meat as it won’t take long to cook, meaning that your guest won’t stay hungry for long.

These portable grills are perfect for parties and social events where you sit down for a meal, and it saves you going to and from the kitchen as all of your food is prepared and eaten in the same place. You can even use them in the home over the winter period which means that you can use the barbecue over the summer and then use the teppanyaki grill during the rest of the year.

They really do add a unique flavour to your food and if you are looking to get hold of one there are a number of online stores that you can contact in order make a purchase. For simple cooking, the teppanyaki grill is worth buying, it’s the perfect portable appliance: easy to clean and can be used on trips away or around the home when you have guests over.

Vincent Rogers writes for a number of UK businesses. If you are looking for a Teppanyaki Gill he recommends Garden Gift Shop.

Article Source: http://EzineArticles.com/?expert=Vincent_Rogers
http://EzineArticles.com/?What-Is-a-Teppanyaki-Grill?&id=7028966


April 14, 2012 Butcher's Guide

Here’s The Beef 101

Beef 101Where’s the beef?  Here’s the beef!  A new info graphic guide to what 25 percent of American’s eat daily.  Stats… nutritional info… cuts… take a look and soak it up!  More in our Butcher’s Guide.

Beef Infographic

Source: FrugalDad

Beef 101

February 19, 2012 Cook

BBQ Chicken Can Be Deadly

The Dangers of Eating Undercooked Chicken

By Lynne Evans

You hear a lot of scary stories about people contracting illnesses which have been linked to undercooked chicken and unfortunately the results of eating n undercooked one can be severe and even fatal.

The problem is often that if you cook a chicken after defrosting, it may require a longer cooking time. Cooking in a microwave can be tricky as often I have found, the chicken is still raw close to the bone. You should avoid eating chicken meat which looks bloody. However smoked chicken may remain pink even hen thoroughly cooked, so checking only the color is not recommended.

Chicken can often contain the bacteria Staphylococcus aurea, and this can cause food poisoning. The problem with this strain of bacteria is that it has become resistant to certain antibiotics including penicillin.

Salmonella food poisoning outbreaks are also associated with chicken, and the meat can be infected by human handlers. This can cause a variety of symptoms and cause osteomylitis, where bones are infected, pericarditis which occurs when the bacteria attack the sac surrounding the heart, meningitis when the brain or spinal cord are infected, and hepatitis which is a liver disease, and pneumonia, a lung problem. Salmonella typhi bacteria can be the cause of typhoid fever too. However the symptoms of salmonella poisoning are usually milder with vomiting, nausea and diarrhoea, stomach cramps and these usually only last for one or two days.

Another bacterium which can be present in undercooked chicken is campylobacter which can lad to Guillain-Barre syndrome, which is a temporary paralysis which begins in the feet (you experience a tingling sensation) and moves upwards. This can cause complete paralysis, although this is usually temporary but may result in some weakness which will remain.

Chicken nuggets have recently caused outbreaks of food poisoning, perhaps because people eat them raw or do not realize that they are undercooked because they are coated in breadcrumbs and bite-sized – by the time you realize they are not properly cooked, it is probably too late.

The bacteria mentioned here are killed by cooking chicken at 350 degrees Fahrenheit or 180 degrees Celsius, Gas mark 5. For a fan oven a whole chicken should be roasted at this temperature, while for a conventional oven the temperatures should be 190 degrees Celsius or 375 degrees Fahrenheit. The formula for cooking a chicken is generally recognized to be 20 minutes per pound plus and extra 20 minutes. (454 grams equals one pound weight.)

If you buy chicken products, then read the cooking instructions carefully and follow them to the letter to avoid any illnesses related to undercooked chicken. It’ so easy to get it right that you shouldn’t be alarmed by the food poisoning stories you hear. Chicken is safe to eat as long as you cook it thoroughly.

http://www.herbs-treatandtaste.blogspot.com If you found this article interesting you might like this website, as it contains information about the food we eat and the plants we can use to stay healthy. There are also easy to follow delicious recipes that are usually a fusion of western and eastern cuisines. Why not click on the link and see what it is all about for yourself?

Article Source: http://EzineArticles.com/?expert=Lynne_Evans
http://EzineArticles.com/?The-Dangers-of-Eating-Undercooked-Chicken&id=6868164


January 7, 2012 Cook

Beer In The Rear Turkey 25.4

Resting Turkey

Beer In The Rear Turkey

Turkeyon a grill or smoker can be tricky.    It’s easy to get rubbery skin (and that can actually make some people mad).  There’s a lot of expectation on a Thanksgiving dinner especially with skin lovers.

Beer in the Rear Turkey is almost fool proof.  It’s quick and give you a crisp golden skin with a hint of smoke.

The first time I heard about the beer can trick was around 1999 when my morning radio hosts became enamored with a recipe they found called Beer Butt Chicken.  They thought it was so great (probably just liked that the word Butt was in a recipe) they wanted to bring a grill to the radio station and demo it in the parking lot.   I’ve grown to like it too.  So it’s fun to be able to super size the recipe.

This time the poor thing gets violated with not just a regular beer can but you use the big “Foster’s Lager” sized can of beer. You can find it in most grocery stores.   Reserve half and enjoy as you prep.  You’ve earned it. You’re going to want to punch some holes in the top of the can and put some spice rub in the can.  And then you get to the bird…where you clean off the bird really well and make sure you get all the different things out of the inside of the cavity of the bird.  They hide it in different areas… the neck, the gizzards…

Beer Butt Turkey

Caution: It's harder to REMOVE the can...

With the bbq spice rub inside the can… the steam and the beer flavoring will actually steam through the turkey and infuse it with a really super flavor keeping the bird moist from the inside out. You’re not going to get much from the outside-in because the skin of a turkey is kind of like a wet suit.    Rub the spice under the skin (I call this getting to second base with the Turkey).  The skin is really pretty resilient and thick so you’re not going to damage anything.

Then you just insert the can upright inside the bird.     Carefully lower the turkey on top of the can making kind of a tripod of sorts.    If you need a little extra room on the grill you may want to remove the bottom grill grate and put the tripod on a small roasting pan actually on the floor of the grill directly on the burners of the gas grill.  You won’t  actually turn the burners on under the bird.   Set up for indirect grilling heat.  Temperature is going to be 325 to 375 (if you have a temperature gage on  your gas grill – use it this time).    You can usually get this temp/indirect by having one or two gas burners on and the other two off.

To get a lick of smoke use some wood chips in a smoker box on he lit burner or using a tin foil pouch.  Making a smoker pouch really easy.  Then and then just let it cook.

After about an hour – open it up turn the bird around let it cook for another hour or until it gets golden brown on both sides.   Use a meat thermometer in the thickest part of the thigh and cook until you hit at least 160 degrees.

You’ll  want to use gloves and be super careful removing that can.   The liquid is dangerously hot and the can is greasy! Let rest before carving.


Beer In The RearTurkey

In the video demo we used an 11.75 lbs turkeyand cooked for two and a half hours (150 minutes). Approximately 345 degrees Indirect heat.

“Discard” half of the beer.    Add 2 tablespoons Rub into remaining liquid in can.   Using a “churchkey” can opener add additional holes to top of can.  Insert upright under and inside turkey using legs as tripod support.  Grill over indirect heat 2 to 3 hours until temperature measures 160 degrees in the thickest part of the thigh.  Let rest  before carving serving.

Ingredients:

1 wholeTurkey(10 to 18 lbs.)

6 tablespoons of BBQ Rub or Greek Seasoning

1 can Fosters Lager (or 25.4 oz other)

November 6, 2011 Cook

Grilled Fish on Your BBQ

Credit: John Harvey / Wikipedia

How to Cook Fish on the Grill By Brent Nelson

Grilling is an ideal way to cook fish, producing quick, easy and delicious results. In most cases, you can watch it happening before your eyes, and pop it onto a (warmed) plate the instant it is cooked to perfection. As pretty much any fish of a suitable size can be grilled, these guidelines should help you whatever your choice.

As there are far too many species to consider for this short article, your main choices can be broken down into flat fish, round fish, and oily fish. Then you can chose to have the fish filleted or cooked on the bone. Large fish can, of course, be cut into suitable sized portions, again on or off the bone.

If there is a secret to successful fish cookery, it is to cook the fish for as little time as possible. Fish needs to be heated through just until the point the flesh has “set”; cook any further and you lose moistness and flavor. We are usually talking just minutes here.

Some fish need scaling, and some need to have the skin removed before cooking. If you are not sure, ask your fishmonger, and they will prepare it for you. Even if the skin is inedible it is often better to leave it on while cooking, after which is will easily peel off, or you can just eat the fish from it and leave it on the plate.

If you are cooking whole round fish, such as herring, bass, trout etc, cut a few diagonal slashes in the flesh, right down to the bone, just before cooking. This helps the heat penetrate so that the fish can cook evenly.

The final consideration before you begin cooking is simply how thick is your fish? A thin fillet of sole will obviously cook much more quickly than a thick tuna or cod steak, for example. The basic rule is the thicker the fish, the lower the heat, or the further away from the grill.

    • If it needs it, oil the fish, not the pan or grill. Season liberally with good salt and freshly ground black pepper, and by all means rub in some chopped herbs if you like them.


    • Pre-heat the grill before you start to cook – wait until it is at the full required operating temperature.


    • If cooking filleted fish, place the skin-side toward the heat first (unless, of course, you have had the fish skinned).


    • Indicators that the fish is ready are when the skin starts to slightly char and become golden, or the flesh becomes opaque rather than translucent at the thickest part, or that the flesh can be easily pulled from the bone.


  • Turn, if necessary to finish the other side – it will generally not take as long as the first side.

Fish, when grilled simply, is so delicious that it rarely needs elaborate or fancy sauces – often just a little melted butter or a squeeze of lemon is the perfect finish.

Brent Nelson writes The Guerilla Griller, one of Europe’s top 500 food blogs. On a mission to demystify food and cooking, with clear step-by-step recipes, and here for the newbie and experienced cook alike. Find The Guerilla Griller at: http://guerillagriller.blogspot.com/

Article Source: http://EzineArticles.com/?expert=Brent_Nelson

http://EzineArticles.com/?How-to-Cook-Fish-on-the-Grill&id=6654004


June 11, 2011 Cook

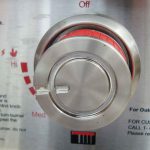
Control Your BBQ Zone

bbq grill knobControlling Temperature Zones in Your Outdoor Gas Grill
By Marsha Hinde

Today, the best outdoor gas grills have a cover or lid. You can leave the cover up while grilling or you can leave the cover down. When the cover is down, you turned your outdoor gas grill into an outdoor oven – you’re using indirect heat to cook your food in a 360 degree grid pattern. The only difference is that your indoor oven does a much better job of maintaining even heat than your outdoor grill. So how do you gain control over the temperature in your gas grill?

Creating delicious foods on your grill, even if it’s only hot dogs, requires precise temperature control because the compounds in the food react differently at different temperatures. “For example, meats are composed of protein, water, fat, collagen, and some sugars, and each component changes drastically at different temperatures. Fats render at one temp, water evaporates at another, collagens melt at another, sugar caramelizes at another, the Maillard reaction (a.k.a. browning of proteins) occurs at another, and carbonization (a.k.a. charring or burning) occurs at yet another temp.” ( Meathead Goldwyn)

With today’s modern gas grills with multiple burners, it is much easier to set up temperature zones for cooking your food perfectly. High end grills, such as the SUN 5 Burner Infrared Gas Grill, have gone a step further to help the grill master achieve perfect temperature control. They have incorporate Gourmet Heat Separators between the individual Flavor Zones, enabling you to shield the heat produced by one burner from the remainder of the grill. Thus, you can have the left hand side of your grill cranked up all the way, producing excellent direct (or radiant) heat while you have no burners lit on the right hand side, producing indirect (or convection) heat. (See the directions at the end of this article on setting up your grill depending on the number of burners it has.)

This set up provides an excellent way of running a sear grill on one side and a finish grill on the other. The most common mistake made in grilling food is to cook meat over direct heat until it is considered done. This produces a charred, tough piece of meat. All the juices have dried up from the direct heat. That’s what direct heat does. When using an internal grill thermometer (not the one built into your grill) the indirect heat side should produce a temperature between 200 and 225 degrees. This will slowly finish your meat without drying out the flavorful juices we all look forward to,

To avoid the catastrophe or ruined meat, sear both sides of your meat on the direct heat side of the grill and then move it to the finish side of the grill – where the indirect, convection heat will cook it to perfection, retaining those juices that run down your chin as you eat that perfect steak – one that you can now produce over and over again.

For the best chicken you ever ate, do the opposite. Cook the chicken over indirect heat until it’s almost done. Then transfer it to the direct heat and watch as the fat under the skin renders into the chicken and the skin crisps up to golden perfection. You’ll have your family begging for more!

All beef and pork roasts should be cooked over indirect heat to prevent loss of moisture and flavor. It you like the outside crisp, place the roast over direct heat for the last 10-15 minutes. You’ll have a roast that will have everyone begging for more.

And fish – fish should always be cooked only over the indirect heat since it has less fat than other meats. Cooking over indirect heat will retain its delicate taste and moisture. Just don’t forget to baste it once or twice during cooking.

The two zone method of grilling is an excellent way of grilling multiple foods at the same time. Start your steaks over the direct heat and your vegetables and fruit over the indirect heat. Most vegetables and fruit contain a high quantity of natural sugars and will burn or char when placed over direct heat. Indirect heat will grill them to perfection. Most fruits and vegetables will also benefit from a light basting or two during the grilling process.

As you get ready to move your meat to the indirect heat side, place your fruits and vegetables on the warming rack to finish cooking. And voila! When the meat is done, everything else is ready too! No more eating your barbeque meals in stages as the food is ready. You can now enjoy it all at once – just like a five star dining room.

Grill Set Ups for Direct and Indirect Heating (indirect heating on the right).

(2) Two Burner Grills: Left Grill on High; Right Grill Off

(3) Three Burner Grills: Left Grill High; Middle Grill Medium; Right Grill Off

(4) Four Burner Grills: From Left to Right – High, Medium, Off, Off

(5) Five Burner Grills: From Left to Right – High, Medium, Low, Off, Off

Practice the art of indirect heat next time you grill. It’s a technique well worth learning. Remember, practice makes perfect. Happy Grilling…

Marsha Hinde

President of Great Joys Enterprises, LLC in Tampa, FL http://www.TheBestOutdoorGrills.com http://www.PerfectOutdoorGrilling.com

Marsha Hinde is a business owner, teacher and designer. She has taught “How to Conquer Your Barbeque” and specializes in creative and unique outdoor entertainment. She designs Custom Outdoor Kitchens and sells the components needed to create the barbeque island of your dreams.

Marsha owns The Best Outdoor Grills.com which provides the finest gas grills available on the market today. With a Lifetime Warranty and a 100% Customer Satisfaction Guarantee we provide great value for our customers. Add to that free shipping and you know you are dealing with a No Risk vendor.

Be sure to visit her site to subscribe to her newsletter and recipes. Get new recipes and entertaining ideas weekly.

Article Source: [http://EzineArticles.com/?Controlling-Temperature-Zones-in-Your-Outdoor-Gas-Grill&id=6306185] Controlling Temperature Zones in Your Outdoor Gas Grill

March 13, 2011 Cook

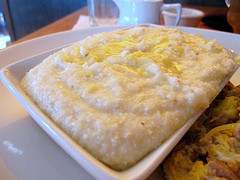
Barbecue Grits

Photo: Flickr/accidentalhedonist

This is another of my leftover pulled pork barbecue recipes. I always make a lot, and really I do that on purpose so we can freeze some for sandwiches, make Pulled Pork BBQ Spaghetti (recipe in another post) and make my now famous Barbecue Grits. This dish freezes well also. Recipe below:

Barbecue Grits

3 cups pulled pork barbecue
2 cups grits
2 tsp salt
2 Tbsp butter
2 tsp garlic powder
1/2 cup milk
8 oz mozzarella cheese
1 small jalapeño, finely chopped
1 medium onion, chopped
2 eggs, lightly beaten

Boil 6 cups of water and 2 tsp salt. Gradually add grits, reduce heat to low and cover for about 5 minutes. Add butter, garlic powder, milk, cheese, jalapeño and onion and mix well. Remove from heat after cheese is melted and all ingredients are blended. Temper eggs and add to grits. Stir in pulled pork barbecue. Spray a 9×13 dish with non-stick spray before pouring grits into dish. At this point, the dish can be frozen and baked later (up to 3 months). To bake, thaw completely and bake at 350 degrees for about 40 minutes. Cool slightly and serve warm. Reheats well too.

  • « Go to Previous Page
  • Page 1
  • Interim pages omitted …
  • Page 3
  • Page 4
  • Page 5
  • Page 6
  • Go to Next Page »

Primary Sidebar

Welcome To BBQTricks!

Hey Y'all... Thanks for stopping by. I'm Bill West. I blog about BBQ and occasionally country music. When it comes to BBQ I try to find solid time saving tips and tricks to make the grilling life a bit easier. It's life hacking for the backyard cooker. Read More…

Your Gateway to Barbecue Information

This site is a member of The Smoke Ring BBQ Webring A linked list of BBQ websites

Next BBQ Site - Next 5 BBQ Sites - Prev BBQ Site - Random BBQ Site

Join the BBQ ring or browse a complete list of The Smoke Ring BBQ Webring member's BBQ sites

If you discover problems with any of The Smoke Ring BBQ Webring sites, please notify the Ringmaster

fb

Footer

DISCLOSURE:

Posts on this site may contain affiliate links. If you purchase something via one of these links you won’t pay more but the site operator gets a small commission. Or as I like to call it: “beer money.”

Copyright © 2025 — Barbecue Tricks • All rights reserved.