• Skip to primary navigation
  • Skip to main content
  • Skip to primary sidebar
  • Skip to footer
  • Big Book of BBQ Tricks
  • Resources
  • Free E-CookBook / Newsletter
  • Smoking Meat 101 Book
  • BBQ Blueprint Book
  • Electric Smoker Cookbook
  • Wood Pellet Grill Smoker Book
  • Temperature Guide
    • Seafood
    • Pork
    • Poltry
    • Beef
  • About Me
  • Shop
  • Sitemap

Barbecue Tricks

BBQ Tips and Tricks

turkey

November 21, 2016 Featured

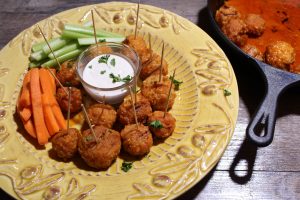
Turkey Balls and Buffalo Balls


img_6708-300x200We were looking for the perfect food for a football pre-party.  We love chicken wings with hot sauce and blue cheese dip – but hate deep frying at home.

This fun tailgate treat is easier to munch than traditional buffalo wings. Plus you get all the zesty spice and the joy of biting into the blue cheese center with every bite.  No bones about it. They’re good!

Recipe:

1 lb ground chicken
2 cups Bisquick
1 tsp chicken bouillon powder
1/4 cup water
2 cups cheddar cheese, grated
1 block Bleu cheese cut into cubes
1 tsp parsley (for garnish)
Ranch dressing
Buffalo Sauce
½ c butter
1 c Frank’s Red Hot Sauce
2 tsp Cayenne pepper

Heat grill to medium.
Mix together chicken, Bisquick, bouillon, water and cheddar cheese. Form chicken mixture around 1 cube of Bleu cheese, and roll into a ball. Grill on medium heat for approximately 30 minutes until firm and internal temperature reaches 160°F.

Using a cast iron pan on indirect heat, melt butter and stir in Frank’s Red Hot Sauce and Cayenne pepper to mix. Dredge cooked chicken balls in hot sauce and sprinkle with parsley before serving. Serving suggestion: serve with cut celery and carrot sticks and Ranch dressing for dipping.
November 22, 2015 Featured

Turkey Fry Without The Oil

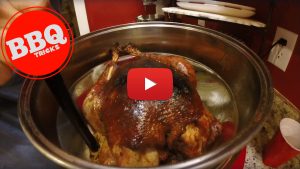
no_oil_fried_turkey.Still005Fried Turkey without the oil! It’s safer. Less Fat… but can you get the same taste with an air fryer?
Oil-Less Frying
BIG BOSS 1300-Watt Oil-Less Fryer, 16-Quart First you will need to have this fryer…  (get it here and support the site) Amazon has it and you will be amazed.

This cook is an attempt to achieve an air fried version of the smo-fried turkey. the deep frying in the driveway always seems a little dangerous for a once a year job…plus it’s a ton of oil that a lot of people use for the single cook. Here’s how no oil version with apple wood comes together.

Prep for the bird is pretty straight forward. We always rinse the bird before seasoning. Dont forget to remove everything from the inside and outside of the turkey. Including the thermometer in this case. We’re using the Big Boss Oil less fryer here and it gets really hot due to using a combination of Halogen, convection and infrared heat – not sure the plastic thermometer would melt or not.

I seasoned with a BBQ rub and salt – getting under the skin. Poultry third base… I did NOT inject but you could – the tip to that is injecting from the inside of the cavity… We did trim up thicker sections of fat andno_oil_fried_turkey.Still002 skin to help the rendering.
Here’s where I tried to add smoke I applied via this smoking gun and applewood. I also needed to use the extender ring for the big boss and some plastic wrap to seal in a good dose of smoke. I then let the bowl bird, lid and all chill in the refrigerator for 4 hours.

Then – it’s simply place the bird and set the timer and temperature

Whole Turkey 6 lb. LOW 350°F 1.5 hours (15 min/lb. from thaw) — The manual says you can even cook from frozen — but obviously i didn’t do that…

My main issue was the size of the bird – in this case it was still a bit too large for the size of the bowl even with the extender ring – the skin turned out great but very close to burning on top… which leads me to a great tip i learned from Carolina Pitmaster’s Jack Waibore who suggests for ANYONE… instead of always “going large” on the turkey every year with a 20 ponder… Consider two smaller turkeys instead… double the coveted drumsticks and wings plus in the oven it’s actually quicker to heat.

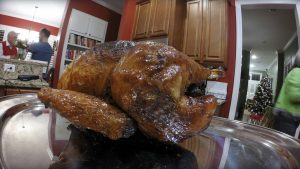
Because it cooks the skin so quick I was extra careful to make sure the INTERNAL temperature was up to 165 degrees Fahrenheit in the thickets part of the thigh and breast too – check a few points… but that’s it. The final product is very rotisserie like – which I love. Let it rest before carving.

As for the smoke flavor – I couldn’t really discern any distinct applewood taste so you may not want to worry about that step.

Nonetheless the end result was a fantastic air fried oil – less “fried turkey” that got rave reviews at the table. The skin was perfect.

https://barbecuetricks.com/wp-content/uploads/2015/11/no_oil_fried_turkey_small.mp4

November 23, 2014 Gadgets

Rotisserie Chicken and Rotisserie Turkey

rotissthisCLICK FOR VIDEO There’s something about a rotisserie chicken.

They’re everywhere these days in supermarkets – slow roasting by the dozen on display in industrial cookers the size of your guest bedroom. But the truth is if you have a rotisserie kit (it may have come with that fancy new grill and is now in a box in the attic somewhere) it’s actually pretty easy.

Every attempt we made with our gas powered Sam’s Club spit and electric motor set up ended with incredibly succulent and golden brown bird.

There’s only about four ingredients.

Here’s an updated video overview using turkey: http://youtu.be/xqB5mLKevxI First start with a clean bird – Chicken and small Turkey seem to work equally as well. Rub lightly (watch for too much salt) with BBQ Tricks house seasoning UNDER the skin and over the entire outer surface of the skin. Rub seasoning generously inside the cavity of the bird (remove any “spare parts.” Let the bird rest (upright if possible) uncovered in the refrigerator for about four hours to allow the seasoning to take and also to dry the skin a bit (this helps to crisp the skin later). My hunch is you could bypass all the above and still have an incredible meal but the little things do make a difference. Remove the bird and let it come to room temperature about an hour before you plan to cook. two or three hours before you plan to serve. Before you put the chicken or turkey on the spit mark the location of the grill’s burner with two marks (with a Sharpie Permanent Marker) so you’ll always know exactly where to slide the meat in the future. The most important thing to accomplish is to balance and secure the bird firmly on the rotisserie prongs so that the entire mechanism rotates smoothly on the spit. Use trussing to help if needed. Test it by rolling the spit ends on a flat surface or even on your hands. After you have it on a hot grill it’s very difficult to adjust. Also use pliers to secure thumb screws. You don’t want an end to slide.

rotisserie poultryFinally make sure the spit is secure in the motor mechanism. Confirm there is no way for it to slide out (does it sound like it happened to me?)! After you start the spin and cook come back and sight check everything after five minutes. Let it Cook til golden brown checking infrequently for one to two hours. Our 4.72 lbs chicken took just over two hours.

When golden check the temperature with a good thermometer and remove to a cutting board to rest. BBQ Tricks House Seasoning 2 Tablespoons Kosher Salt 1/2 Tablespoon Fresh Ground Black Pepper (grinding is a little bit more work but worth it) 1/2 Tablespoon Garlic Powder add Paprika for color

November 17, 2013 Featured

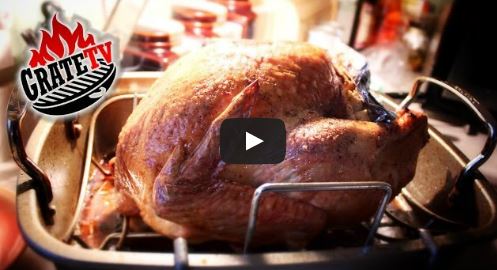
Top Thanksgiving Turkey Tricks

Turkey always seems better when cooked outdoors!  At least that’s how we see it here at BarbecueTricks.com and GrateTV.com.

turkeyvideoturkey tips

We decided to give you a super fast rundown of our favorite ways to BBQ Turkey.  From slow smoke to fast fry and rotisserie turkey too.  Take a look and plan your Turkey day to be the best ever.

Watch Top 6 Turkey Here or Below:

December 19, 2012 Featured

Smoked Turkey Tips and Tricks Video

smoked turkey

Use caution around the heat.

We know preparing the holiday meal can be a daunting task especially when there are a lot of unfamiliar mouths to feed in the house. Well, here’s our BBQ Tricks guide to smoking a mid sized to large bird this was about an 17 pound turkey.

We’re using a standard Brinkmann gourmet bullet type charcoal smoker with a large chimney of charcoal briquettes and also  watersoaked hickory chunks to add smoke. A weber smokey mtn. cooker or any indirect heat would be similar – hardwood lump charcoal may burn a little hotter so that may  speed things a bit if you use that.

Get the charcoal ready by firing up a chimney and waiting until the top coals are burning with some white ash.  We’ll have another video here to show you how to do that. Waiting til the coals are  white lets you make sure most any impurities are burned out of the charcoal and won’t give the bird an off taste.

While the coals are heating up you can unwrap your bird.  Typically large birds like this from the grocery store are already sold as “enhanced” with a brining solution already.  It will be labeled on the packaging as enhanced. So really you do not need to brine unless you really want to. And you can.  Over brining can actually make the meat kinda mushy,,. So just be aware of that.

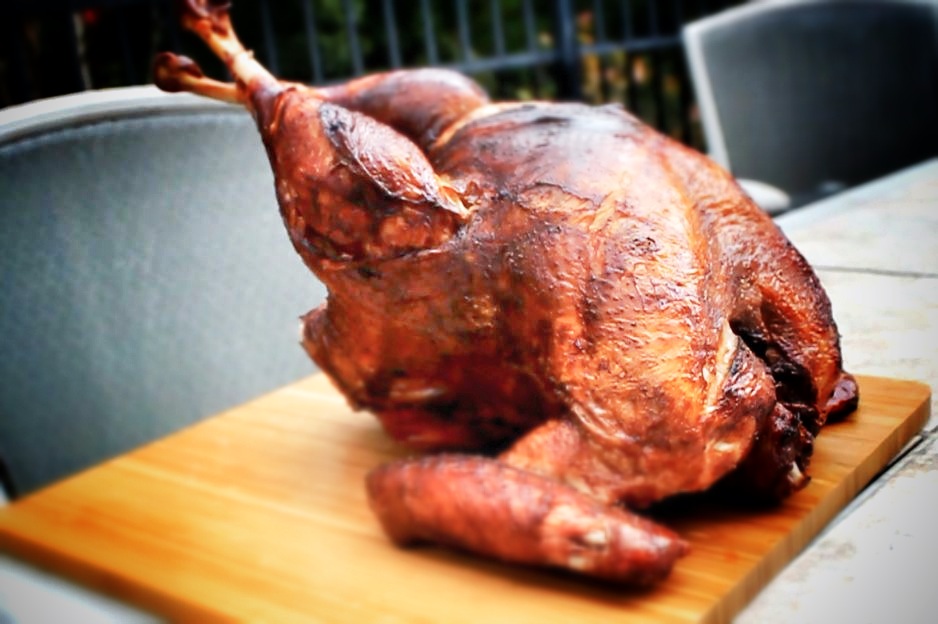
turkey after smoking

Final Temperature shoud be 160 to 170 degrees

All you need to do is give the bird a good rinse and pat dry with paper towels… remove the weird parts of it popes nose at the end , pull out the neck and organs that are stuffed inside and  trim off any other excess skin you think is gonna detract from the final look of your turkey. Make sure you remove all the plastic packaging that’s inside too.

Season the bird generously inside and lightly out with your favorite dry rub seasoning. It could be anything. Then you may opt to inject the bird with some melted butter and Cajun seasoning.  It’s nice.

The one tip we have is to inject from the INSIDE of the Cavity to keep the outside pristine.  Or just do what we did here…. Loosen the skin of the turkey all around the breasts and as deep into the legs as you possibly can and massage some spice rub under the skin and into the meatiest part of the bird.  Or as we like to call it  getting to poultry third base here. It gets it nice and seasoned.

Next, it’s about time to load the smoker  with the charcoal and top with some wood chunks like hickory to produce smoke. Place the bird over the water pan to prevent drips and block the direct heat of the fire just a little bit.   Smoker should be 225 degrees  – this smoker simply reads ideal – which is fine. Close the lid, leave untouched for two to  three hours  and  reloading with more charcoal after that if you need.  Reload  wood chunks through that little side door each hour.  You don’t want to open the lid if you don’t have to. That just adds 15 to 25 minutes every time you open the lid.  By adding wood chunks to the side door you also get a little glimpse of the skin thru the side  door to make sure you’re not over doing it.

After about three or three and half hours check the temperature of the bird using a meat thermometer – you’re shooting for minimum  160 to 170 degrees in the breast.  Usually we’d hit deepest part of thigh but it’s kinda hard to get to in this smoker

Use gloves to carefully remove the bird and be careful of hot liquid in the carcass… drain that out if you can.  Let the bird rest for at least fifteen minutes before carving.

This turkey took just about four hours and fifteen minutes with opening the lid simply once after three hours.

Our biggest tip… always give yourself an extra couple of hours leeway just in case. Because it’s easier to keep that bird warm and rest it a little bit longer than to rush the whole cooking process.    It’s really that simple

If you need more turkey tips it’s all at the website – www.barbecuetricks.com.

November 15, 2012 Featured

Smoke Fried or SmoFried Turkey Recipe

I first heard of a SMOKE fried turkey about a year ago when Jack Waiboer mentioned it in discussions on frying turkey.   It went something like “You wanna try something REALLY good ya gotta smoke fry a turkey.”

I haven’t been able  to get it out of my mind so I set up shop for us to demo the making of what Jack calls a “SMO-Fried” turkey for http://GrateTV.com.  I now know it’s as good as it sounds and – although it may be double the work – it’s not really very difficult.

It’s worth another reminder – don’t burn down the house… ask Jack about his old garage door.

Here’s the Deal:

Smo-Fried turkey is a natural progression combining 2 of the most popular ways to cook a turkey. It?s really quite simple, smoke or grill the bird then drop it in hot grease to finish off the cook and crisp up the skin. Please be very careful. Hot grease, liquids, and fire mixed together can spell disaster if you don?t put safety as your top priority! Trust us we call it the garage door killer from personal experience.

Smo-Fried Turkey

Ingredients:
10 bs. Turkey, completely thawed.
3 Gal Oil

Injection:
Equal parts butter, hot sauce (we used Texas Pete wing sauce), white grape juice,
Rub: Tony Chachere’s,

Directions:

Inject turkey breast from inside cavity, legs and thighs from outside. Rub under skin, on top of skin, and inside of cavity.
Smoke over hardwood coals and chunks at a settled temperature for at least 2 hours.

Finish turkey in a 325- 350 degree, preheated turkey frying apparatus, until done. 170 degrees in deep thigh. Takes about 30 mins. Let rest, carve, then serve.https://barbecuetricks.com/wp-content/uploads/2012/11/turkeya.jpg

Print
Smoke Fried or SmoFried Turkey Recipe

Smoke Fried or SmoFried Turkey Recipe

Ingredients

  • 10 bs. Turkey, completely thawed.
  • 23 Gal Oil
  • Injection:
  • Equal parts butter, hot sauce (we used Texas Pete wing sauce), white grape juice,
  • Rub: Tony Chachere's,

Instructions

  1. Directions:
  2. Inject turkey breast from inside cavity, legs and thighs from outside.
  3. Add Rub under skin, on top of skin, and inside of cavity.
  4. Smoke over hardwood coals and chunks at a settled temperature for at least 2 hours.
  5. Finish turkey in a 325- 350 degree, preheated turkey frying apparatus, until done.
  6. Takes about 30 mins.
  7. Check temp. for 170 degrees in deep thigh.
  8. Let rest, carve, then serve.
3.1
More Recipes at BarbecueTricks.com

October 25, 2012 Featured

Bacon Wrapped Stuffed Turkey on GrateTV

Jack Waiboer creates an Ostrich Egg recipe that you’ll want to try on the Grill. Stuffed Turkey rolled up in a crispy Turkey Bacon weave. It’s a poultry explosion. Full recipe here at http://GrateTV.com search “ostrich egg.”

ostrich turkey egg

Bacon Wrapped Stuffed Turkey Breast

January 7, 2012 Cook

Beer In The Rear Turkey 25.4

Resting Turkey

Beer In The Rear Turkey

Turkeyon a grill or smoker can be tricky.    It’s easy to get rubbery skin (and that can actually make some people mad).  There’s a lot of expectation on a Thanksgiving dinner especially with skin lovers.

Beer in the Rear Turkey is almost fool proof.  It’s quick and give you a crisp golden skin with a hint of smoke.

The first time I heard about the beer can trick was around 1999 when my morning radio hosts became enamored with a recipe they found called Beer Butt Chicken.  They thought it was so great (probably just liked that the word Butt was in a recipe) they wanted to bring a grill to the radio station and demo it in the parking lot.   I’ve grown to like it too.  So it’s fun to be able to super size the recipe.

This time the poor thing gets violated with not just a regular beer can but you use the big “Foster’s Lager” sized can of beer. You can find it in most grocery stores.   Reserve half and enjoy as you prep.  You’ve earned it. You’re going to want to punch some holes in the top of the can and put some spice rub in the can.  And then you get to the bird…where you clean off the bird really well and make sure you get all the different things out of the inside of the cavity of the bird.  They hide it in different areas… the neck, the gizzards…

Beer Butt Turkey

Caution: It's harder to REMOVE the can...

With the bbq spice rub inside the can… the steam and the beer flavoring will actually steam through the turkey and infuse it with a really super flavor keeping the bird moist from the inside out. You’re not going to get much from the outside-in because the skin of a turkey is kind of like a wet suit.    Rub the spice under the skin (I call this getting to second base with the Turkey).  The skin is really pretty resilient and thick so you’re not going to damage anything.

Then you just insert the can upright inside the bird.     Carefully lower the turkey on top of the can making kind of a tripod of sorts.    If you need a little extra room on the grill you may want to remove the bottom grill grate and put the tripod on a small roasting pan actually on the floor of the grill directly on the burners of the gas grill.  You won’t  actually turn the burners on under the bird.   Set up for indirect grilling heat.  Temperature is going to be 325 to 375 (if you have a temperature gage on  your gas grill – use it this time).    You can usually get this temp/indirect by having one or two gas burners on and the other two off.

To get a lick of smoke use some wood chips in a smoker box on he lit burner or using a tin foil pouch.  Making a smoker pouch really easy.  Then and then just let it cook.

After about an hour – open it up turn the bird around let it cook for another hour or until it gets golden brown on both sides.   Use a meat thermometer in the thickest part of the thigh and cook until you hit at least 160 degrees.

You’ll  want to use gloves and be super careful removing that can.   The liquid is dangerously hot and the can is greasy! Let rest before carving.


Beer In The RearTurkey

In the video demo we used an 11.75 lbs turkeyand cooked for two and a half hours (150 minutes). Approximately 345 degrees Indirect heat.

“Discard” half of the beer.    Add 2 tablespoons Rub into remaining liquid in can.   Using a “churchkey” can opener add additional holes to top of can.  Insert upright under and inside turkey using legs as tripod support.  Grill over indirect heat 2 to 3 hours until temperature measures 160 degrees in the thickest part of the thigh.  Let rest  before carving serving.

Ingredients:

1 wholeTurkey(10 to 18 lbs.)

6 tablespoons of BBQ Rub or Greek Seasoning

1 can Fosters Lager (or 25.4 oz other)

November 24, 2010 GrateTV

Turkey Talk – GrateTV BBQ Show

Video thumbnail. Click to play
Click to Play
From http://GrateTV.com Smoking, frying, and rotisserie turkey – what way is best. ;Jack Waiboer and Bill West break it down and look at a secret ingredient that may help your turkey. Gobble it up!

July 15, 2010 Featured

Grilling Turkey with Hoisen

Glaze On Turkey

Turkey only seems to get center stage one time a year and that’s a shame.

There’s nothing quite like a super tender turkey leg drenched in smokey sauce (I totally embarrassed myself gnawing a leg at the local Charleston Riverdog’s minor league baseball game food court the other day).    There’s a ton of different ways to tackle turkey.  Best of all it’s even better (and more impressive for dinner guests) when it’s prepped on the barbecue.

Just entered a cool contest with Honeysuckle White Turkey… I was actually hoping to show off one of my favorite ways to BBQ turkey with a rotisserie spit.   Instead I stumbled on thier teriyaki tenderloin breast fillets.  All I know about Asian cooking I learned from Steamy Kitchen (Jaden there would laugh at my lack of authenticity!).  But  the pre-marinated poultry looked and ended up tasting fantastic and all I really added was smoke.

breast baste

Brushing On the Hoisen

The recipe is really already in the meat (is that cheating?) so here’s a very simple recipe for a Asian Inspired Turkey with more on a smoke pouch from an earlier post.   It really was super easy.

Asian Turkey

1 Package Honeysuckle White Teriyaki Turkey Breas1 Tenderloins

1/3 Cup  Hoisen Sauce

1 Cup Apple Wood Chips ( can substitute Hickory or Oak)

Soak chips in a small bowl for 15 minutes to encourage smoldering.   Wrap the chips sealing tightly in an aluminum foil pouch. Vent with three small holes and place touching grill burner flame.

Once smoke is produced place marinated turkey directly on medium grill for 10 – 15 turning once being careful not to overcook.

Baste each side of turkey with a layer of hoisen sauce to glaze.  Repeat to thick glaze.

  • Page 1
  • Page 2
  • Go to Next Page »

Primary Sidebar

Welcome To BBQTricks!

Hey Y'all... Thanks for stopping by. I'm Bill West. I blog about BBQ and occasionally country music. When it comes to BBQ I try to find solid time saving tips and tricks to make the grilling life a bit easier. It's life hacking for the backyard cooker. Read More…

Your Gateway to Barbecue Information

This site is a member of The Smoke Ring BBQ Webring A linked list of BBQ websites

Next BBQ Site - Next 5 BBQ Sites - Prev BBQ Site - Random BBQ Site

Join the BBQ ring or browse a complete list of The Smoke Ring BBQ Webring member's BBQ sites

If you discover problems with any of The Smoke Ring BBQ Webring sites, please notify the Ringmaster

fb

Footer

DISCLOSURE:

Posts on this site may contain affiliate links. If you purchase something via one of these links you won’t pay more but the site operator gets a small commission. Or as I like to call it: “beer money.”

Copyright © 2025 — Barbecue Tricks • All rights reserved.