• Skip to primary navigation
  • Skip to main content
  • Skip to primary sidebar
  • Skip to footer
  • Big Book of BBQ Tricks
  • Resources
  • Free E-CookBook / Newsletter
  • Smoking Meat 101 Book
  • BBQ Blueprint Book
  • Electric Smoker Cookbook
  • Wood Pellet Grill Smoker Book
  • Temperature Guide
    • Seafood
    • Pork
    • Poltry
    • Beef
  • About Me
  • Shop
  • Sitemap

Barbecue Tricks

BBQ Tips and Tricks

Recipes

March 13, 2011 Cook

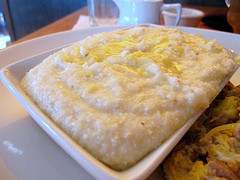
Barbecue Grits

Photo: Flickr/accidentalhedonist

This is another of my leftover pulled pork barbecue recipes. I always make a lot, and really I do that on purpose so we can freeze some for sandwiches, make Pulled Pork BBQ Spaghetti (recipe in another post) and make my now famous Barbecue Grits. This dish freezes well also. Recipe below:

Barbecue Grits

3 cups pulled pork barbecue
2 cups grits
2 tsp salt
2 Tbsp butter
2 tsp garlic powder
1/2 cup milk
8 oz mozzarella cheese
1 small jalapeño, finely chopped
1 medium onion, chopped
2 eggs, lightly beaten

Boil 6 cups of water and 2 tsp salt. Gradually add grits, reduce heat to low and cover for about 5 minutes. Add butter, garlic powder, milk, cheese, jalapeño and onion and mix well. Remove from heat after cheese is melted and all ingredients are blended. Temper eggs and add to grits. Stir in pulled pork barbecue. Spray a 9×13 dish with non-stick spray before pouring grits into dish. At this point, the dish can be frozen and baked later (up to 3 months). To bake, thaw completely and bake at 350 degrees for about 40 minutes. Cool slightly and serve warm. Reheats well too.
March 6, 2011 Featured

Grilling Fresh Vegetables

As the weather starts to think about getting warmer in the South (at least we can hope), we begin to plan our outdoor meals. One of my favorite things is grilled fresh vegetables, but as a friend once told me, it isn’t necessary a given that they will turn out good.

So, let’s talk about perfect grilled veggies. Of course, some of that is subjective, but I believe charred on the outside yet tender on the inside sure beats overcooked and mushy, or undercooked and too crunchy. If you cook them about 1o minutes on a hot grill, they will likely come out burned on the outside and raw on the inside, but if you cook them just 10 minutes on a medium fire they won’t cook long enough. What are the BarbecueTricks.com secrets? As with anything, good food takes time – low and slow is best. All veggies are not created equal – they don’t cook at the same rate, as a general rule, cook them over a MEDIUM fire for about 16-20 minutes.

The seasoning is also very important – bland is not good no matter how it’s cooked! Try using different oil-based dressings, such as Italian dressing, to marinate your veggies at least an hour before grilling. Just before skewering or loading into a grill basket (shown), sprinkle lightly with salt, pepper and garlic (and cayenne if you’re like me). If you do not use an oil-based dressing, try a sprinkle of Greek or Cajun seasoning and toss in a little olive oil before cooking. After cooking, sprinkle a little more dressing over all to coat and serve immediately.

So, if you follow these simple guidelines below, and have properly seasoned your favorites, you will be rewarded with pride-of-the-neighborhood grilled vegetables!

Zucchini, Onion & Yellow Squash – Grill over medium heat 18 – 22 minutes. Turn as needed for even cooking.

Mushrooms, Eggplant, Bell Peppers – Grill over medium heat 16 – 18 minutes, turning once.

ENJOY!

February 28, 2011 Featured

Pulled Pork Barbecue Spaghetti

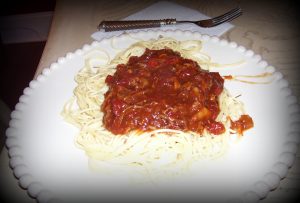
pork spaghettiWhenever I make pulled pork I have extra. You can freeze it in small batches for quick dinners, you can make BBQ Grits, which are awesome and I will describe in a separate post, or you can make Pulled Pork Barbecue Spaghetti. Here is the recipe:

Pulled Pork Barbecue Spaghetti

2 cups pulled pork barbecue
2 medium green pepper, chopped
1 medium onion, chopped
2 tsp garlic powder
1 Tbsp olive oil
salt & pepper to taste
3 cups of your favorite barbecue sauce (or use recipe below)
Spaghetti

Homemade BBQ sauce for spaghetti:
2 cups ketchup
1 cup water
1/2 apple cider vinegar
5 Tbsp sugar
5 Tbsp brown sugar
1/2 Tbsp black pepper
1/2 Tbsp onion powder
1/2 Tbsp ground mustard
1 Tbsp Worcestershire sauce
1 Tbsp lemon juice

Mix sauce and bring to a boil. Reduce heat and simmer 15 minutes. Cook spaghetti according to package directions. Saute’ green pepper and onion in olive oil with salt, pepper and garlic powder. Stir pulled pork and veggies into sauce until heated through and serve over spaghetti.

February 13, 2011 Featured

Grilled Corn on the Cob

silver queen corn

Photo: Flickr.com/Aimee Steen

I love corn. I mean I love corn any way –  grilled, fried, baked, creamed, in a casserole, muffin, pudding or soufle’, etc. But one of the best ways to serve corn in the summer when you can get that really good Silver Queen corn on the cob, is on the grill.

There are also many ways to cook it on a bbq grill. You can pull the husks back, remove the silks, wash and replace the husks to grill, or you can remove all the trappings, season and wrap in foil. Either way, just make sure you have some oil-based product on them before sealing them up to grill. It will turn out juicy and packed with flavor.

I recommend coating each ear with mayonnaise – I know, what? It doesn’t have a mayo taste once it’s cooked, it just preserves moisture.

So, back to the mayonnaise. Once you have a real mess on your hands, literally, and have them slathered up really well, sprinkle with chili powder for a little sweetness (or you can just use sugar) and salt. Lastly drizzle a small amount of lime juice on each ear and then wrap and seal tightly in aluminum foil and place them on the grill for about 20-25 minutes. Yum! It doesn’t matter what you serve with that – it’s gonna be the main course!

Photo —  http://www.flickr.com/photos/43387439@N02/5420704391/

February 12, 2011 Recipes

Grilled Parmesan Onions

There are lots of ways to serve onions, but for a treat I like to serve Grilled Parmesan Onions. You can do this in the oven too, but they’re great on the grill.   The addition of a lick of smoke makes this vegetable taste incredible.

Start with sizable onions (preferably Vidalia, or at least sweet onion). Cut off both ends and peel the onion without cutting in half. Take a pairing knife and cut a gouged out top hat or lid, like you would when carving the top of a pumpkin. Go as deep as you can so you can put your ingredients towards the middle of the onion. Push a chicken (or beef) bouillon cube as far down into the onion as you can. Sprinkle grated Parmesan cheese down in the onion on top of the bouillon cube. Then pack to the top with butter. Sprinkle with more Parmesan cheese. Place top of onion back in place and press to secure. It won’t fit perfectly with all the goodies you have in there, and boy will that be worth it. Next, wrap each onion tightly in aluminum foil and grill for 45 minutes to an hour (depending on the size of the onions). Then just unwrap and eat; no need to do another thing to these.

If you’re grilling over live fire or charcoal try adding an additional layer of foil wrap and then place the onion DIRECTLY ON THE COALS!    This makes for quite a show with guests and it shortens the cooking time quite a bit.

As I said, this can also be done just exactly like this in the oven. Or, another variation to feed a crowd is to take several onions, cut them into chunks and place in a baking dish. Crush 3 or 4 bouillon cubes of your choice and sprinkle over the onions. Cut up a stick of butter into slices. Top the onions with grated Parmesan cheese and spread the butter around in the dish. Cover tightly with aluminum foil and bake at 350 degrees for 45 minutes.

Serve hot and enjoy!

January 30, 2011 Featured

Fired Up Football Dips

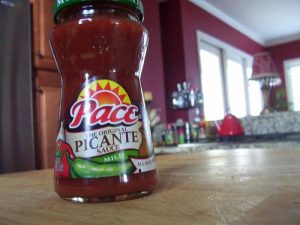
picante sauceMost people host a Super Bowl Party, we host a Super Bowl Barbecue. If you’re looking for a sure-fire way to spice up your party or next barbecue, serve these crowd-pleasing, lip-smacking dips! The common ingredient is zesty Pace Picante sauce. Pace  provided it at no charge and asked us to share our favorite dishes using their product. Here are the two dips we chose, but rest assured there are many uses for Pace Picante sauce when planning to barbecue!

Firehouse Bean Dip

1 stick butter
1 chopped onion
2 cans canned Pinto beans, drained & mashed
6 oz. Provolone cheese, cut up
3 jalapenos, finely chopped
1/2 cup Pace Picante sauce
1/4 cup milk
1 Tablespoon prepared garlic
1 Tablespoon Morton’s Hot Salt
Serve with warm flour tortillas and home made sturdy tortilla chips

Melt butter. Add beans and cook over low heat mashing and stirring until smooth. Stir in remaining ingredients and cook until cheese melts, stirring often. Keep on low heat until ready to serve. Cut flour tortillas into wedges and microwave in wax paper. Serve dip while hot and bubbly with warm tortillas and tortilla chips.

For a heartier dish, try this next one with either tortilla chips or battered chicken fingers.

Southwestern Ranch Dip

8 oz. sour cream
1/2 cup Buttermilk Ranch Dressing
1 cup Pace Picante sauce
1/2 cup cheddar cheese, shredded
1/4 cup Bleu cheee crumbles
1/4 cup Tabasco sauce
1 chopped Chipotle pepper in Adobo
Serve with battered/fried chicken fingers and sturdy tortilla chips

Mix all ingredients until well blended and pour into a small baking dish. Bake at 350 degrees for 20 – 30 minutes until bubbly. Serve hot with fried chicken fingers and tortilla chips.

These taste-tempting dishes are sure to please your most discerning palettes, and just remember Barbecue Tricks when you’re looking for some delicious recipes and tips!

January 30, 2011 Recipes

Tortillia Chips Made Easy

nacho chipsTortillia chips can be easy to make at home.  The recipe is as easy as three ingredients. Click through the video for the easy step by step.

The best things about these home made chips is the buttery taste and the sturdy firmness of the chip.  In fact, you’ll have a hard time finding a chip that can stand up to guacamole and spicy bean dip any better than these.

Add some salt right after frying and serve ’em hot.

Tortillia Chips
Fresh corn tortillias
Vegetable oil
Salt

January 7, 2011 Featured

Huli Huli Chicken How To

Salt The Chicken Under the Skin

By Gary Nicolassiand Maria Nicolassi

Are you in the mood for trying something different on your grill? Want something that is fun to cook, delicious to eat and that will impress you, your family and your friends? Well then, do we have something for you. Don’t look now, but straight from the islands it’s Huli Huli Chicken coming your way!

“Huli” is the Hawaiian word for “turn.” Ernest Morgado “invented” Huli Huli chicken in 1955 when barbecuing a batch of chicken for some farmers using his mother’s marinade recipe. It became such a hit that he registered the trademark with the Territory of Hawaii in 1958 and with the US Government in 1965. Morgado cooked the chicken between two grills and when one side was done someone would shout “Huli” and the grills would be flipped over.

The dish has become legend in Hawaii where it is often sold at charity fundraisers. It has also launched many commercial sauce brands and has even inspired a song called Huli Huli Chicken by the group The Barefoot Natives.

Fortunately, you don’t need to use two grills do you your own backyard version of this great tasting dish (although we highly recommend shouting “huli huli” when you turn the chicken). Instead, a charcoal burning barbecue will work quite nicely – we use a Big Green Egg, for example. You will need to get some mesquite chips, if you don’t already have some, and then the ingredients for the following recipe:

One cut up chicken

1/2 cup frozen pineapple concentrate

1/2 cup soy sauce

1/4 cup catsup

1 piece of fine grated ginger

3 cloves of crushed garlic

3 Tablespoons of brown sugar, packed

1 tablespoon of rice vinegar

Mix up the ingredients and use about half to marinate the chicken for at least an hour. Reserve the remainder to baste the chicken when it is on the grill. Meanwhile, soak the mesquite chips in water for about 20 minutes. Heat your barbecue to the 300 to 350 degree range, apply your pre-soaked mesquite chips and proceed to turn and baste the chicken every 5 minutes until it is done – about one hour. Oh, and don’t forget to shout “huli huli” when you turn the chicken!

Once you taste Huli Huli Chicken, you will understand what the fuss is about. The chicken is tender, succulent and flavorful without being overpowering. When we have it, the chicken is eaten clean down to the bone. It really is that good! It also lends itself well to entertaining – for example you can use it as a centerpiece for your own Luau. Don’t feel like entertaining? Then use it to give yourself or your family a night of fantasy and fun. Dial up some Don Ho on your iPod, put on that DVD of Elvis in Blue Hawaii, mix up a Mai Tai or other such suitable libation and voila, you have a made-to-order Hawaiian vacation without the expense or hassle of the travel!

Gary and Maria Nicolassi are a husband and wife writing team that author two blogs:

http://apackageatthedoor.blogspot.com/

http://biggreeneggatthedoor.blogspot.com/

Article Source: http://EzineArticles.com/?expert=Gary_Nicolassi
http://EzineArticles.com/?Huli-Huli-Chicken&id=6572032


January 5, 2011 Cook

Tricks for How To BBQ A Whole Chicken On A Rotisserie

rotisserie chickenAuthor: Larsen Markston

Rotisserie chicken from the grocery shop is becoming a delicious last minute meal. It really is delicious, but if you discover how to BBQ a whole chicken on your own rotisserie you will understand how significantly greater it tastes with not significantly additional work than the trip to the grocery. You are going to have to have a grill which has a rotisserie, a whole chicken, butter or olive oil with seasonings, and about 1-1/2 hours of cook time to get a yummy home-cooked chicken.

The initial action is setting up your rotisserie on your grill. You can find rotisseries made for both gas and charcoal grills. Follow your manufacturer’s directions and make guaranteed that it rotates freely and is ready to go. Locate a drip pan with about 1/2 inch of water within the grill to catch excess fat drippings and prevent flare ups and to add moisture to the roasting chicken. Fire up the grill to high and let it to heat up while you prepare the chicken.

Rinse the chicken inside and out with cold water. Get rid of the giblets and excess fat, I prepare those up separately for my kitties to be a special treat. Pat the chicken dry inside and out using a paper towel. It is possible to rub butter and salt inside the cavity or include some garlic or onion if you like for additional flavor. You are likely must truss the chicken if your rotisserie is a spit with out a basket. To truss the chicken you need to tie the legs and wings to each other so they will not flop around in the course of cooking possibly getting burned or throwing the spit off center. The least complicated solution to do this really is with heat-proof butchers twine or non-coated wire.

After the bird is trussed it’s set being spitted on the rotisserie. Slide the spit through the entire body in the chicken and make certain the pronged pieces at either end of the spit are secured to the chicken. These are to enable the chicken to turn using the spit so the chicken cooks evenly on all sides. Place the spit on the grill according to the manufacturer’s directions and you’re prepared to go. Turn off the burner or move away the charcoal directly beneath the chicken so the high temperature is less direct.

Baste the chicken every 20 minutes to 1/2 hour with butter or olive oil mixed with whatever seasonings you like. You would like to let the chicken cook on it’s very own for your most part. Leave it alone and don’t lift the lid of the grill any more than you must letting the heat out. In the event you like to use a glaze being a finishing touch, apply it during the very last 10 to 20 mins of cooking.

The full preparation sounds far more complicated than it really is. After you find out how to BBQ a whole chicken, the set up time is really a snap. The cooking time will depend on the size of the chicken and the heat of the grill. When the chicken is on the rotisserie and cooking, it needs minimal attention and enables the cook to tend to the rest of the meal, the guests, or just set your feet up for any bit and enjoy the cooking smells.

Article Source: http://www.articlesbase.com/cooking-tips-articles/tricks-for-how-to-bbq-a-whole-chicken-on-a-rotisserie-2912331.html

About the Author

I don’t cook in BBQ competitions, but sure do enjoy grilling for my family and trying out new recipes. For more ideas and recipes for Competition BBQ recipes visit BARBECUECOOKBOOK.INFO

December 8, 2010 GrateTV

Country Sausage Gravy Recipe Step by Step

Video thumbnail. Click to play
Click to Play
From http://GrateTV.com Mini Extra – Jack’s Recipe For ;Country Gravy using Lea and Perrins and sausage.
  • « Go to Previous Page
  • Page 1
  • Interim pages omitted …
  • Page 5
  • Page 6
  • Page 7
  • Page 8
  • Page 9
  • Page 10
  • Go to Next Page »

Primary Sidebar

Welcome To BBQTricks!

Hey Y'all... Thanks for stopping by. I'm Bill West. I blog about BBQ and occasionally country music. When it comes to BBQ I try to find solid time saving tips and tricks to make the grilling life a bit easier. It's life hacking for the backyard cooker. Read More…

Your Gateway to Barbecue Information

This site is a member of The Smoke Ring BBQ Webring A linked list of BBQ websites

Next BBQ Site - Next 5 BBQ Sites - Prev BBQ Site - Random BBQ Site

Join the BBQ ring or browse a complete list of The Smoke Ring BBQ Webring member's BBQ sites

If you discover problems with any of The Smoke Ring BBQ Webring sites, please notify the Ringmaster

fb

Footer

DISCLOSURE:

Posts on this site may contain affiliate links. If you purchase something via one of these links you won’t pay more but the site operator gets a small commission. Or as I like to call it: “beer money.”

Copyright © 2025 — Barbecue Tricks • All rights reserved.