• Skip to primary navigation
  • Skip to main content
  • Skip to primary sidebar
  • Skip to footer
  • Big Book of BBQ Tricks
  • Resources
  • Free E-CookBook / Newsletter
  • Smoking Meat 101 Book
  • BBQ Blueprint Book
  • Electric Smoker Cookbook
  • Wood Pellet Grill Smoker Book
  • Temperature Guide
    • Seafood
    • Pork
    • Poltry
    • Beef
  • About Me
  • Shop
  • Sitemap

Barbecue Tricks

BBQ Tips and Tricks

Recipes

October 8, 2009 Featured

Creating Perfect Ribs in Your Smoker

By Joe Johnson

In all honesty, I love ribs, but I hate the ribs that the vast majority of establishments serve. Rarely do I get ribs that are done properly as most tend to be either dry and leathery, or soft and mushy. Worst part is, most of these establishments believe that slathering the ribs in a barbecue sauce will bring them back to edible status. Well they are wrong…all it serves to do is add to my frustration by making the meal messy.

While very few, if any, chefs, pit masters, or home-cooks strive to achieve a leathery finish, you do hear the statement that “falling off the bone” is the way to go. While I agree that tender and soft is the ultimate goal, any competition rib that completely falls off the bone is considered completely over-done. A truly perfect rib will adhere to the bone, but fall off when tugged. So my goal with this post is to show you how to achieve a perfect rib at home. The key to good ribs has four components – the rub, the smoke, the heat, and the time. Let’s begin with the rub.

The point of using a rub is to develop a flavor base and to create a crust or bark on the ribs. Depending on where you go and whom you talk to, the rubs you have to choose from will reflect regional influences. Some will be hot and spicy, whereas others will be sweeter. I am partial to the Pork and Poultry Blend from Caroline’s Rub, which has a more typical Texas flavor – more savory than sweet. I like sweet, don’t get me wrong, but I prefer my ribs with more kick than candy, so I let my wood choice add the sweetness. Before applying the rub, the first thing I do is remove the thin skin that covers the back side of the ribs. Using a filet knife, I loosen it from one end, grip it with a paper towel, and then pull it off in one easy motion. While you don’t absolutely have to remove this skin, taking a few extra seconds to do so will definitely improve the tenderness of your final outcome. I then rinse and thoroughly dry the ribs, and follow that with a thorough coating of my chosen dry rub. How much you use, will entirely depend upon you. I like a thicker coating, some will prefer less. Next take the coated ribs, and tightly wrap them in plastic wrap, place in the refrigerator and let sit for at least 3 hours. This will give the rub time to penetrate and flavor the ribs. Once the ribs have sat, remove from the refrigerator and allow them to return to room temperature before putting on the smoker.

While the rub adds an immediate kick of flavor, the smoke you choose will work to complement the rub, and add that flavor we all recognize as barbecue. With meats such as pork ribs, I like to kiss the meat with smoke from pecan and cherry woods. The pecan is very similar to hickory in flavor, without the strong bite that can sometimes overpower the lighter meat of the ribs. The addition of cherry wood to the mix serves to work with the pecan to sweeten the meat.

Next factor for success is heat. While there are a thousand ways to cook ribs, many of which yield a truly great product, I prefer slow smoked ribs. Nothing gets my blood pumping like the smell of slow smoked barbecue. I have always found that higher temperatures result in tougher ribs, so my goal is to maintain a low heat level of around 215F to 225F in the smoker (or in your oven at home). This temperature range has yet to fail me. Once I have the smoker where it consistently holds the temperature within this range, I will place the ribs standing in a rib rack, inside for cooking.

Finally, the last factor for creating successful ribs is the cooking time. While many folks insert a thermometer in their ribs to determine doneness, I prefer simply watching the bones. For an average rack of baby back ribs, you can assume a cooking time of between 3 ½ and 4 hours at the temperatures I recommend. The easiest way for me to determine if my ribs are done is to perform two steps, starting with the first at the 3 hour mark – look at the bones. If I have a good ¼ – ½ inch of bone showing, I then perform step two, which is to take a toothpick and insert into the meat. If it slides through will little resistance, like going through butter, the ribs are done. You will want to watch them closely as they will go from done to overdone fairly quick.

Once cooked, I like to let the ribs rest for at least 10 minutes to allow the juiced to evenly distribute themselves within the meat, which will keep things tender and moist. Like I said earlier, I don’t like messy, so I tend to serve the ribs dry, with a side of my favorite barbecue sauce for dipping.

Following this method has consistently provided me with ribs that are succulent, moist, and truly satisfying.

Joe Johnson is a proud Texan and founding partner and chief pit-master with Caroline’s Rub, where he is in charge of product promotion and development for their line of gourmet dry rubs, smoked salt, and Texas chili seasoning.

Article Source: http://EzineArticles.com/?expert=Joe_Johnson
http://EzineArticles.com/?Creating-Perfect-Ribs-in-Your-Smoker&id=193036

July 11, 2009 Featured

Pita Chips – Making Them Easy

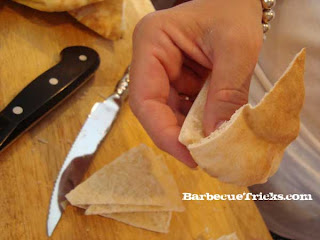
Barbecue’s big flavors often call for a collection of robust sides. Often times a backyard cookout is accompanied by some cheap potato chips. Here’s a way to dress it up and offer a slightly healthier (baked) alternative. Sure you can buy pita chips in the store, but they tend to be small overpriced bags and not enough for small gathering.

Go ahead and try to make these chips at home they’re super easy and we nailed it on the first try.


Garlic Pita Chips

1-2 packages pita bread

Olive oil

Seasoned salt

Garlic powder

Olive oil spray

  • Cut pita bread in half, then cut each half into four triangles and separate each triangle.

  • Place chips on baking sheets lined with parchment paper and brush heavily with olive oil.

  • Sprinkle salt and garlic powder over all. (One side only for best result.)

  • Bake at 350 degrees for 8 minutes.

  • Flip chips and spray with olive oil spray.

  • Bake 6-8 more minutes until golden brown. (For convection, use 325 degrees and only 6 minutes on the second round.)

  • Drain on a paper towel and serve with your favorite dip!

June 16, 2009 Recipes

Grilled Fruit For Summer

We’ve spotted some nice grilled fruit recipes lately. One included the nice tip of using long natual cinnamon sticks a skewers… another including cubes of pound cake along with the fruit on kebabs. But here’s a simple and elegant pinapple trick that’s sure to please from a new book called “Sizzle.”


Grilled Pineapple

The sight of grilled pineapple with a caramelized glaze makes me think of summer, no matter what time of year it is. But sugary fruits make a right mess of the barbecue hot plate (griddle). Fortunately, the mess is easily removed with water. Squirt plenty of water on the plate while it is still hot, scrape it clean, wipe with an old towel and it’ll be just like new.

Serves 4-8

1 firm but ripe pineapple, peeled, cut into thick rounds, then into quarters
1/2 – 1 cup brown sugar
Vanilla ice cream for serving
Bamboo skewers, soaked in cold water for 30 minutes

Thread pineapple pieces onto bamboo skewers. (Threading pineapple onto bamboo skewers is easier if you pierce the pieces with a metal skewer first.)

Put brown sugar on a large plate and turn skewers in it to coat. Cook over medium heat on a barbecue hot plate (cast-iron griddle) until lightly browned (the hot plate should be clean but not oiled – the juice will soon run out of the pineapple as it heats). Transfer to a plate and serve with ice cream.

Alternatively, cut the pineapple into eighths, coat in sugar, then cook on a barbecue hot plate.

* * *
Recipes from SIZZLE: Sensational Barbecue Food by Julie Biuso
(Julie Biuso Publications, April 2008, $19.95/softcover)

May 10, 2009 Recipes

How to Marinate Anything

How to Marinate Anything
By Todd Mohr

Everyone loves to have their favorite foods cooked to perfection on the grill. And learning how to marinate is an important step in achieving this perfection. marinating is a cooking method – or at the very least an important prelude to many cooking methods – that needs to be understood in itself. It is much more than simply soaking your favorite meat in your favorite salad dressing before slapping it on the grill. Or at least it should be! There are some tricks to getting it right and lucky for you, they are simple and you will learn them right here!

Marinate with a Mission.

You’re probably wondering if you really need to learn how to marinate for great grilling. My general mantra when it comes to cooking is that there are no unbreakable rules. So I guess, in sticking with that, you don’t HAVE to do anything. But before you decide your reading for now is over, let me give you some quick reasons why you might WANT to marinate. marinating meats imparts flavor, adds moisture, and can (to a degree) tenderize meat. The first secret to great marinating is learning how to match the correct marinate with the correct cut of meat and then apply the correct cooking method. This simple formula will produce great results every time.

Proceed with Caution (but not too much!).

In learning how to marinate, one of the things to determine is what meat you plan to use. A common mistake is to overestimate the meat tenderizing results that can be achieved with marinating. Yes, marinating will provide SOME tenderizing – but only some. You still cannot take shoe leather, marinate it and cut it with a butter knife. It’s not going to happen – and expecting that will only produce those disappointing results I mentioned before. Like anything else you cook, it is always best to start with good ingredients and to consider the end result you desire. In addition, muscle tissue will absorb marinate better than fat tissue so using an overly fatty piece of meat will result in very little marinating actually getting into your product.

There is a Method to the Madness (and to the marinate).

Making your own marinate is easy and ingredient options are virtually limitless. In most marinates, the essential ingredient is an acid, which acts as a slight tenderizer, but the type of acid you choose is completely open to your creativity and the type of dish you are making. Wine, lemon juice, tomato juice, balsamic vinegar, orange juice pineapple juice and margarita mix are all fairly common acids that work great in marinates. Adding oil is also an option, but keep in mind that the oil itself will not be drawn into the muscle tissue. Oil in this case is used solely for flavoring so if you use oil, choose a flavored oil. Fresh herbs and spices can also add flavor to marinates and you’ve got lots of choices here, too. When using herbs, remember that whole herbs release their flavor slowly so they work best for long marinates. If you are going with a quicker marinate, grind up the herbs before use to impart their flavor more quickly. Then you just make it up! Yes, you read that correctly. There is no recipe here because there are hundreds of recipes for marinates and I don’t know what you like or what you’re making. The key to cooking success is to learn the basic cooking methods, the techniques of achieving the end result you desire, and then let your taste, imagination and your unique situation be the guide for making up your very own marinate recipe, which might be different each and every time you marinate.

The only Reaction should be a Good One.

Always place the product you are marinating (with the marinate) in an air-tight container to keep the moisture in. Remember – one of the reasons we are going through this process is to add moisture so you don’t want to lose it at the same time! How long you let the juices soak in to the meat depends on how much time you have and the cut of meat you are using. The thicker the meat, the longer you will have to marinate to impart the flavor into the protein. Remember to use an acid-resistant container such as stainless steel. Don’t use copper or pewter as this can react with the acid, making those who eat the food sick. Finally, always store the container in the refrigerator for the entire duration – until you cook the meat. Remember to always discard the marinate after you have finished marinating and never re-use the marinate during the cooking process because it has had raw meat soaking in it for a length of time. In these ways, you are ensuring food safety.

So – what will you make this weekend? Relax. You know how to marinate and you’ve got a whole summer of delicious experimentation ahead of you!

Chef Todd Mohr is a classically trained chef, entrepreneur, educator and host of the “Cooking Coarse” video series. For more details on Cooking by Method and how you can cook better everyday at home, visit Chef Todd’s website http://www.i-hate-cooking-recipes.com/ where you can view over 150 free cooking videos and subscribe to the Free monthly e-zine “Burn Your Recipes.”

Article Source: http://EzineArticles.com/?expert=Todd_Mohr
http://EzineArticles.com/?How-to-Marinate-Anything&id=2311614

September 28, 2008 Recipes

4th Revision BBQ Rub – The Best Recipe

When you’re working on getting the PERFECT flavor for a BBQ competition recipes get tweaked and adjusted to perfection. Rubs are a little like the spelling of the word barbecue (try barbeque, B-B-Q, Bar-b-que, etc) there are a lot of ways to do it. This versatile barbecue rub has endured it’s fourth revision and it’s ready for the public.

A few special ingredients help for the “barbecue trick” here. The turbinado sugar (Sugar In the Raw is available with free shipping with Amazon Prime) may be tough to find but the large crystals don’t burn as easily on ribs and on other meats on the grill. The cumin is also something that adds a robust flavor that is this recipe’s secret.
4TH REVISION BBQ TRICK RUB

  • 4 Tablespoons Paprika
  • 1/2 Tablespoon Chili powder
  • 1/2 Tablespoon Cayenne (optional for heat)
  • 3 Tablespoons Tony Cachere’s Cajun Seasoning
  • 4 Tablespoons Sugar In The Raw
  • 1/2 Tablespoon Cumin
  • 1 tablespoon Brown Sugar

Combine all ingredients in a mixing bowl and blend thoroughly with forks, slotted spoons, or fingers (eliminating all lumps).

September 9, 2008 Featured

Almost Award Winning BBQ Sauce

This barbecue sauce recipe didn’t really come close to winning any awards with competition judges. Likely because of the strong kick of heat provided by a dose of chipotle and cayenne. It just crossed the line out of “mainstream” in the heat department. A few judges seemed to love it with high ranks for chicken and ribs and all of our B-B-Q Tricks home samplers were ready to take a bath in the stuff. It’s that good.

The best thing about this “Almost Award Wining Sauce” is that it’s a perfect sweet heat finishing sauce that will caramelize perfectly as the finishing touch to ribs and chicken. Feel free to temper the heat by dropping the cayenne or chipotle.

2 tbs. Vegetable Oil
1 large clove of Garlic (crushed/minced)
1 medium Onion minced
1 Chipotle Pepper (from can) minced
1 tsp. Chili Powder
1/4 tsp. Cayenne Pepper
1 cup Ketchup (we use Heinz)
2 tbs. Dijon Mustard (Grey Poupon)
5 tbs. Dark Molasses
3 tbs Worcestershire Sauce
1/2 tsp fresh ground Black Pepper
2 tsp. Hot Pepper Sauce (we use Texas Pete)


Print
Almost Award Winning BBQ Sauce

Rating: 51

Prep Time: 5 minutes

Cook Time: 20 minutes

Total Time: 25 minutes

Yield: 1 to two cups

Serving Size: 2 to 3 Tablespoons

Almost Award Winning BBQ Sauce

This is my Go-TO sauce for everything. Too spicy for a competition but it did win third in wings (no too shabby) but just right for my family. It has enough sugar to provide ribs and chicken with the perfect smoky char.

Ingredients

  • 2 tbs. Vegetable Oil
  • 1 large clove of Garlic (crushed/minced)
  • 1 medium Onion minced
  • 1 Chipotle Pepper (from can) minced
  • 1 tsp. Chili Powder
  • 1/4 tsp. Cayenne Pepper
  • 1 cup Ketchup (we use Heinz)
  • 2 tbs. Dijon Mustard (Grey Poupon)
  • 5 tbs. Dark Molasses
  • 3 tbs Worcestershire Sauce
  • 1/2 tsp fresh ground Black Pepper
  • 2 tsp. Hot Pepper Sauce (we use Texas Pete)

Instructions

  1. Heat the oil in a deep sauce pan and then add garlic and onions until they soften.
  2. Next add all peppers and heat for 20 seconds before stirring in the remaining ingredients.
  3. Cook on low heat for 20 minutes until thickened to your liking.
  4. If desired: When cooled strain to remove chunks (garlic and onion).
  5. Stores air tight refrigerated for approx. 6 days.
3.1
More Recipes at BarbecueTricks.com

August 16, 2008 Misc

Award Winning Potato Salad

Emeril just wrapped up a big contest/feature on “Good Morning America” where he named the “Best Potato Salad Ever.”

The recipe they chose broke from tradition for us at Barbecue Tricks. We’re not used to much bacon in the mix. But when it’s there most BBQ lovers DO like the flavor.

Here’s the recipe followed by the runner up with a bit more tradtional and creamy salad. The third runner up was different too… she oven roasted the potatoes… neat idea.

Ingredients:
8 large red potatoes
6 hard boiled eggs, chopped
1 lb. bacon
1 large white onion, chopped
2 c. mayonnaise
1 c. sour cream
3 tbsp. milk
2 ½ c. shredded lettuce
2 large tomatoes, chopped
2 c. Shredded cheddar cheese
1. Wash and boil potatoes until tender. Let cool.
2. Chop and cook bacon and onion together, until bacon is crispy. Drain grease into a bowl and reserve.
3. In a small bowl mix mayonnaise, sour cream, bacon drippings and milk. In a large bowl, combine potato, eggs, and the onion-bacon mixture. Add mayo mixture to potato mixture and toss. Cover with plastic wrap and refrigerate for 2-3 hours.
4. Served topped with lettuce, tomatoes, and cheese.

July 20, 2008 Recipes

Kickin’ Cheese Biscuits

Need a quick side to cap off a BBQ feast? This is a quick cheese biscuit recipe that has an emphais on quick. You could roll the dough and cut into neat rounds (trick: use an old clean soup can with both ends out for perfect round cuts) but these “drop” buscuits are a bit rustic and taste just as good.

  • 2 cups bisquick baking mix
  • 2/3 cup milk
  • 1/4 Sour Cream
  • 3/4 cup Kraft Mexican Cheddar Jack with Jalapeno
  • 1/4 teaspoon baking soda
  • pich of salt
  • 1/4 cup butter, melted
  • 1/4 teaspoon garlic powder
Heat oven to 450. Mix baking mix, milk, & cheese until a soft dough forms; beat vigorously for 30 seconds. Drop dough by spoonfuls onto an ungreased cooking sheet. Bake 8 – 10 minutes or until golden brown.
Mix butter & garlic powder. Brush garlic mixture over warm biscuits before removing from cookie sheet. Serve warm. Makes 12.
Serving Size: 4

June 10, 2008 Recipes

North Carolina Vinegar Sauce

North Carolina and South Carolina are an odd pair. Yankees almost see the duo as the same State… “Carolina.” But there are differences… especially when it comes to barbecue sauce.

It’s somewhat regional but everyone has his or her own favorite. Up North East they like a close to pure vinegar version of an ultra thin sauce. I’ve even seen it clear (although usually using cider vinegar).

South Carolina has it’s hands in different styles… but their claim to fame (thanks to Maurice Bessinger and family) is a tangy sweet mustard based sauce.

In the Piedmont area… or out West it’s also vinegar. But there’s a good squirt of tomato or ketchup in the mix.

We’ll cover all of them here… but first

Here’s a Barbecue Tricks version of a Western Carolina Vinegar sauce. Tart, hot and a bit sweet but thin enough to mix quietly into a pile of pulled pork without getting in the way of the smoke in the meat.

Print
Carolina Pride Vinegar BBQ Sauce

Rating: 51

Prep Time: 5 minutes

Cook Time: 10 minutes

Total Time: 15 minutes

Yield: 16 oz. of Sauce

Carolina Pride Vinegar BBQ Sauce

A Western Carolina favorite. This tart and tangy vinegar sauce is thin but bold.

Ingredients

  • 1 Cup cider vinegar
  • 1/2 Cup Ketchup
  • 1 tablespoon crushed red pepper
  • 1/2 teaspoon black pepper (secret: McCormick's Worcester's flavored)
  • 1 teaspoon kosher salt
  • 1/2 teaspoon ground mustard
  • 1/2 teaspoon celery salt
  • 1 tablespoon Plum Sauce (option: substitute dark molasses)
  • 1 tablespoon brown sugar
  • 1 tablespoon Worcestershire sauce

Instructions

  1. I like to pick up a full 16oz. bottle of good cider vinegar for this sauce. Get it in the glass bottle so you can funnel the finished sauce back in. Get a good sized kitchen funnel. You'll have some vinegar left... so you may choose to double the amounts and make extra sauce to serve and have a full bottle to save for later.
  2. Simmer ingredients in a small to medium pot for ten minutes. Let cool before serving:
3.1
More Recipes at BarbecueTricks.com

vinegar sauce bbq
Print

North Carolina Vinegar Sauce

Author Bill West

North and South Carolina are indeed different entities. One difference is in sauce appeal. Cross the state line headed north and things get a lot more sour in the the form of Western Carolina Vinegar sauce. Tart, hot, a li’l bit sweet, but thin enough to mix quietly into a pile of pulled pork without getting in the way of the smoke in the meat.

Ingredients

1 cup cider vinegar1/2 cup ketchup1 Tbsp crushed red pepper1/2 tsp black pepper (secret: McCormick's Worcestershire flavored)1 tsp kosher salt1/2 tsp ground mustard1/2 tsp celery salt1 tsp plum sauce (or dark molasses)1 tsp brown sugar1 tsp Worcestershire sauce

Instructions

Use an empty 16oz bottle (from cider vinegar or the like) for this sauce to store and serve. Simmer ingredients in a small to medium sauce pan for ten minutes. Let cool before serving.


May 12, 2008 Recipes

Sweet Southern Brisket

That name may be a bit confusing… beef Brisket has always been a Texas thing. Mesquite, slow slow smoked, a tradition down there.

Here’s a Barbecue Tricks version of the brisket that tastes great with HICKORY smoke and a bit of sweet heat to give it a southern twist.

We used a Brinkmann Gourmet Electric smoker that keeps the smoker a low 225 degrees and also used a combination of chunk and chipped hickory for smoke.

Brisket is an all day affair… so using a true smoker (with a good drip pan) will really save you some peace of mind. Electric smokers are offensive to purists (no charcoal?!) but if you keep it smoking with pre-soaked wood chips (in a foil pouch) you can’t tell the difference.

Start the night/day before by separating the FLAT portion of the brisket from the tip. Trim away most of the excess fat (down to about 1/4 of an inch covering the flat). This will cut the cooking time way down and give you more smokey surface area. Continue by rinsing clean and rubbing a 5 to 10 pound brisket with a simple RUB. Wrap with plastic wrap and refrigerate until morning. It should “cure” 4-12 hours for best results.

Give yourself extra time for the smoker and restrain yourself from lifting the dome lid more than you absolutely have to. Lifting the dome lid will add at least a half hour to the entire process every time you release the already low heat. Hopefully the smoker has a side door to replenish chips and drip pan liquid.

Remove your meat, unwrap and allow to slowly come to room temperature (about an hour). Start your smoker and give it 40 minutes to heat up.

Place the meat – fat side up – over the drip pan to avoid messy drips.

After smoking 5 or 6 hours we enlisted our Barbecue Trick: sprinkle the brisket liberally with brown sugar and paprika. Place it upside down (fat side down) on aluminum foil and coat the other side. Check the internal temperature. Wrap tightly with foil and put back on the smoker.

The entire smoking process will vary but our Flat cut was finished (internal thermometer to 190 degrees ) in about eleven hours (opening the lid only once). The Point cut took an additional 2 hours to get to internal 190 degrees (the lid was often opened for testing).

One you remove from the smoker you STILL will want to wait another 40 minutes to allow the meat to rest and retain coveted juices. Remember YOU NEED TO ALLOW A LOT OF TIME for this entire process. Back time from meal time and make sure to include an hour for “heating up the smoker” and getting the chill off the meat. Plus another hour for the final “rest”.

It’s an all day affair. Our tested brisket started as a 10.5 lbs piece of meat but when the flay was separated it was two approximately 5 lbs. pieces. Flat took eleven hours on the smoker. The point was thicker and a bit bigger and took thirteen.

It’s also important to note that -IF YOU CAN WAIT- some say it’s best to refrigerate and re-heat the next day for the best results (good luck with that waiting!)

  • « Go to Previous Page
  • Page 1
  • Interim pages omitted …
  • Page 7
  • Page 8
  • Page 9
  • Page 10
  • Go to Next Page »

Primary Sidebar

Welcome To BBQTricks!

Hey Y'all... Thanks for stopping by. I'm Bill West. I blog about BBQ and occasionally country music. When it comes to BBQ I try to find solid time saving tips and tricks to make the grilling life a bit easier. It's life hacking for the backyard cooker. Read More…

Your Gateway to Barbecue Information

This site is a member of The Smoke Ring BBQ Webring A linked list of BBQ websites

Next BBQ Site - Next 5 BBQ Sites - Prev BBQ Site - Random BBQ Site

Join the BBQ ring or browse a complete list of The Smoke Ring BBQ Webring member's BBQ sites

If you discover problems with any of The Smoke Ring BBQ Webring sites, please notify the Ringmaster

fb

Footer

DISCLOSURE:

Posts on this site may contain affiliate links. If you purchase something via one of these links you won’t pay more but the site operator gets a small commission. Or as I like to call it: “beer money.”

Copyright © 2025 — Barbecue Tricks • All rights reserved.