• Skip to primary navigation
  • Skip to main content
  • Skip to primary sidebar
  • Skip to footer
  • Big Book of BBQ Tricks
  • Resources
  • Free E-CookBook / Newsletter
  • Smoking Meat 101 Book
  • BBQ Blueprint Book
  • Electric Smoker Cookbook
  • Wood Pellet Grill Smoker Book
  • Temperature Guide
    • Seafood
    • Pork
    • Poltry
    • Beef
  • About Me
  • Shop
  • Sitemap

Barbecue Tricks

BBQ Tips and Tricks

Cook

September 11, 2013 Butcher's Guide

Knives: Types, Safety, and Care

Knives: Types, Safety, and Care

Cutting BoardBy Jodi L Level

We all know it’s hard to buy knives; there are so many different lengths, materials, handles, and sets. What do I choose! Well here is a list of the different types of knives and their uses to choose from.

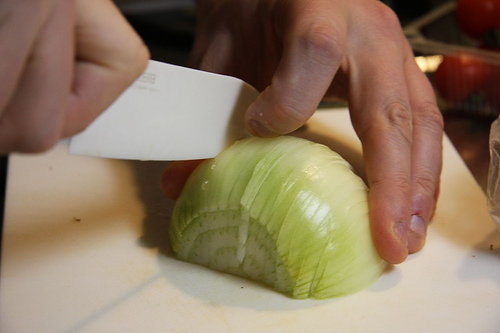
Paring Knife – It’s used for many small multipurpose jobs such as topping and tailing vegetables, removing skins from onions and preparing small fruits.

Turning Knife – This one has a very small curved blade used to turn vegetables for presentation.

Filleting Knife – It has a medium length blade that is thin and flexible so it can bend while cutting along the bone of fish.

Boning Knife – This one has a short to medium blade, that’s strong and has ridges, and is used to cut away the meat from the bone.

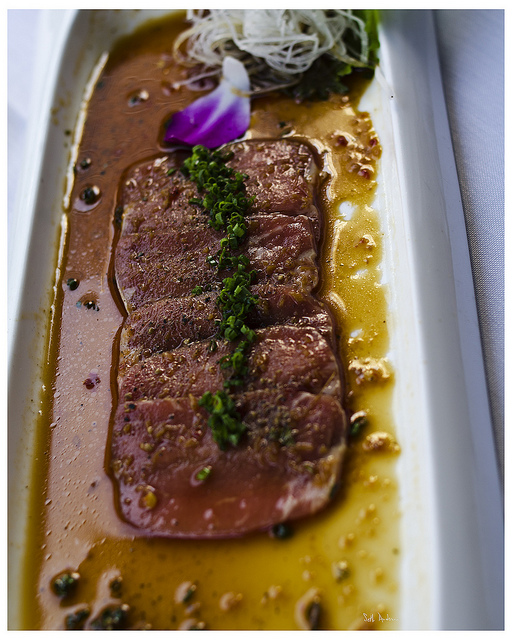
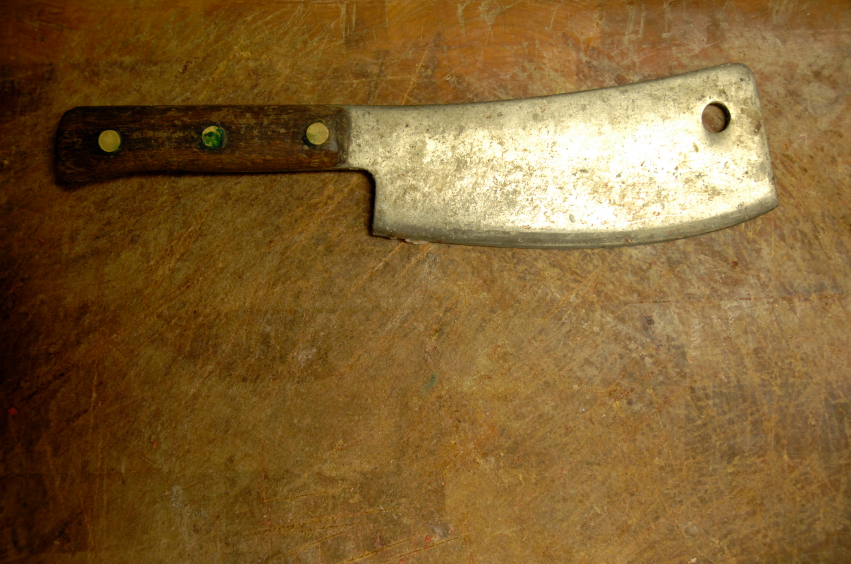
General Chef’s Knife – It has many different uses such as slicing, dicing, shredding, and chopping. It is used on fruits, vegetables, meat, and poultry.

Palette Knife – Blunt but flexible it’s used to flip things over while they’re cooking, pick things up from the pan and transfer them to the plate, and spreading butter or cream on things.

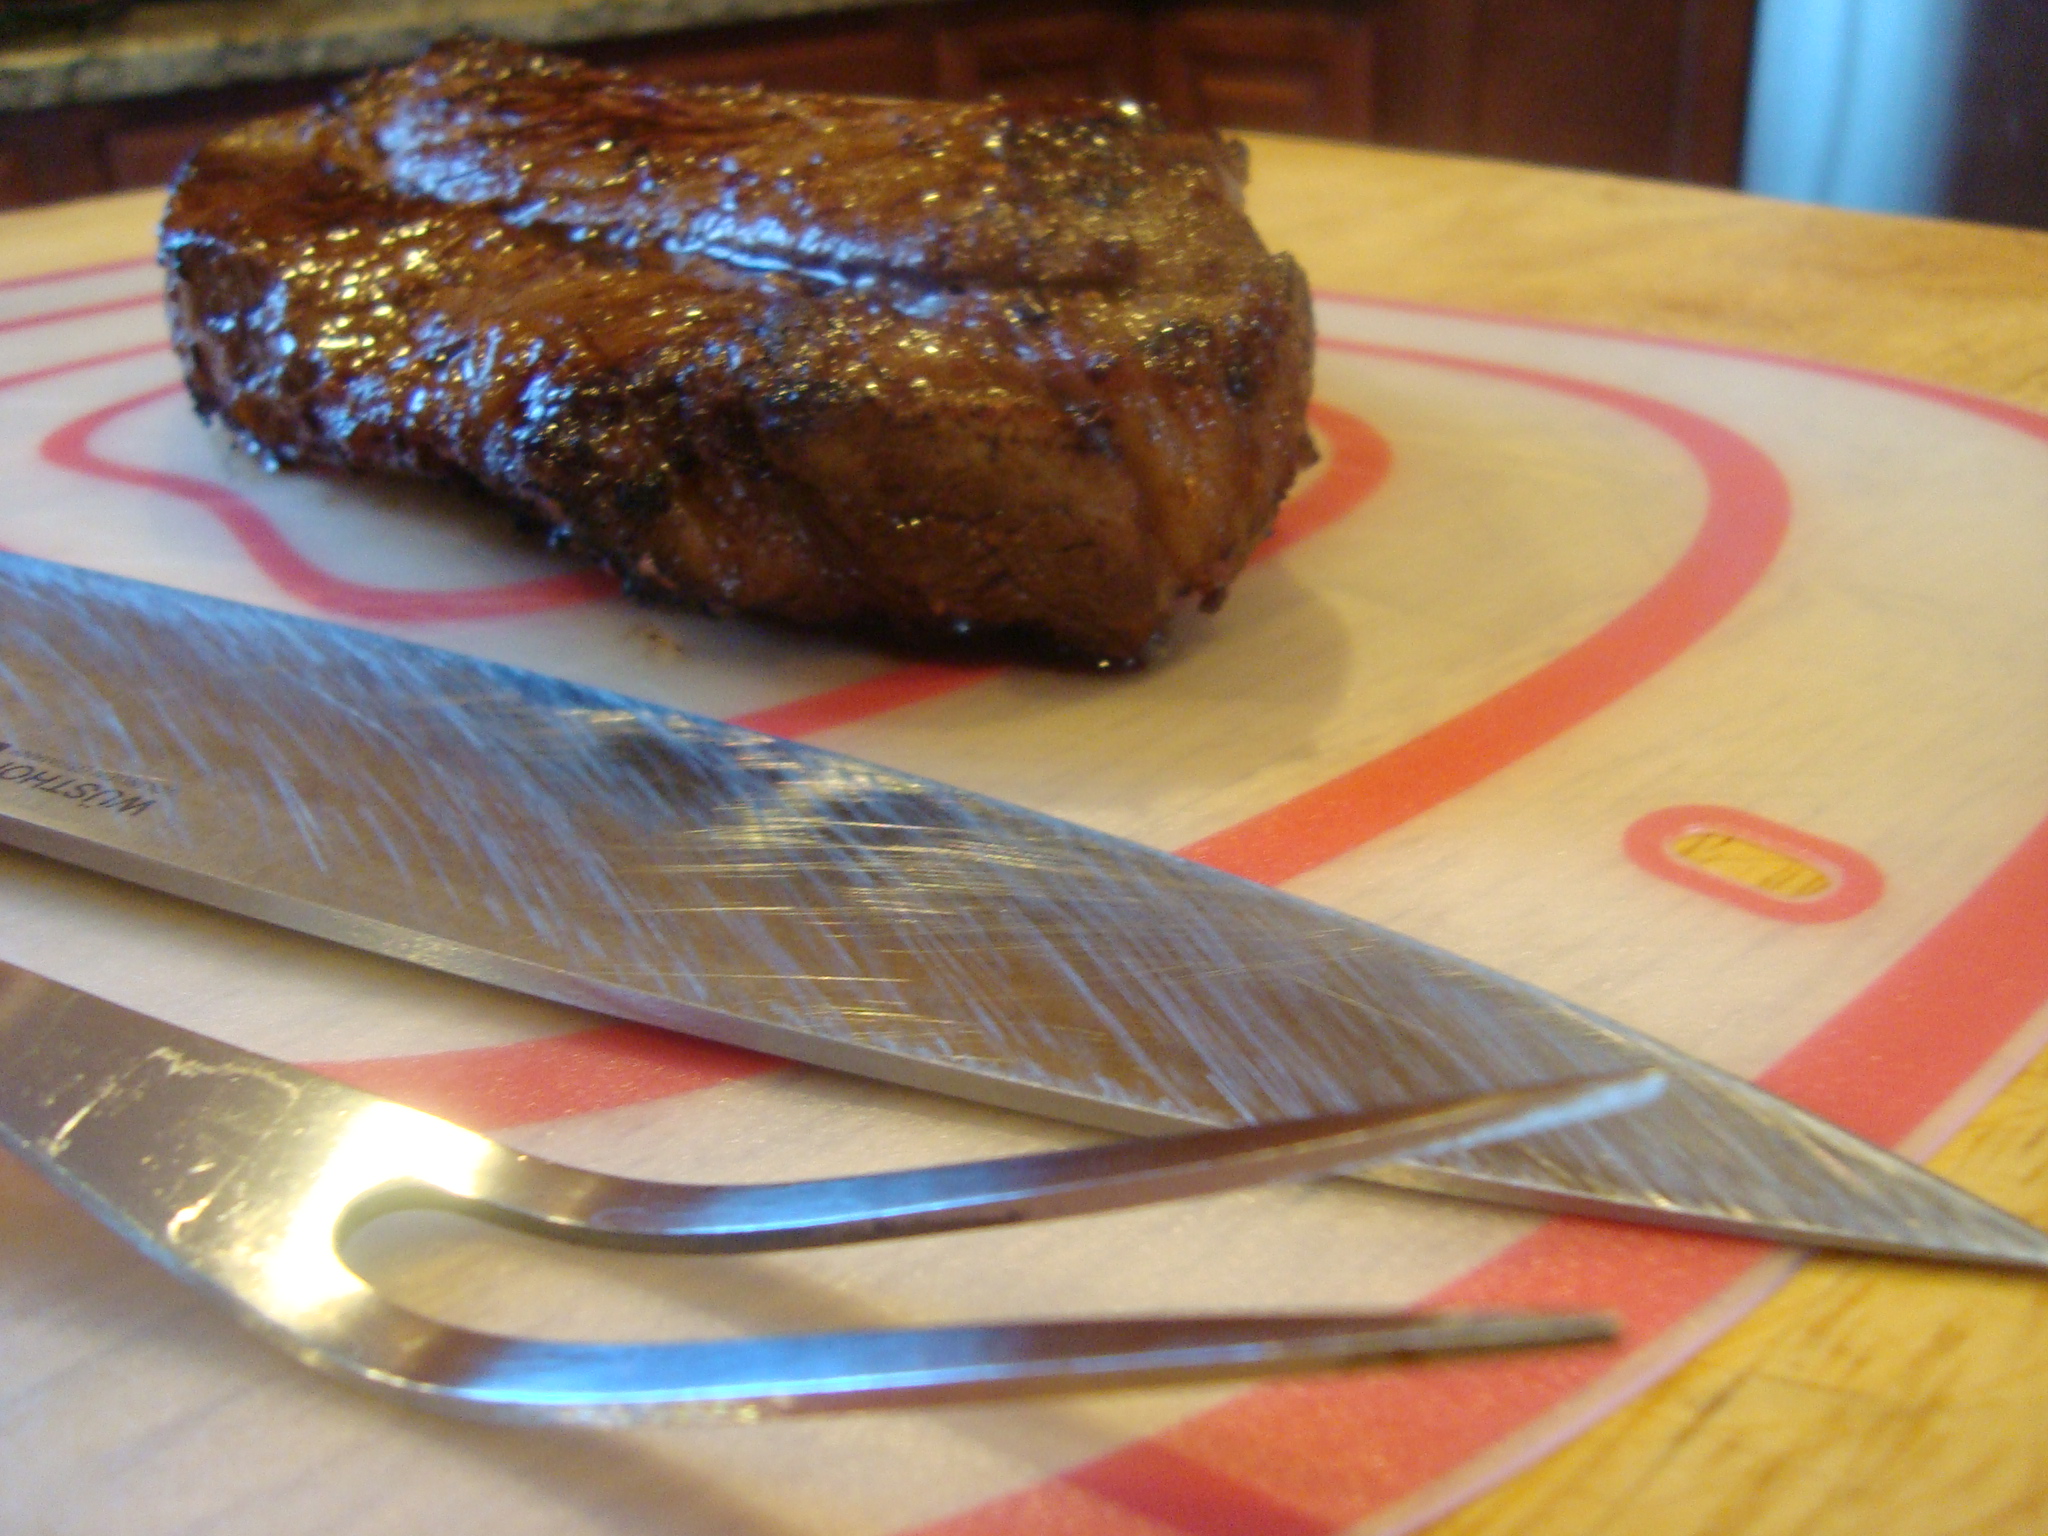
Carving Knife – It’s long and a thin blade should be sharp, and is used to cut meat.

Serrated Knife – Designed to cut certain things such as bread or vegetables with firm skins; it assists in the sawing motion that is used to cut these items.

Safety first!

Now that you know about all the different types of knives, you need to know how to be safe with them, right?! Here are some basic safety tips for using your knives:

  • Always place a knife on the bench to give to another person, rather that pass it by hand to the person.
  • Never hold knives in the air or hold them with fingers overlapping the cutting zone.
  • Don’t use the knife as a screwdriver or can opener.
  • Don’t wave a knife around, point with it or turn around with it in your hand. Place on the bench and then turn to talk to others.
  • Never transport food on the blade of a knife.
  • Never leave knives in sinks or under items. Blades are hazards when not in a visual range.
  • Always keep the knives separate and individually contained, wrapped or held with the point of the knives secured, this includes in your toolbox or even in the picnic basket. Never hide knives under anything.

Keeping your knives the sharpest

Last but not least, making sure you have sharp knives is very important. If they are dull, you have to apply more pressure to slice through things, which creates a higher risk of the knife slipping, and cutting you.

Storage – Don’t put your knives in a loose draw with other knives or utensils, because they rub against everything else, damaging the blade.

The best way to store them is to put them in a knife roll, or a wood block, which has individual compartments for each knife, making sure they don’t touch each other. But if you’re using a wood block, make sure the knives don’t rub against the wood sides when you’re taking them out, or putting them in. Another way to store them is on the wall, with a magnetic strip.

Cutting Boards – Never cut things on extremely hard surfaces such as glass, ceramic plates, and granite counters, as they can dull your knives. Instead, use bamboo and wood boards, because these are much softer materials.

Dishwasher – Don’t wash your knives in the dishwasher, because it can also dull the blade. Instead wash them by hand in the sink, and place in a plastic drying rack, not touching one another. If you do wash them in the dishwasher, make sure the knife is in a plastic silverware divider.

NEVER use your knives for opening cans, unscrewing rivets, or opening packages, as all these will damage the blade.

http://www.cookwareneeds.com is the place to go to find the knives you need and any cookware you might want. Make sure to check out the website each month for a new special offer.

Article Source: http://EzineArticles.com/?expert=Jodi_L_Level
http://EzineArticles.com/?Knives:-Types,-Safety,-and-Care&id=7891510


July 17, 2013 Cook

Grilled Veggies And Fruit – Summer’s Bounty

grilled vegetablesBy Lisa Thomas

A slab of high-quality meat might be the archetypal barbecued dinner, but there’s plenty of room on the grill for other foods. Almost all vegetables (and many fruits) are delicious as grilled veggies and fruit, and they’re the perfect side dish – or even main course – for hot summer days. They’re also healthy and quick to prepare, leaving you with more time to enjoy the fruits of your labor with a lazy, midsummer meal. So whether you want to make some classic foil-packet potatoes or grill mango for a salad, fire up and get ready for a treat.

Potatoes And Other Root Vegetables

Once reminiscent of comfort and home cooking, “meat and potatoes” now sounds boring, flavorless, and unhealthy. Yet potatoes need not be boring, especially when grilled, and the low-carb bandwagon misses the point that “it’s not that carbohydrates are fattening, rather that people eat too many of them,” according to Dr. Jean Harvey-Berino of the University of Vermont. Potatoes and other root vegetables can be prepared in a variety of delicious ways, and eaten in moderation they’re a good source of vitamins and minerals. Foil-packet potatoes are a classic for a reason, but sometimes changing up the ingredients can make them seem brand new. Try using other root vegetables like sweet potato, carrot, celeriac, or beets, or experiment with marinades and sauces. Celeriac in particular goes well with Asian-inspired flavorings like lime salt and peanut sauce, while beets can be served with their wilted greens. Because this style of grilled veggies and fruit is so easy, it’s simple to try out new ideas!

Root vegetables can also be cooked directly on the grill. This method can take a few more steps, depending on the vegetable, but it also gives the finished dish a fantastic flavor. Aside from carrots, most starches should be cut into half-an-inch thick slices (or equal-sized wedges) before grilling, and most benefit from a quick simmer so that they don’t end up perfectly grilled but undercooked. Coat your veggies in a thin layer of oil – some marinades also work well for this – and then get to grilling. Take them off the grill when they still have a slight bite to them, as they’ll keep cooking once they’re off the heat, then serve them as-is or as part of a grilled salad.

A Feast Of Grilled Veggies

It’s easy to eat your veggies when they’ve been grilled, giving them a delicious smoky flavor and a variety of textures in each bite. This isn’t about soggy, overcooked broccoli – these veggies can make for a real feast. By considering water content and structural integrity before grilling, it’s possible to make your least-favorite vegetables into your new favorite side dish. As a rule, the dryer and more compact a vegetable is, the easier it is to grill. Cauliflower, for example, is slightly easier to grill than broccoli, and grilled zucchini is delicious while grilled cucumber is a (quite literal) flop. However, very compact veggies take longer to cook completely, so either precook them before grilling or enjoy the crunch. (Half-done grilled vegetables are particularly delicious in summer salads with a light dressing.) Vegetables with high water content, like peppers, should be grilled for short lengths of time in order to keep them from collapsing or burning.

Some vegetables can be grilled as-is, but most others do better when cut into chunks or florets. These should be large enough that they don’t fall between your grill’s slats; if smaller chunks are needed, use a kebab skewer or a grill pan to keep them safe. If you haven’t used a marinade for your veggies, dry them well and oil them lightly before grilling. Different vegetables cook at different speeds, but most should be done within five to ten minutes. Keep a close eye on them, and remember to turn them frequently so that they don’t scorch.

Refreshing Grilled Fruit

BBQ PineappleMeat and fruit have been served together since before the dark ages, and there’s no sense in arguing with history on this count. The sugars and acids in fruit cut through the richness of meat, waking up your taste buds and allowing you to fully appreciate the range of flavors in a meal. Grilled fruit is also the perfect desert on a hot summer day: either serve as-is, toss in a warm fruit salad, eat with ice cream, or drizzle with white chocolate sauce. Most fruits can be grilled, but citruses and berries aside from strawberries are rarely worth the effort.

When grilling fruit (aside from apples and pears, which can be cooked), the goal is simply to warm them while adding a subtle smoky flavor. To ensure this result, start with a clean grill and a low flame, as well as thick fruit slices which have been coated with a very thin layer of flavorless cooking oil. (Fruits can also be grilled as kebabs.) Err on the side of caution when deciding how long to grill them for, as fruit sugars burn easily and overcooked fruit can fall apart.

Summer is a time of excess: lots of fun, lots of sunlight, and lots of beautiful fresh grilled veggies and fruit. By taking advantage of this harvest, you can grill a range of healthy, easy meals all summer long.

March 7, 2013 Cook

What Is London Broil

london broilYou may have wondered what London Broil really is.  It’s not really a special cut of beef or from a particular part of the cow.  It’s actually a STYLE of cooking or grilling a piece of beef.  Typically London Broil is Flank steak but not necessarily.

Many times (like in the above London Broil video) the supermarket will use or label a top round steak/roast as London Broil.

So Just What Is A London Broil?

In North America London Broil is basically an affordable cut of beef – marinated – grilled and sliced thin.

In Canada London Broil is thought of as a ground meat patty wrapped in flank or round steak is known as a London broil.

Ironically, the dish is unknown in the English city of London.

In general the meat will be a tough cut, but generally affordable.

You can go from tough to tender by following a few general tricks and tips for the BBQ.

First pound it with a meat mallet.  In a way – not to be gross –  it’s almost pre-chewing it.  Break up the tough fibers a bit.  Don’t worry about the meat looking mashed.  In the end your BBQ will still look pristine.  If it’s a larger cut just hit it harder!   Good stress relief.   Tip:  wrap the meat in plastic wrap to avoid splatters.

Next, use a  marinade like this Steak Marinade to soften the newly damaged fibers.  Any high acid marinade will aid the tenderizing effects.

Then use what’s called the reverse sear – cook it slow to an internal temp of about 120 — then pull it off until the the center just starts to lower and finish the cook with a fast sear direct over red hot heat.

Finally, let the cooked meat rest for five to ten minutes or so before slicing AGAINST the grain of the meat fibers or perpendicular to the strands of beef in pencil thin slices.

For more on tenderizing check out 3 Tips For Tenderizing HERE.

February 19, 2013 Cook

Tri-Tip Tricks – How to

tri-tip

Tri-Tip Photo: Flickr/jmayer1129

The Best Way to Cook a Tri-Tip

By Bob Moglia

I have attended BBQ contests, mixed and matched spices and rubs and have tasted so-called winners “Best”. Honestly, few have lived up to their billing. While attending a BBQ contest last summer, I spoke with three competitors who all cooked their Tri-tip roasts differently. The first group smoked theirs in a hanging smoker. When served, the temperature was 135 and rare. The sauce a mix of ketchup. The first rule of thumb is…

TEMPERATURE; You need to achieve slightly pink in the middle and totally done around the exterior. In order to achieve this, I pull my Tri-Tip at 138 degrees. Let the meat sit for 15 minutes and it will come up 10 degrees in temperature. Remember, 140 is rare, 150 medium, 160 well. A well done Tri-Tip is chewy and lacks flavor and taste.

The second competitor called their entry “Santa Fe style”. They used a Santa Fe style rub on the beef. They also had a special red tree bark thrown on to smoke the last 10 minutes which was supposed to impart a special flavor on the beef. What I found was very little flavor from the rub, and no extra special taste from the bark.Dull and bland!

PREPARATION: I have found little to no difference utilizing countless rubs on Tri-Tip. Remember you are cooking a roast. If you really want to impart flavor, use a wet marinade. You have a thick piece of beef and you need penetration. Try to marinate for at least 24 hours with potent flavors to build character and flavor profile. You can add your spices to the marinade.

The last competitor and winner of this BBQ Tri-Tip award was a local winery, whose chef did little to no prep but creatively hid his trip tip in a small brioche bun with a bit of home made chutney. I thought it was smart, but far from showcasing the meat product. He hid it!

BUILD CHARACTER AND FLAVOR: the meat should be marinated to build a rich flavor. The longer the better but try for over night. Sear the outside of the roast first to help build a char and a crust. If you have a bit of a fat layer, this will help build a good crust. A total of 5-10 minutes over direct heat when you are getting the coals going should do the trick. Once the sear is complete, pull it across the grill and indirectly smoke it. Use chip and chunk and a mix of hickory, apple, cherry or other fruit. Hickory for its pungent signature and fruit wood for its mild taste. Watch your temperature and pull it at around 138 degrees. Sit it for 10-15 minutes before cutting into it ENJOY!

Article Source: http://EzineArticles.com/?expert=Bob_Moglia
http://EzineArticles.com/?The-Best-Way-to-Cook-a-Tri-Tip&id=7505046


February 7, 2013 Cook

What You Need to Know About Using BBQ Marinades

What You Need to Know About Using BBQ Marinades

marinate

Photo: Flickr/swanksalot

By Les Fenton

Take your barbecue and grilling skills to a new level by learning how to make marinades for the food you cook on your bbq grill. By using your own bbq marinades you can not only produce lots of exciting and different food flavors, but also ensure that your barbecued food is more pleasant and healthy to eat.

What is a Marinade?

Marinating is a process used before barbecuing or grilling to impart flavor and also, especially for meat dishes, to tenderize. The marinating process is carried out by soaking your fish or meat in mixtures of different ingredients (the marinade) before cooking, sometimes for just a few minutes and sometimes for many hours or even overnight. You can use marinades for any food you cook, but they really come into their own when used on the food cooked on your barbecue grill.

This article will introduce you to the different types of marinade you can use and outline the steps you should follow for successful marinating. It will also point out some of the mistakes commonly made when making and using bbq marinades.

Use a Marinade for Flavoring

There are thousands of different marinade recipes which can be used to flavor foods cooked on a bbq – meat, fish and vegetables. The intensity of the flavor produced depends upon the ingredients of the marinade and the length of time used for marinating.

For example, if you are going to cook shrimp on your bbq you might choose a lime marinade. The lime flavor to enhance the flavor of the shrimp when it’s cooked. As we’ll find out later though shrimp should only be marinated for about half an hour. If you do it for longer the strong flavor of the lime will dominate that of the shrimp and spoil your dish.

However, the same thing doesn’t apply to all fish dishes. Tuna has a strong flavor so you might choose a recipe which recommends marinating for several hours. As a general rule, stronger flavored and less delicate fish can be marinated for longer, but the length of time used will depend upon the ingredients in your marinade.

If you are working on a jerk beef marinade recipe with all manner of spices and sauces you’ll want your bbq beef to be tender and have an intense flavor. In this case you would marinade for at least eight hours. The longer period of marinating affects both the flavor and the tenderness of the meat once it is cooked.

Using Your Marinade for Tenderizing

Marinating is an excellent way of tenderizing meat. The amount of tenderization depends upon the ingredients you use. For tenderization bbq marinades can be either acidic or enzymatic:

– Acidic Marinade

Acidic marinades contain vinegar, cider, lemon juice, or wine as ingredients. These ingredients act on the coiled protein substances within meat (or fish), breaking them up by causing them to unwind. The process of unwinding softens them.

It may seem rather strange to use acidic marinades for fish, but they can produce the most wonderful flavors. The key is to use the correct strength acid for the type of fish you’re marinating. The shrimp marinade described above should be a low-acid marinade (perhaps one part mild acid to four parts oil) to avoid making the shrimp tough.

A fairly tight-textured cut of meat like flank steak can survive a more acidic marinade because the marinade only penetrates the meat by a fraction of an inch and therefore won’t toughen it.

– Enzymatic Marinade

Enzymatic marinades contain ingredients which break down the connective tissue in fish and meat. Raw pineapple, figs, papaya, honeydew melon, ginger, and kiwi all contain these enzymes (known collectively as proteases or protein enzymes).

The enzymatic marinades need to be used carefully because they can work almost too well. They will, for example, turn tough meat muscle into mush if it’s left in the marinade too long. In some cases the meat won’t even pass through any intermediate stage of tenderness.

Make sure you use a proven recipe when preparing marinades for your bbq. As a general guide marinate fish for short periods of time (anything from 30 minutes to 2/3 hours depending upon the texture of the flesh) and meat for much longer periods (8 to 24 hours).

Marinades for BBQ’s – Three Steps to Follow

Step 1

Find a good marinade recipe and prepare your marinade. Make a careful note of the recommended times for marinating.

Step 2

Use a large porcelain vessel (with a lid) to marinade your fish or meat. You’ll need just enough marinade to cover your food. If you have an excess of marinade, you can save it in a sealed container in the fridge for use on another occasion.

Step 3

When you have covered your food in the marinade put the vessel in the fridge. The lower temperature will inhibit the growth of bacteria in your raw fish or meat and prevent oxidation of the marinade ingredients.

Step 4

When your bbq has reached the required temperature remove the food from your marinade and put it on the hot grill. During cooking don’t baste your meat with the raw marinade, and don’t use the marinade left over in your basting vessel to prepare any sauces unless you intend to boil them first to destroy the bacteria.

Marinade Recipes

The flavoring ingredients in a marinade can include a wide range of juices, oils, herbs, and spices. Marinating is used for barbecuing and grilling all over the world for many different types of national cuisine. For example, the marinades used for Indian cuisine contain lots of spices such as, cinnamon, cardamom, cloves, paprika.

Once you start preparing marinades for your bbq you should start investigating the many global internet sites where you can find marinade recipes. Make a folder for these recipes as you discover them, but I recommend that first of all you should start with the well-established recipes, later moving on to recipes which might not be so well-known, but can be great fun to experiment with.

Find out more about bbq methods and techniques and catch up with my reviews on the most popular and best-selling bbq grills at www.barbecues-for-sale.com.

And while you’re there don’t forget to sign up for our FREE “Barbecue Secrets and Tips” Newsletter.

Article Source: http://EzineArticles.com/?expert=Les_Fenton
http://EzineArticles.com/?What-You-Need-to-Know-About-Using-BBQ-Marinades&id=7458476


January 8, 2013 Cook

No Cry Onion Cutting Tip

cutting onion

First cone out the root core. Flickr/MShades

We go through a bunch of onions at the BBQ Tricks test kitchens and we’re always looking for ways to keep from embarrassing ourselves in front of other good ole boy barbecue cook teams.   So we’ve been wondering if there was an easy way to avoid crying every time we cut an onion.

Lots of suggestions out there. You can wear swim goggles (and some do) or chop in front of a fan or cut under water… probably works.  We’ve even heard that clenching a smoking wooden match stick in your front teeth helps (kinda embarrassing) .   but when we saw this old Life Hacker post it got our attention.

The idea is suggestion is to avoid the toxic fumes you first  just cut out the root end in a cone.    That’s where the “gland” for the toxic fumes are.  Make the cut about a third of the diameter of the onion and about a third deep.  Once it’s out dispose of it immediately and get to choppin’ like “normal.

Other suggestions include  are using milder onions (like a sweet onion from Vidalia, Georgia) or wiping you knife with lemon juice before cutting.

BS?   Do you have a  way that works for you?  Share with us in the comments below.

November 14, 2012 Cook

Smoker Pouches Make BBQ Better

To a lot of foodies and backyard cookers “barbecue” means “smoke kissed” meat.   The succulent and flavorful meat just isn’t quite right without a lick of Hickory (in the South) or a hint of Mesquite (in Texas) or even flavors of whiskey barrel Oak (ala Lynchburg, TN).      Smoke flavor in grilling and barbecue isn’t too hard to achieve.   You don’t need a huge wood stoked smoker on a trailer like the super serious competition teams or even a specially built upright smoker.   The only thing you really need is real hardwood.

Hardwood chips or chunks for barbecue are fairly easy to find.   Watch the country roadsides to buy good dry wood in full logs or split.   Wood chunks – about the size of a lemon – can be found in outdoor and cooking centers.  And smoking wood chips can be found bagged in many supermarkets right along side of the charcoal.  When buying make sure the wood is nice and dry and with little bark attached (bark and insects can emit unpredictable scents).

Vessels for your woodchips.

If you don’t have a true smoker you can still add that real smoke flavor to your outdoor gas grilled foods.  Smoker boxes are made to contain about a fist full of your favorite wood chips.  The box controls the intake of oxygen to help keep the wood from burning too fast and, instead, smolder with a slow stream of flavorful smoke lofting up to the meat.  The boxes come in lots of shapes and sizes.  Some are even triangular to set nicely inbetween grill grates or wedge next to a gas burner.  Most all smoker boxes are short enough to fit UNDER grill grates to set next to or on top of gas burners.  Place the meat directly in line with flow of smoke (usually between the box and an open chimney).

The smoker boxes are an inexpensive addition to a gas grill and can also be used in charcoal grills to keep floating ashes down off the meat.

If you are looking to buy a smoker box look for the most solid construction you can find.  Ideally a cast iron box will last the longest in the high heat and corrosion.   Pit masters will bigger grills sometimes resort to using cast iron pans for long term chip boxes.

If you are only adding occasional smoke in your back yard gas grill you can easily achieve great results by constructing a simple “smoker pouch” out of heavy (or double layer) aluminum foil.    Simply fold the foil into a makeshift envelope, add chips of your liking, and fold to seal tight.    Poke just a few air holes into the foil to release the smoke and then set the pack under the grill grate and on top of the burner.  For longer cooking time (like four hour ribs) you can have a second or even third “smoke bomb” set aside from the start to quickly toss under the grate after the first pouch smokes out.  Discard the pouches when the grill is fully cooled.    You could even soak half the chips in water to slow down the smoking process.   BBQ masters will typically soak wood chips and chucks for at least 30 minutes before they put coals directly on hot charcoal to allow for a smolder instead of a sooty hot fast burn.

Wood chips and a smoker pouches can really help make your next batch of home cooked barbecue taste like the competition champ’s.  Experiment with wood varieties like hickory, apple wood, mesquite, and cherry.   Avoid pine and resin heavy woods that can leave off flavors and never use pressure treated lumber that could give of toxic fumes.     See our Wood Smoking Guide HERE.


November 5, 2012 Cook

See How Easily You Can Make Perfect Grill Marks

The signature sign of a great grill master is those perfect diamond or square grill marks.  To keep your bbq cred they gotta look good on on a steak or a piece of chicken or a chop.   Here’s how to do it:

First, start with a clean gril.  You don’t want grime making the mark.  You want it to be a true sear.  With the grill clean it’s time to look at seasoning.  Basically, with the seasoning you don’t want too much sugar.  Sugar will simply burn on the surface of the meat. low sugar on the surface.  Use turbinado suger when you must.  It has a higher burn point.

Then, it’s pretty simple.  Place the meat on the grate and make sure it has good surface contact.  Then, don’t touch it for one fourth of the cooking time.  Again don’t touch for one quarter of the cooking time.   After you’ve exercised your patience give the meat a 45 to 90 degree rotation on the grill (remaining on the same side) forthe rest ( the second quarter) of the cooking time.  Again, don’t move it.   You’ll want to allow the sear to do it’s thing and actually release from the grill.  If it is still sticking you may need a bit more time.   Once the whole piece is half cooked you can flip and check your results (repeat for the 2nd side.  Inevitably one side will look better than the other.  Present that side up on the plate.

The method also works well with indoor grill tops.  Looks nice on veggies and best on lighter colored meats.


October 27, 2012 Cook

Warning! What You Need To Know about Grease Fires

Grease fires are unfortunately an all too common danger in the cooking, and especially the barbecue, and live fire outdoor kitchen environment. Meats marbled with fat, and poultry dripping oil directly on to an open flame can cause real problems for the apathetic pit master. When you set out to grill use extra caution with high fat content meats like ground beef, sausages and skin on meats like chicken and pork.

Of course you should never leave any open flame unattended. It takes mere moments for flare ups to run out of control. By the time you walk inside the house to get a beverage in the refrigerator you could have a blaze on the kettle grill.

First, if you expect dripping oil or any pooling grease at all consider using a drip pan and an indirect heat source (off set flame or coals) before you cook.

Place a sturdy aluminum pan filled with water (juice or beer may be nice) under the grate beneath the meat or drips. This will avoid major flare ups and protect succulent meats from over cooking. Indirect heat like this is usually desired for cuts thicker than the palm of your hand.

Second, make sure you start with a clean grill. A dirty grill can mean pooling oil and grease that can ultimately flare up.

Third, have a dry chemical fire extinguisher handy whenever grilling. It’s O.K. to use the one temporarily from the kitchen (you DO have one in your kitchen right)? Baking soda can also be used to stop a small grease fire. You may need a lot (and baking flour!)

Fourth, NEVER spray water on a grease fire. It will most likely flare up and spread.

Fifth, In the kitchen you can often cover a grease fire with a pan lid. to cut off oxygen. This is very difficult on a grill grate. A heavy wool or flame retardant blanket can sometimes smother a flame.

And finally do not try to move the flaming material. Turn off the burners and if all else fails get away and call 911.

Flare ups can be a real danger with live fire cooking. Keep charcoal grills off wood decks and all grills clear of vinyl siding. In fact its good practice to remove any and all flammable material at least ten feet away from active and hot grills and barbecues. This includes the ground (dry grass can catch fire in an instant in the dry summer months). Use some advance planning and keep it safe.

October 7, 2012 Cook

Rotisserie Cooking Is Popular Again

rotisserie chickenWhat’s Causing the Resurgence in Rotisserie Cooking?
By Timothy Daniels

Do you find it a challenge to think about what to cook for large family gatherings? Does the thought of having all your family around at once cause you to panic about catering? Perhaps you should be looking at one of the latest trends. Rotisserie Cooking.

“Rotisserie cooking?” I hear you say. “My mother used to have a rotisserie when we were kids.”

Yes. Well. You know what they say, everything old is new again. And the new item on the block at the moment is rotisserie cooking.

So what is it about rotisserie cooking that has caused a renewal in popularity?

I think there are a number of reasons. Rotisserie cooking is:

• Easy. You can just set it and walk away.

• Great for entertainment, you have time to enjoy the company of your guests while at the same time preparing a meal.

• Slow cooking. This means that the meat is cooked slowly which improves the texture particularly in less expensive cuts of meat.

• Cheaper. Because you can safely use cheaper cuts of meat, cooking for a crowd is less expensive and just as tasty.

• Suitable for one or two, but can also be suitable for a crowd. This type of cooking developed from the need to serve large quantities of people at once. And that meant being able to cook the whole animal at the same time.

• A low-fat cooking method. The way the meat is cooked means that the naturally occurring fat drips from the meat during the cooking process. There is no fat needed to cook the meat, so it is virtually fat-free, certainly no added fat.

So as you can see there are many reasons why rotisserie cooking is having a revival in popularity. Then of course there is also the availability of the new compact machines.

In the past they were large outdoor contraptions, usually rigged up by the man of the house over an open-pit fire or barbeque for some outdoor occasion.

Children had to be kept clear due to the nature of the fire, and as the fat dripped from the joint of meat you had to be careful that the dripping fat didn’t catch fire. From time to time people would get injured which would put a damper on the whole occasion.

No longer! The new generation rotisserie cookers come in all shapes and sizes and are suitable for all budgets. If you have a high-end cooker you can get a spit for those cookers to enable you to use your oven as a rotisserie.

You can buy bench top rotisseries that are suitable for smaller joints of meat, and you can also get larger outdoor machines for large parties and functions.

So now you know why this type of cooking is undergoing a revival in popularity. There is something for everyone with rotisserie cooking. You can spend as much or as little as you like and you can go as large or as small as you want.

The key is to shop around and get the best rotisserie for your needs.

You can get more information on rotisserie cooking at Rostisseries for BBQ and if you want to know about specific rotisseries, at Rotisserie Types

Article Source: http://EzineArticles.com/?expert=Timothy_Daniels
http://EzineArticles.com/?Rotisserie-Cooking-Is-Popular-Again—Whats-Causing-the-Resurgence-in-Rotisserie-Cooking?&id=7301660


  • « Go to Previous Page
  • Page 1
  • Page 2
  • Page 3
  • Page 4
  • Page 5
  • Page 6
  • Go to Next Page »

Primary Sidebar

Welcome To BBQTricks!

Hey Y'all... Thanks for stopping by. I'm Bill West. I blog about BBQ and occasionally country music. When it comes to BBQ I try to find solid time saving tips and tricks to make the grilling life a bit easier. It's life hacking for the backyard cooker. Read More…

Your Gateway to Barbecue Information

This site is a member of The Smoke Ring BBQ Webring A linked list of BBQ websites

Next BBQ Site - Next 5 BBQ Sites - Prev BBQ Site - Random BBQ Site

Join the BBQ ring or browse a complete list of The Smoke Ring BBQ Webring member's BBQ sites

If you discover problems with any of The Smoke Ring BBQ Webring sites, please notify the Ringmaster

fb

Footer

DISCLOSURE:

Posts on this site may contain affiliate links. If you purchase something via one of these links you won’t pay more but the site operator gets a small commission. Or as I like to call it: “beer money.”

Copyright © 2025 — Barbecue Tricks • All rights reserved.