• Skip to primary navigation
  • Skip to main content
  • Skip to primary sidebar
  • Skip to footer
  • Big Book of BBQ Tricks
  • Resources
  • Free E-CookBook / Newsletter
  • Smoking Meat 101 Book
  • BBQ Blueprint Book
  • Electric Smoker Cookbook
  • Wood Pellet Grill Smoker Book
  • Temperature Guide
    • Seafood
    • Pork
    • Poltry
    • Beef
  • About Me
  • Shop
  • Sitemap

Barbecue Tricks

BBQ Tips and Tricks

Tricks

June 16, 2013 Featured

Watermelon Keg

watermelon coxktail recipeTime for a cool summertime beverage.  This one is cool and ice cold delivered in a chilled watermelon keg!  It’s a cocktail recipe that can be served spiked or not and we make it a bit more special by tapping the keg with an affordable spigot from our local home brew craft shop.

More on this cocktail recipe at our podcast site http://gratetv.com/cocktail-recipe-watermelon-keg/
April 28, 2013 Featured

Molcajetes – Trick to Clean and Season

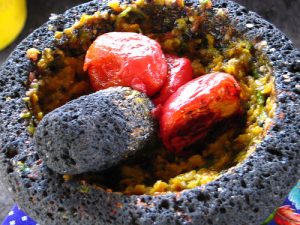
molcajetes clean

Photo:Flick/arantxamex

Fans of authentic salsa and guacamole are probably familiar with the historic cooking and grinding tools called Molcajetes. A Molcajete is a stone bowl used for mashing seeds, spices and herbs. A must have if you love preparing authentic tex-mex cuisine. But beware; these new bowls must be seasoned before use.

This special mortar and pestle – traditionally carved from basalt volcanic rock – is a common tool in most Mexican restaurants. In fact, many dishes like, pico de gallo, and guacamole are served right inside this rustic bowl so you’ll want it to be free of stone particles.

True molcajetes can be found from many online merchants for twenty to forty dollars plus shipping but they are likely to be delivered to you unseasoned. That means you may even see grains of rock still loose in the bowl. The rough and unfinished look of the molcajete is beautiful. However the grit and sand it could leave in your first batch of salsa or guacamole is definitely something to avoid.

Here’s how you can season your new toy. When you first receive your molcajetes clean and season the mortar and pestle thoroughly with a wire brush and then give it a good scrub with a clean damp cloth. Paper towels are not strong enough for this task.

Next start hand grinding small batches of rice in the molcajete. This will start to dislodge the loose stone and make it a bit more clean. Repeat this process with several batches of dry uncooked rice until you no longer see any grains of black sand in the rice flour. You’ll want to really use some elbow grease and grind the grain into as fine a power as you can. Again repeat. Any remaining rice sediment in the bowl is not a concern.

Then take a slice of sticky soft white bread and grind it into the bowl to dislodge and draw out more sediment. You may want to repeat this step as well before you are sure there is no more sediment to be found. It takes some people ten to twelve rice grindings before they are really comfortable grinding food to serve.

If shopping for a molcajete beware there are some imitation bowls made of concrete or pressed rock being sold as “authentic.” Look for a disclosure that they use real volcanic rock. The molcajete is a beautiful tool for your kitchen and should last a lifetime in your kitchen. It was originally invented and used by pre-Hispanic Mesoamerican cultures like the Aztec and Maya thousands of years ago.

Once you’ve seasoned molcajetes you can experiment and find modern and delicious recipes to prepare and serve in.

Find a few online now at the site Fundido Tex Mex.

Article Source: http://EzineArticles.com/?expert=Bill_Triebold
http://EzineArticles.com/?How-to-Clean-and-Season-Your-New-Molcajete&id=7376479


April 3, 2013 Featured

Milk Jug to Charcoal Scoop Hack

charcoal scoopIf you’re looking to avoid sooty hands before cooking in the back yard here’s a quick trick to recycle an old milk jug into a multi-purpose scoop.    The half gallon size works best.  Just use some good scissors and shear off the bottom of the jug and a portion of the handle side.  Simple ’nuff.

I especially like the soft plastic jugs used for milk and juice because the “hard” scraping sound that you can get digging into the coals in minimized.  Keep several on hand

Sure you can always just pour the coals straight out of the bag…. but hey this is real recycling.

March 7, 2013 Cook

What Is London Broil

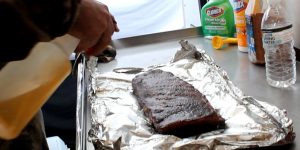
london broilYou may have wondered what London Broil really is.  It’s not really a special cut of beef or from a particular part of the cow.  It’s actually a STYLE of cooking or grilling a piece of beef.  Typically London Broil is Flank steak but not necessarily.

Many times (like in the above London Broil video) the supermarket will use or label a top round steak/roast as London Broil.

So Just What Is A London Broil?

In North America London Broil is basically an affordable cut of beef – marinated – grilled and sliced thin.

In Canada London Broil is thought of as a ground meat patty wrapped in flank or round steak is known as a London broil.

Ironically, the dish is unknown in the English city of London.

In general the meat will be a tough cut, but generally affordable.

You can go from tough to tender by following a few general tricks and tips for the BBQ.

First pound it with a meat mallet.  In a way – not to be gross –  it’s almost pre-chewing it.  Break up the tough fibers a bit.  Don’t worry about the meat looking mashed.  In the end your BBQ will still look pristine.  If it’s a larger cut just hit it harder!   Good stress relief.   Tip:  wrap the meat in plastic wrap to avoid splatters.

Next, use a  marinade like this Steak Marinade to soften the newly damaged fibers.  Any high acid marinade will aid the tenderizing effects.

Then use what’s called the reverse sear – cook it slow to an internal temp of about 120 — then pull it off until the the center just starts to lower and finish the cook with a fast sear direct over red hot heat.

Finally, let the cooked meat rest for five to ten minutes or so before slicing AGAINST the grain of the meat fibers or perpendicular to the strands of beef in pencil thin slices.

For more on tenderizing check out 3 Tips For Tenderizing HERE.

February 20, 2013 Featured

Reverse Sear BBQ How To

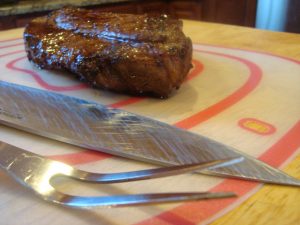
medium rare steakThere are hundreds of ways to cook a steak.  Most BBQ aficionados and backyarders keep it simple.   Fire up high heat and sear the beef and hope the middle is still good.  The traditional thought is that the initial sear “Locks in juices.”  The reality is the sear will not lock in anything… it’s kind of BS… in fact we’ve all seen a seared steak still pool with juices.

But the fast sear is fine for most – honestly I could eat a steak no matter if you cooked it in a crock pot… even when it’s bad – it’s still pretty good….but lately there has been talk of a reverse sear method.  Here’s the deal:

It’s basically the opposite of that fast sear and bake.  In this case you START the steak off low and slow – between 250 and 300 on indirect heat.  You grill until the internal temperature reaches a temperature that is about ten degrees BELOW your final desired internal temp.

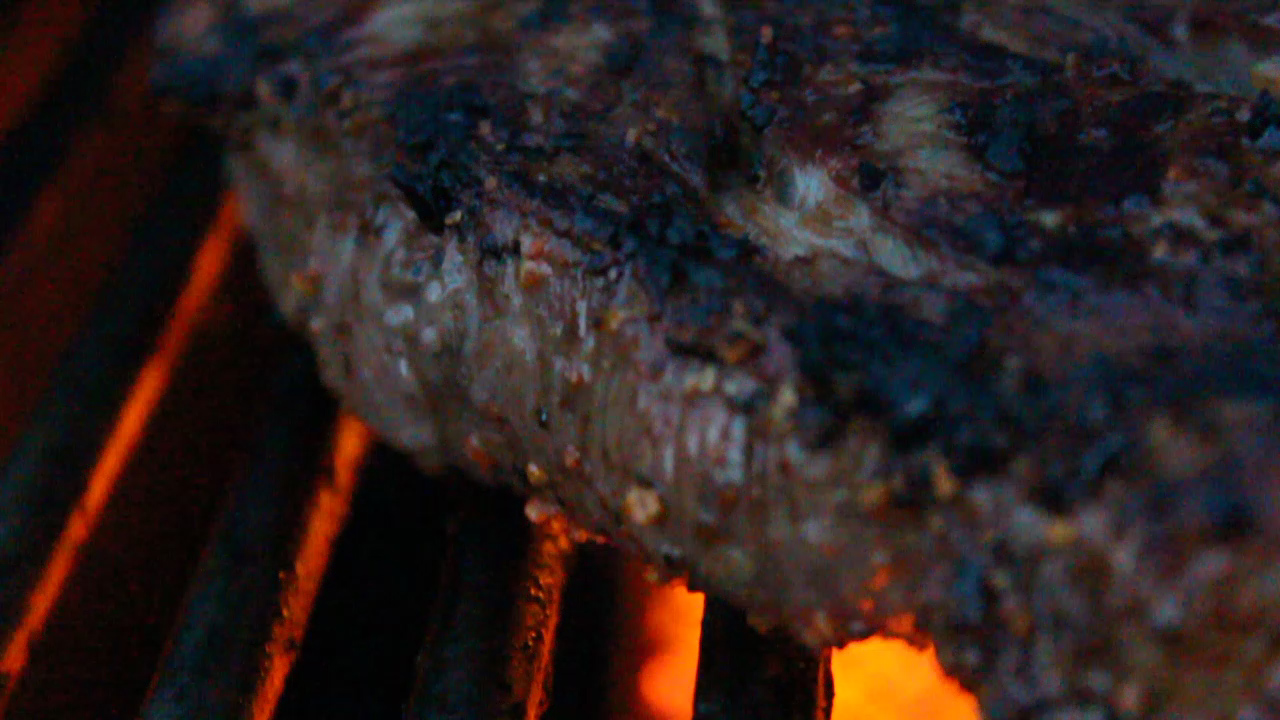
Canadian Steak SpiceIf you want it around 150 degrees Medium  -( USDA may differ) target 140 with a quick read thermometer.  Then pull it off the heat for a few minutes until it just starts to drop below 140.  That’s your cue to fire up the high heat or searing burner as you see here and blast ut on both sides to achieve the charred caramelization and crust.   Pull and enjoy.

Some xperts say the low and slow reverse sear method gives you a more tender steak allowing natural anzymes some additional time to do some magic.  Most say it wont affect flavor all that much – but I believe you do end up with a better char and crust.

For traditional flavor use a Canadian or Montreal style spice like the one below.

Print
Canadian Steak Seasoning

Rating: 51

Prep Time: 15 minutes

Cook Time: 15 minutes

Total Time: 30 minutes

Yield: 3/4 cup

Serving Size: one tablespoon

Calories per serving: 0

Canadian Steak Seasoning

For best results season 10 to 15 minutes prior to grilling.

Ingredients

  • 2 tablespoons fresh ground black Pepper (grind it please)
  • 1 tablespoon sweet paprika
  • 2 tablespoons coarse ground sea salt
  • 1 tablespoon fresh dehydrated garlic
  • 1 tablespoon granulated onion
  • 1 tablespoon ground corander
  • 1 tablespoon dill seeds
  • 1 tablespoon crushed red pepper flakes

Instructions

  1. Also known as Montreal Steak spice or seasoning this combination of coarse garlic, salt, and pepper is the perfect blend to compliment the best cuts of beef.
3.1
More Recipes at BarbecueTricks.com


February 19, 2013 Cook

Tri-Tip Tricks – How to

tri-tip

Tri-Tip Photo: Flickr/jmayer1129

The Best Way to Cook a Tri-Tip

By Bob Moglia

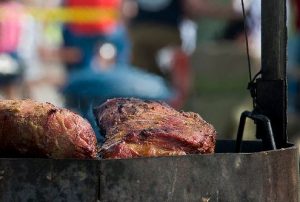
I have attended BBQ contests, mixed and matched spices and rubs and have tasted so-called winners “Best”. Honestly, few have lived up to their billing. While attending a BBQ contest last summer, I spoke with three competitors who all cooked their Tri-tip roasts differently. The first group smoked theirs in a hanging smoker. When served, the temperature was 135 and rare. The sauce a mix of ketchup. The first rule of thumb is…

TEMPERATURE; You need to achieve slightly pink in the middle and totally done around the exterior. In order to achieve this, I pull my Tri-Tip at 138 degrees. Let the meat sit for 15 minutes and it will come up 10 degrees in temperature. Remember, 140 is rare, 150 medium, 160 well. A well done Tri-Tip is chewy and lacks flavor and taste.

The second competitor called their entry “Santa Fe style”. They used a Santa Fe style rub on the beef. They also had a special red tree bark thrown on to smoke the last 10 minutes which was supposed to impart a special flavor on the beef. What I found was very little flavor from the rub, and no extra special taste from the bark.Dull and bland!

PREPARATION: I have found little to no difference utilizing countless rubs on Tri-Tip. Remember you are cooking a roast. If you really want to impart flavor, use a wet marinade. You have a thick piece of beef and you need penetration. Try to marinate for at least 24 hours with potent flavors to build character and flavor profile. You can add your spices to the marinade.

The last competitor and winner of this BBQ Tri-Tip award was a local winery, whose chef did little to no prep but creatively hid his trip tip in a small brioche bun with a bit of home made chutney. I thought it was smart, but far from showcasing the meat product. He hid it!

BUILD CHARACTER AND FLAVOR: the meat should be marinated to build a rich flavor. The longer the better but try for over night. Sear the outside of the roast first to help build a char and a crust. If you have a bit of a fat layer, this will help build a good crust. A total of 5-10 minutes over direct heat when you are getting the coals going should do the trick. Once the sear is complete, pull it across the grill and indirectly smoke it. Use chip and chunk and a mix of hickory, apple, cherry or other fruit. Hickory for its pungent signature and fruit wood for its mild taste. Watch your temperature and pull it at around 138 degrees. Sit it for 10-15 minutes before cutting into it ENJOY!

Article Source: http://EzineArticles.com/?expert=Bob_Moglia
http://EzineArticles.com/?The-Best-Way-to-Cook-a-Tri-Tip&id=7505046


February 1, 2013 Featured

Traveling Spice Rack

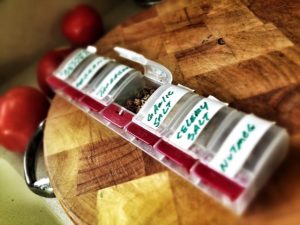
pill box spice rack

Mobile Spice Rack

Recently my family traveled to Florida and stayed in a condo with a full kitchen but, of course, there was no pantry items available for a rental.  Have you ever had to buy twenty dollars worth of salt, pepper, and other spices you probably already have at home?

Here’s a simple solution… If you do a lot of traveling you’ll save some money by having a portable handy spice rack ready to go.   This trick comes compliments of Chef Paul Stewart of Palmetto Bay Sunrise Cafe on Hilton Head SC and it’s a keeper.  He says to use one of those inexpensive “day of the week” pill dispensers to act as your seven spice rack.  It may not hold enough rub for a BBQ competition but it can probably store enough for a weekend at the beach.

Our suggestion:  keep it in a zip-lock bag in the suitcase to keep your underwear from smelling like garlic.   Unless you’re into that sort of thing.

January 27, 2013 Competitions

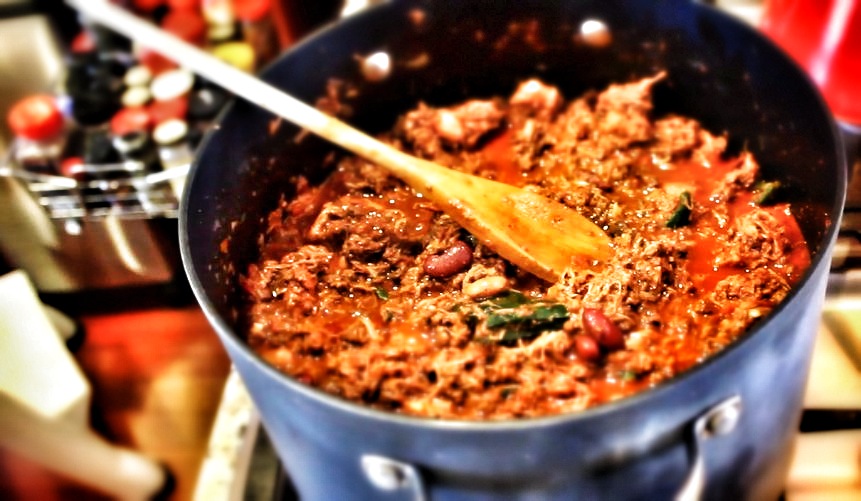
First Place Competition Chili

1st place chili recipe

I’ll be the first one to tell you I have limited experience in Chili cook offs.    But I tried my hand in a competition at my church this weekend and feel like I’ve come up with a trick for scoring first place in you next chili recipe competition.

Previously I posted a recipe for Third Place BBQ chili here.  Looking back to prep for my latest challenge I realized how lame it was.  Chili seasoning mix… pork loin… fresh tabasco peppers… It wasn’t very authentic (seasoning mix?) or practical (have you seen fresh  Tabasco peppers at the grocery?).

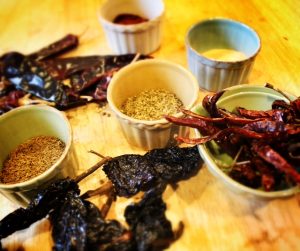
Chili powder ingedients

Chili powder ingedients

A quick call to Jack got me a great tip.  “Make your own chili powder.  You’ll have a better flavor profile than the store bought stuff,” he advised and sent me what had won for him in the past. I took his advice and am now convinced that using a hand crafted fresh batch of chili powder is a real game-changer.  I took first place against about twenty other chili’s I thought were really good too.

The Fist Place chili recipe is below but the real trick is the chili powder.  Fun and easy to make. Use those dried whole chilies you see at the store (you may want to mix and match if you cant find Guajillo, Arbol or Ancho) and toast /roast them briefly in a cast iron pan.  Be careful not to burn them and don’t choke on the potent fumes.  Pull the stems and grind with cumin seeds in a blender, coffee grinder, or spice grinder.  Simple.

arbol chili

Arbol Chiles

Try the recipe below and post in the comments how it fares for you.  It’s a winner. 2 oz. Ancho Chiles – dried and roasted 2 oz. Guajillo Chiles – dried and roasted 1 oz. Chile de Arbol – dried and roasted 5 tablespoons Cumin seeds – toasted and ground 2 tablespoons granulated garlic 4 tablespoons oregano 4 tablespoons smoked paprika Toast whole dried peppers and cumin seeds in a skillet until they slightly start to brown. Let cool and grind to a powder.

Add other ingredients and mix. Yields about two cups.


Print
First Place Competition Chili

Rating: 51

Prep Time: 10 minutes

Cook Time: 2 hours

Total Time: 2 hours, 10 minutes

Yield: 7 quarts or 20 cups

Serving Size: one to two cups

First Place Competition Chili

Home made chili powder is the tricks to making this chili a winner. Find the powder recipe at BarbecueTricks.com. Substitute other ingredients as needed.

This recipe is a chili cookoff first place winner.

Ingredients

  • 1 Tablespoon Cayanne pepper
  • 2 Tablespoons salt
  • 2 pounds pork (pulled or chunked)
  • 2 pounds ground beef
  • 1 cup homemade chili powder (see above)
  • 1 large onion, chopped
  • 1 head of garlic, minced
  • 3 large fresh Poblano peppers, fire roasted, seeded
  • 1 tablespoon smoked paprika
  • 1 tablespoon ground cumin
  • 4 beef bouillon cubes
  • 2 cans (28 oz.) crushed tomatoes
  • 2 bottles (12 oz) of robust beer
  • 2 cans (15.5 oz) of pinto or kidney beans

Instructions

  1. Saute garlic and onions until translucent. Add 1/4 of the meat and chili powder and brown. Salt the meat while cooking. Repeat until all meat is added. Add all other ingredients and simmer for one to two hours.
3.1
More Recipes at BarbecueTricks.com

January 10, 2013 Recipes

3/2/1 Ribs – A Pitmasters Trick

The 3-2-1 method for ribs seems to be very popular in competition circles.  It’s a barbecue trick that has really caught on.

321 ribs in foilThe trick is to follow the 3-2-1 as time frames.

  • Smoke ribs for 3 hours naked (the ribs naked… but you can be naked too if you want)
  • Wrap the ribs in foil and return to grill for 2 hours (add a bit of liquid maybe brown sugar)
  • Unwrap and put the ribs back on for 1 hour to firm up the crust or “bark”

That’s it.  It’s a simple road map but worth noting that “your mileage may vary” depending on the exact heat of the cooker (base numbers assume holding a stable 225 degrees F) and the size of your ribs.  Practice with your key smoker to get it like clockwork.

I put the method to music.  Give it a look… 2 minutes to brand 3-2-1 into your brain.

January 8, 2013 Cook

No Cry Onion Cutting Tip

cutting onion

First cone out the root core. Flickr/MShades

We go through a bunch of onions at the BBQ Tricks test kitchens and we’re always looking for ways to keep from embarrassing ourselves in front of other good ole boy barbecue cook teams.   So we’ve been wondering if there was an easy way to avoid crying every time we cut an onion.

Lots of suggestions out there. You can wear swim goggles (and some do) or chop in front of a fan or cut under water… probably works.  We’ve even heard that clenching a smoking wooden match stick in your front teeth helps (kinda embarrassing) .   but when we saw this old Life Hacker post it got our attention.

The idea is suggestion is to avoid the toxic fumes you first  just cut out the root end in a cone.    That’s where the “gland” for the toxic fumes are.  Make the cut about a third of the diameter of the onion and about a third deep.  Once it’s out dispose of it immediately and get to choppin’ like “normal.

Other suggestions include  are using milder onions (like a sweet onion from Vidalia, Georgia) or wiping you knife with lemon juice before cutting.

BS?   Do you have a  way that works for you?  Share with us in the comments below.

  • « Go to Previous Page
  • Page 1
  • Page 2
  • Page 3
  • Page 4
  • Page 5
  • Page 6
  • Interim pages omitted …
  • Page 10
  • Go to Next Page »

Primary Sidebar

Welcome To BBQTricks!

Hey Y'all... Thanks for stopping by. I'm Bill West. I blog about BBQ and occasionally country music. When it comes to BBQ I try to find solid time saving tips and tricks to make the grilling life a bit easier. It's life hacking for the backyard cooker. Read More…

Your Gateway to Barbecue Information

This site is a member of The Smoke Ring BBQ Webring A linked list of BBQ websites

Next BBQ Site - Next 5 BBQ Sites - Prev BBQ Site - Random BBQ Site

Join the BBQ ring or browse a complete list of The Smoke Ring BBQ Webring member's BBQ sites

If you discover problems with any of The Smoke Ring BBQ Webring sites, please notify the Ringmaster

fb

Footer

DISCLOSURE:

Posts on this site may contain affiliate links. If you purchase something via one of these links you won’t pay more but the site operator gets a small commission. Or as I like to call it: “beer money.”

Copyright © 2025 — Barbecue Tricks • All rights reserved.