• Skip to primary navigation
  • Skip to main content
  • Skip to primary sidebar
  • Skip to footer
  • Big Book of BBQ Tricks
  • Resources
  • Free E-CookBook / Newsletter
  • Smoking Meat 101 Book
  • BBQ Blueprint Book
  • Electric Smoker Cookbook
  • Wood Pellet Grill Smoker Book
  • Temperature Guide
    • Seafood
    • Pork
    • Poltry
    • Beef
  • About Me
  • Shop
  • Sitemap

Barbecue Tricks

BBQ Tips and Tricks

Recipes

November 16, 2010 Featured

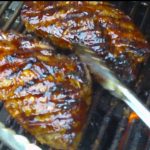
Flank Steak Tailgate BBQ

Photo: Wikipedia

A Great Tailgating Recipe – Flank Steak

By Adam Schlosser

Just about everyone in the United States like to grill out. However, many people are only comfortable barbecuing the basics such as chicken legs and hamburgers. Here’s an approach to grilling you can “steak” your reputation on:

Whether you decide to use a charcoal or gas grill, having the right accessories on hand makes for easy and safe grilling-and even easier cleanup. A wide spatula, extra-long tongs, a long-handled brush and a spray bottle with water are the benchmark of a great griller’s tool kit.

Direct-heat grilling is best for thin cuts of meat that cook quickly. It gets them nicely browned on the outside in the short time they take to get done in the middle. Below is a great recipe for using the direct-heat grilling technique…

How to Make: Flank Steak with Green Olive-Jalapeno Tapenade

About this Dish: A Mediterranean-inspired tapenade is a flavorful addition to this tender flank steak. This is the perfect dish for a great Tailgate party.

Prep time: Approximately 20 minutes

Grill time: 13 to 17 minutes, plus 5 minutes to rest off the grill

Makes: 4 servings

The Ingredients:

1 jar (4.5 oz.) Stuffed Jalapeño Olives, drained

2 garlic cloves, peeled

1 cup coarsely chopped Italian parsley

2 tablespoons fresh rosemary leaves

1 tablespoon grated lemon peel

1/4 cup Olive Oil

1 Flank Steak (about 11/2 lb.)

How to Cook it:

1. Prepare barbecue grill and preheat for direct-heat cooking. For charcoal grill, before you put the grill over the hot coals, brush it with a medium coat of oil; for gas grill, when hot, brush grill with a medium coat of oil.

2. Rinse olives and drain well. Combine olives, garlic, parsley, rosemary, lemon peel and oil in a food processor and pulse until mixture forms a fine paste. Set aside 1/2 cup of the tapenade mixture for seasoning meat; reserve remainder for serving or another use.

3. Rinse flank steak and pat dry. With the tip of a sharp knife, make shallow diagonal cuts about 1 inch apart over one side of steak, then make cuts perpendicular to the first to create a diamond pattern. Repeat on other side of steak.

4. Spread 1/2 cup of the olive mixture on both sides of steak to coat evenly.

5. Lay steak on oiled grill over a solid bed of hot coals or high heat on a gas grill. Keep charcoal grill uncovered; close lid on gas grill. Cook steak until browned on the bottom (lift edge with tongs to check), 8 to 10 minutes. With tongs or a wide spatula, turn steak and continue to cook until done as desired, about 2 minutes longer for rare (red in center; cut to test) or 4 minutes longer for medium-rare (pink in center).

6. Transfer steak to a clean platter or rimmed carving board and let rest about 5 minutes, then cut in thin, slanting slices across the grain to serve. Offer remaining tapenade to add to the meat to taste.

Recommended Tools: Grater (for peel), strainer or colander, measuring cups and spoons, food processor, paper towels, sharp knife, spatula for spreading, heatproof brush for oiling grill, tongs or wide spatula, platter or rimmed carving board.

For more Great Tailgating recipes check out…
http://www.StadiumSeatingChart.info

Article Source: http://EzineArticles.com/?expert=Adam_Schlosser
http://EzineArticles.com/?A-Great-Tailgating-Recipe—Flank-Steak&id=5199131

November 13, 2010 Recipes

Whatsthishere Sauce Recipe Demo

Video thumbnail. Click to play
Click to Play
From http://GrateTV.com Whatsthishere Sauce Recipe – Jack and West rundown a sweet and hot BBQ Sauce that is a hit with pork, chicken and beef. But one ingredient may leave you wondering “What’s this here…” 111210

Whatsthishere BBQ Sauce

2 Tbs vegetable oil

1 large clove of garlic, minced

1 medium onion, minced

1 Chipotle pepper, minced

1 tsp chili powder

1/4 tsp Cayenne pepper

1 cup ketchup

2 Tbs Dijon Mustard (Grey Poupon)

5 Tbs dark molasses

3 Tbs Worcestershire sauce

½ tsp fresh ground black pepper

2 tsp Texas Pete

Heat the oil in a deep sauce pan and add garlic and onions until they soften.  Add all peppers and heat for 20 seconds before stirring in the remaining ingredients.  Cook on low heat for 20 minutes until thickened.  When cool, strain out onion and garlic “chunks” if desired.

July 15, 2010 Featured

Grilling Turkey with Hoisen

Glaze On Turkey

Turkey only seems to get center stage one time a year and that’s a shame.

There’s nothing quite like a super tender turkey leg drenched in smokey sauce (I totally embarrassed myself gnawing a leg at the local Charleston Riverdog’s minor league baseball game food court the other day).    There’s a ton of different ways to tackle turkey.  Best of all it’s even better (and more impressive for dinner guests) when it’s prepped on the barbecue.

Just entered a cool contest with Honeysuckle White Turkey… I was actually hoping to show off one of my favorite ways to BBQ turkey with a rotisserie spit.   Instead I stumbled on thier teriyaki tenderloin breast fillets.  All I know about Asian cooking I learned from Steamy Kitchen (Jaden there would laugh at my lack of authenticity!).  But  the pre-marinated poultry looked and ended up tasting fantastic and all I really added was smoke.

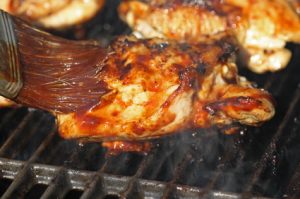
breast baste

Brushing On the Hoisen

The recipe is really already in the meat (is that cheating?) so here’s a very simple recipe for a Asian Inspired Turkey with more on a smoke pouch from an earlier post.   It really was super easy.

Asian Turkey

1 Package Honeysuckle White Teriyaki Turkey Breas1 Tenderloins

1/3 Cup  Hoisen Sauce

1 Cup Apple Wood Chips ( can substitute Hickory or Oak)

Soak chips in a small bowl for 15 minutes to encourage smoldering.   Wrap the chips sealing tightly in an aluminum foil pouch. Vent with three small holes and place touching grill burner flame.

Once smoke is produced place marinated turkey directly on medium grill for 10 – 15 turning once being careful not to overcook.

Baste each side of turkey with a layer of hoisen sauce to glaze.  Repeat to thick glaze.

June 26, 2010 Featured

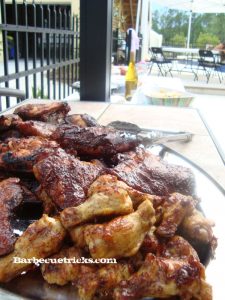
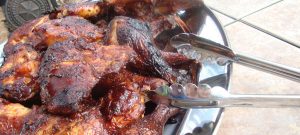
How To BBQ Chicken

Chicken On Platter

Chicken Your Guests Will Crow About

By Tauqeer Ul Hassan

BBQ chicken that has been cooked perfectly will taste delicious. Although it seems that with its increased popularity and careless manner of BBQ cooking, many people cannot enjoy this.

When the chicken has been barbecued improperly, it looks still pinkish in the center and burnt on the outside. Not only it will affect the taste but it also becomes unhealthy.

Here is a guide to BBQ chicken in a good way it can be enjoyed.

Things Needed:

– Chicken pieces

– Gas grill or charcoal grill

– Brush for the sauce

– Meat thermometer

– Marinate

– Rub or seasonings

– Side dishes

– Oven

– Sauce

BBQ Chicken

Procedure:

Step 1:

First, select the type of chicken which has to be barbecued. Legs and thighs are preferred by some while others like skinless and boneless chicken breasts. If barbecuing more than one chicken part is desired, then the cooking times would have to be adjusted. White meat like breasts and wings cook faster than dark meat like legs and thighs.

Step 2:

Now, pick the grill which is desired to be used. This will rely on how one wants to cook the barbecue. This will also depend on the neighborhood one is living in plus the lifestyle. If a person is a beginner at grilling, then the gas type is recommended. However, this might not be easy to use during the holidays.

Step 3:

The chicken has to be marinated. This process will allow the flavor to sink in to the chicken making it taste great after it is grilled. A marinate flavor can be selected as preferred. There are variations available from lemon pepper to teriyaki. If the chicken is marinated in the fridge, it has to be made sure that it is not left in there for more than 48 hours. At room temperature, it has to be leaving it for an hour.

Step 4:

When the chicken has been marinated, it can be now rubbed with the seasonings. This will depend on the type of flavor which is needed to be given to the BBQ chicken.

Step 5:

The chicken has to be pre-cooked by pre-baking. The ideal temperature for baking it is 360 degrees in the oven until partially cooked. This will seal in flavors and will ensure that the chicken has been cooked before it goes to the grill. Others do boiling. However, boiling takes away the flavor and makes it taste weak.

Step 6:

Now the grill has to be made ready while the chicken is baking. If a charcoal grill is being used, ignite the coals and they should be left to burn until a white coating of ash appears on the coals. In case of gas grill, it has to be preheated to a medium heat temperature of 360 degrees. The grate also has to be sprayed.

Step 7:

Put the seasoned chicken on the rack and cover it with the grill lid. It should be given at least half an hour to cook. With time, it has to be checked and turned after every five minutes for ensuring that it is evenly cooked. The pieces can also be rotated to balance the cool and hot spots on the grill.

Step 8:

The BBQ has to be glazed again with the seasoning nearly 10 minutes before taking chicken off the grill.

Step 9:

After grilling, the chicken pieces can be checked with a meat thermometer. The bone should be never touched when the thermometer is inserted. The internal temperature of the meat must be 175 degrees.

Step 10:

Finally, the BBQ chicken is ready. It can be served with delicious side dishes like coleslaw, pasta salad, potato salads, baked beans and biscuits.

Preparing BBQ chicken is not a boring work, it is fun and these easy steps will help to make a perfectly barbecued chicken that everyone will love!

You might also be interested in learning how to can fruits and vegetables and how to BBQ chicken.

Article Source: http://EzineArticles.com/?expert=Tauqeer_Ul_Hassan
http://EzineArticles.com/?How-to-BBQ-Chicken&id=4014080

March 27, 2010 Featured

BBQ Breakfast On the Grill

Breakfast Eggs: Griddle Required!

By Marjorie Bill

Summer time mornings are the best! The air is clear, clean and warm. Why not get out of the kitchen and cook breakfast outside on the grill? Food always seems to taste better when made on the grill and breakfast is no exception. Here are a few ideas to get you started.

Traditional bacon/sausage and eggs and toast:

Use the griddle plate on the grill. One with ridges that allows the grease to flow away and collect away from the food is best. Preheat the grill and cook your bacon/sausage and eggs just as you do on the stove. Toss a slice or two of buttered bread on the griddle at the last moment and enjoy your in house breakfast cooked outdoors. Because there is grease involved watch to make sure there are no fire flareups and remove grease as necessary.

Next is something a little more fun:

Place a thin ham slices in muffin tins, and top with a mixture of beaten eggs, salt, pepper, 1/4 cup milk, chopped onions and peppers. Top with shredded cheese. Place muffin tin in aluminum pan that has about 1/4 cup of water in the bottom. Cover the pan with foil and cook on low heat until egg is set. Approximately 45 minutes.

How about some BBQ fruit to get you energized for a morning walk:

Grilling fruit is very easy to prepare but there are a few things you should do prior to placing it on the grill. First make sure your grill is clean. You do not want the left over burnt bits of last night’s dinner to be mixed with the fresh fruit you will be grilling. Firmer fruits like, pineapples, pears, apples and even bananas work best. They should be firm, fresh and solid so they will hold together will grilling. Leave the peels intact as it will also help hold the fruit together. Slice the fruit into large slices and cut the bananas in half lengthwise. After cutting the fruit soak it in water so that it will absorb as much liquid as possible and stay juicy will grilling. Completely cover the fruit in cold water and add 1 teaspoon of pure lemon juice to the water to help the fruit retain its natural color. Let the fruit soak for 30 minutes adding ice as needed to keep the water cold. Adding spices such as cinnamon to the water gives the fruit a touch of spice flavoring.

Drain the fruit and coat lightly with a mild oil or melted butter to keep it from sticking to the grates. You can also add spices such as ginger, nutmeg, allspice or cloves to the melted butter prior to coating the fruit to spice it up some more. Grill the fruit, on a preheated grill, on medium heat. Grill the fruit till heated through and it has the look of lightly grilled food. Remove from heat and serve warm.

Now that you know how easy it is to make breakfast on the grill. Get out the grill and start your day outside with a meal in the fresh morning air.

Please visit grills to find more fun recipes and to learn about tips and tricks for electric grills visit electric grills. Summer is here and its time to enjoy your grill!

Article Source: http://EzineArticles.com/?expert=Marjorie_Bill

http://EzineArticles.com/?Breakfast-on-the-Grill&id=3966125

January 18, 2010 Featured

Essential Ingredients For BBQ

By Aaron M Walker

Slather It On...

Slather It On...

When exploring how to BBQ with perfection you will need to know the many essential flavors of various types of BBQ meats. I personally feel that simplicity is usually best. Too many contradicting flavors can take away from the flavor of the meat and will likely overwhelm your taste buds. With barbecue, the woods used during the cooking and the seasonings used for rubbing and marinating the meat should add flavor but not be over powering.

Among the more frequently used BBQ woods you will find apple, cherry and maple barbecue smoking chips. I like to have a few varieties available. I also am always sure to have on hand what I feel are the essential BBQ seasoning, spices, and basting products. These items can be used in various combinations based on your personal preference. Making your own BBQ rubs, brine, and barbecue sauces for any of your favorite meats will be quite easy if you keep the following list on hand.

Basting & Sauce Ingredients:

Apple juice: This is Ideal for basting any BBQ meat and especially useful for ribs, pork butt, and chicken. Apple juice and apple cider can often be used in many brine recipes, bbq sauces, injections, or even in the water pan to keep the meat moist.

Rub it in... Rub it in...

Rub it in... Rub it in...

Apple cider vinegar: This is a great ingredient for BBQ sauces and mops. You may also use it to thin store bought sauces and make a quick and simple mop or marinade. This is also a great product for dressing bbq pulled pork.

Molasses: This is used primarily for making sauces. The bold flavor and dark color gives the sauce its thick texture an dark color. Molasses and apple cider vinegar are 2 key ingredients I use in my personal sauce recipes.

Whiskey or Bourbon: Using these can bring great malt flavor and help to add balance to your mops or sauces. Try a bottle mixed with half Jack Daniel’s and half apple juice for basting BBQ meats.

Brown Sugar: This is another essential ingredient in my own barbecue sauce recipes. This is a great way to bring a subtle sweetness to pork butt, chicken, ribs, or pulled pork dishes. Brown sugar blends very well with hot or spicy flavors to give you just a touch of sweetness in your hot and spicy sauce.

Seasonings and Spices:

Onion powder: This is one of my personal preferences of ingredients for my BBQ rubs. The onion flavor works well with any BBQ meat.

Cumin: This is among the most important ingredients for BBQ rubs and chili recipes. This ingredient will bring a slight smoky flavor and it is especially good for a pork BBQ.

Paprika: The primary ingredient found in virtually all BBQ rubs as well as chili recipes. This adds a great color and flavor to any BBQ meat and the subtle flavor helps to balance the other ingredients.

Chile Powder: This flavorful blend can be used on any BBQ meat. This is a great way to add some spice or heat to your BBQ meat.

Garlic powder: One of the major ingredients in my personal recipes of BBQ rubs and sauces. This adds a subtle sweetness along with a touch of heat and brings balance to spicy flavors.

Kosher salt: I personally don’t care for a really salty taste. This salt helps to bring out the actual flavor of BBQ meats and has a much more subtle flavor than regular salt.

Black pepper: A very important part of any seasoning blend to get that hot and spicy touch. The bold flavor and peppery fragrance makes any BBQ meat better.

The truth about BBQ is that personal preference dictates the end result more than anything else. Practice with the flavors you enjoy and try different combinations of seasonings. You will find some you like and some you don’t but, ultimately you will enjoy the journey to find your BBQ perfection. The last and most important tip here is “cook low and slow”. This simply means use a temperature of 325 degrees or less (275 – 300 degrees is best) and cook for a longer period of time. Always make sure the temperature is constant and keep you water pan full so the meat doesn’t dry out. You can even BBQ in your oven at home during the winter if you think it is too cold to fire up the grill. Making BBQ in the oven will follow these same guidelines but for wood or smoke flavor you want to use a liquid smoke product rather than wood chips.

View this and other articls on HubPages at http://hubpages.com/hub/BBQ-With-Perfection

You can also follow my RSS Feed by clicking here http://hubpages.com/author/Has_aWayWithWords/latest/?rss

hubpages.com/profile/Has_aWayWithWords

Article Source: http://EzineArticles.com/?expert=Aaron_M_Walker
http://EzineArticles.com/?Essential-Ingredients-For-BBQ&id=3575631

January 3, 2010 Featured

Beef Brisket Step By Step

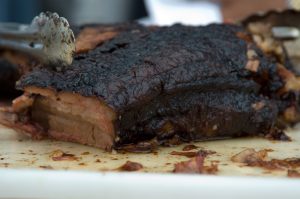
BBQ Beef Brisket worth the all day cook.

BBQ Beef Brisket worth the all day cook.

It was a wet Christmas Day but nothing would get in the way of an appointment I had with a 6.5 lbs. beef brisket set to feed family visiting for the holiday.

The key to brisket – I determined – is simply time.    Cook’s Illustrated (a favorite reference) writes about how to trick the process and only truly “smoke” the beef on a grill or smoker for a mere two hours and then finish off the brisket (wrapped in foil) for an additional number of hours at 300 degrees.   They say two hours is all you need to provide the smoke infusion.

We love a good BBQ trick or two but this day we kept to tradition. Low and slow over charcoal (we mixed hardwood lump and Kingsford Hickory 70/30) and used water soaked Jack Daniels Whiskey Barrel Oak Chips for smoke. (However Mesquite is a brisket favorite and a better choice).

The process began the night before the cooking by preparing a simple rub and rubbing down the brisket.   Feel free to trim down the fat cap.  There’s no need for more that about a quarter of an inch of a layer of fat.   But you do want some.     We opted to rub the seasoning on/in the fat too.   Then in the refrigerator ’til morning.

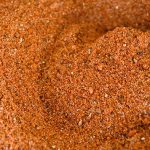
The Brisket Rub ( to cover 7 to 9 lbs. Brisket)

1 Packet Taco seasoning (1.25oz – Publix Generic brand)
2 tbl. Garlic Pepper mix (Tone’s)
5 tbl. Brown Sugar
5 tbl. Paprika
5 tbl. Tony Catchere’s Creole Seasoning

Brisket has a “flat” side and a “point.”    The flat looks similar to a flank steak with a long grain.  The point is on top of the flat with a later of fat in between.   The grain runs in a different direction on the point (something to remember when slicing).  We used what would be considered a small  6.5 lbs brisket that was mainly “flat.”     Typical of what you would find in a major supermarket but not mega cookout sized (you can find the biggies -8 pounds and bigger – at Sam’s, Walmart’s, or a butcher).

Time is the big issue.  We put our 6.5 pounder on a Brinkman Smoker at 9:00 am Fat side up.

You don’t want to open the lid of the smoker more than you have to at this point.  Adding chips in the small side door is fine.   Some say every time you now lift the lid you’ll have to add 15 minutes to your cook time.   We added wet wood chips to the coals through the side door every 40 minutes or so until 11:30am.

At 11:30 we raised the smoker off the bottom and added some additional charcoal (1 chimney already hot / white ash) and wood chips, plus added water to the drip pan.

Smoker Temperature should stay between 225 and 275.   The Brinkman smoker has a reading of “Ideal” and I tried to stay at that level until about 1:50pm.  Then CAREFULLY wrap the brisket in foil.    Seal it as much as you can to retain drippings and return to the smoker for two to four hours until the brisket reached an internal temperature of about 207 degrees.  The thermometer will slide right in with very little resistance.   207 degrees sounds crazy to some that find a rare steak (130 degrees) the most tender… but there’s different chemistry happening.    The tissues in the tough brisket (collagen) only begin to melt at around 180 degrees.  You’ll just want to watch that the meat doesn’t dry out (keep it wrapped) and that the smoker isn’t too hot.

We pulled our brisket off at about 4:30pm with a reading of 206 and let it rest in a  cooler wrapped in paper bags (new trash compactor bags work well) until a half hour before time to serve.  The internal temperature will still rise when resting.   Give yourself plenty of time in the planning – we used all eight and a half hours (including an hour to let the meat rest before cutting).

Remember to carve against the grain into pencil thick ( quarter inch) slices if possible.  Our results were so tender we had to cut a bit thicker.    Electric slicers come in handy here.

Total cook time – about nine hours.   Process starts the night before.  Our experiment was with 6.5 pond brisket.

Serves about 12 to 16 (WITH 6.5 LBS.)

December 24, 2009 Recipes

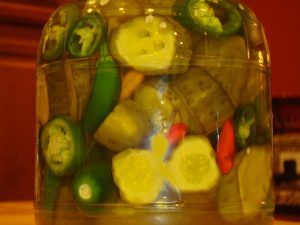
Atomic Sweet Pickles and Peppers

Atomic Sweet Pickles and Peppers

Atomic Sweet Pickles and Peppers

There’s something about pickles that can add that extra touch to sandwiches and BBQ.   I crave the pickle in a Chick-fil-a sandwich…   Even a Krystal burger (like a white Castle for you Northerners) isn’t the same without a sliver of dill chip… and once I tried the sweet sliced pickles at Sconyer’s Barbecue in Augusta Georgia I couldn’t have pulled pork without at least a few sweet dill chips (and white bread).

Here’s a way you can create your own signature pickle or pepper without all the traditional pickling hassles.   Plus no boiling jars here.  You use inexpensive store bought pickles (I experimented with different brands and prefer the crunchy snap of Vlasic’s Baby Kosher Dills) and add in any variation of peppers you like.   I mixed jalapenos and fresh Tabasco peppers (might be tough to find… we had a few in the garden) but any chile will work.  You can even remove the peppers for zero scoville heat.  But what fun would that be.

I found I like the sweet jalapeno chips best of all… but the heat in the pickles will make your guests remember the meal.

ATOMIC SWEET PICKLES AND PEPPERS

  • 46 OZ. Jar of Baby Kosher Dills
  • 1/2  Cup white wine vinegar
  • 1 and 3/4 cups sugar
  • 6 Large Jalapeno Peppers
  • 2 Fresh Tabasco, small red chile peppers  or “experimental”  Peppers for red color and sharp heat.
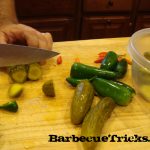
Cut to your desired size.

Cut to your desired size.

In a large bowl reserve pickles and the jar’s liquid.   Slice the pickles in 1/4 to 1/2 inch slices (for sandwiches) or chunks (for snacking).   Clean peppers thoroughly and slice Jalapenos into 1/4 inch disks.

Slice Tabasco peppers or extremely hot peppers lengthwise (or just score them).     Leave the stems on for looks.

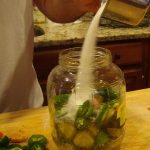
Return the pickle chips back to the jar in layers along with even portions of peppers and sugar until full.  Use all the sugar and peppers and reserve any leftover pickles for another use.

Slowly add the vinegar and then fill the jar with the remaining original juice.

Add sugar a bit at a time.

Add sugar a bit at a time.

Let the sugar dissolve and cover with the lid and allow the sugar to dissolve with the jar at room temperature for about an hour.

Shake and rotate the jar  occasionally to expedite.   Refrigerate overnight.

November 11, 2009 Competitions

Third Place BBQ Chili

Chili with Sour CreamLove a good Chili Cook-off?   This was a last minute – rush to slap together – concoction that just happened to be a crowd pleaser!   Unfortunately, it didn’t win with the judges in the office cook-off … but out of eleven other entries I heard some unsolicited (it was a blind judging) raves for it’s traditional chili taste and it’s hearty barbecue meatiness.   The winning chili was fantastic but was fairly eclectic with red wine and venison.

In a last minute / night before frenzy I decided to use a leftover pork tenderloin as the meat of choice.  It worked great… but feel free to substitute something a bit less expensive (like pork shoulder).     The lean tenderloin did however make for a low fat and overall healthy and hearty bowl of comfort.    Third place was still a favorite.

3RD PLACE BARBECUED CHILI

BBQ Chili With Tenderloin

BBQ Chili With Tenderloin

1.5 lbs Pork Tenderloin (substitute leftover pork shoulder or pulled pork)

2 packages Chili seasoning mix

1 whole large white onion (diced)

5 green onions (chopped)

1 tsp prepared garlic

1/2 red bell pepper (sliced in slivers for texture and appearance)

1 – 15 oz can of black beans

2 – 15 oz. cans of kidney beans

8 fresh Tabasco peppers (substitute: 3 jalapenos) finely minced

2 – 15 oz. cans of diced tomatoes

4 fresh ripe red tomatoes – diced

1 – 15oz. can Tomato sauce

Brown cooked pork in oiled skillet. Add onions and garlic and cook until transparent.

Transfer to deep pot or crock pot, add the rest of the ingredients and simmer.  Add up to a cup of water for preferred consistency.  Serves 10 to 20.

November 5, 2009 Featured

Grilling The Ultimate BBQ Chicken

Foul Play

Foul Play

Grilling the Ultimate BBQ Chicken
By Richard Calvin Myers

You don’t have to be a grilling pro to cook like one. So many recipes on the grill only call for a few things to make them phenomenal: fresh ingredients, the right seasoning, and proper cooking time. Just three little things to remember and your food will surprise everyone. One of the most versatile foods in the entire world is chicken. This fine feathered friend of ours has been prepared thousands of ways over hundreds of years. One of America’s favorite ways to eat chicken is barbequed. It’s so simple and delicious, yet people tend to get the formula wrong and their chicken comes out tasting like rubber smothered in ketchup.

The first thing people do wrong is overcook the chicken. They leave the poor little pieces of chicken on the grill for hours until there’s nothing left but dehydrated meat and bone. You want to cook your chicken only to 170 degrees, never more. The idea is to let the chicken rest. Carryover heat will increase the temperature to 180 degrees, the safe point at which you can eat chicken. Chicken will remain juicy as long as it’s not overcooked. Don’t worry about drying it out. As long as it cook it the proper length of time, it will be just fine.

Ultimate BBQ Chicken:

This BBQ chicken recipe is really simple and super delicious. The first thing we’ll want to do is to go shopping. I personally like chicken thighs for this recipe, but you can choose what you wish. Make sure to grab a bottle of your favorite BBQ sauce. The trick here is in the seasoning, we won’t need to make a fancy sauce for these. The seasoning consists of salt and pepper, garlic powder, onion powder, paprika, rep pepper, and some old bay seasoning. Whatever you don’t have already, pick some up.

We want to start the night before you grill and begin to season the chicken. We’ll need to make a quick spice rub. To do this, take two tablespoons of salt and black pepper, 1 tablespoon of garlic powder, onion powder, paprika and old bay, and a ½ teaspoon of red pepper. Combine all these ingredients in a bag or a container, and that’s it. Wash the chicken pieces and let dry thoroughly. After they’re completely dry, rub the chicken liberally with the seasoning. Wrap your chicken in foil or plastic wrap, place in a leak-proof container, and let it sit overnight. Be careful to never cross contaminate when dealing with raw poultry.

On the day you’re ready to grill, cut your burners on medium heat. After your grill heats up, oil the racks well and place your chicken pieces skin side down. Once they start to cook, close the lid. Check on them every 5 minutes or so to make sure they’re not burning. All together, we want to give them 15 minutes on the skin side. After that, turn over and repeat the checking and waiting process. Let them go for another 15 minutes and them begin to sauce your chicken.

Saucing is the last step. Make sure you keep a close eye on your chicken, the BBQ sauce will burn quickly due to its high sugar content. After you finish saucing one side of the chicken and turning it over, the pieces should be ready to turn back over after saucing the opposite side. They should only take about 3 minutes on each side to cook the sauce on. Be careful taking the chicken pieces off of the grill. This recipe is really simple. It’s all in the seasoning. These seasonings play very well with chicken, especially BBQ. The paprika has a nice, deep smoky taste. This recipe will be a hit with even the toughest crowds.

Richard Myers is the contributing author for this website and is an acknowledged expert in the field of grilling. He can be found on the internet at: http://www.TheGrillingCoach.com

Article Source: http://EzineArticles.com/?expert=Richard_Calvin_Myers
http://EzineArticles.com/?Grilling-the-Ultimate-BBQ-Chicken&id=1453183

  • « Go to Previous Page
  • Page 1
  • Interim pages omitted …
  • Page 6
  • Page 7
  • Page 8
  • Page 9
  • Page 10
  • Go to Next Page »

Primary Sidebar

Welcome To BBQTricks!

Hey Y'all... Thanks for stopping by. I'm Bill West. I blog about BBQ and occasionally country music. When it comes to BBQ I try to find solid time saving tips and tricks to make the grilling life a bit easier. It's life hacking for the backyard cooker. Read More…

Your Gateway to Barbecue Information

This site is a member of The Smoke Ring BBQ Webring A linked list of BBQ websites

Next BBQ Site - Next 5 BBQ Sites - Prev BBQ Site - Random BBQ Site

Join the BBQ ring or browse a complete list of The Smoke Ring BBQ Webring member's BBQ sites

If you discover problems with any of The Smoke Ring BBQ Webring sites, please notify the Ringmaster

fb

Footer

DISCLOSURE:

Posts on this site may contain affiliate links. If you purchase something via one of these links you won’t pay more but the site operator gets a small commission. Or as I like to call it: “beer money.”

Copyright © 2025 — Barbecue Tricks • All rights reserved.